Return to Section TOC
Return to Section TOC
Return to Master TOC
Return to Master TOC
TROUBLESHOOTING & REPAIR
IDLER SOLENOID TEST (continued)
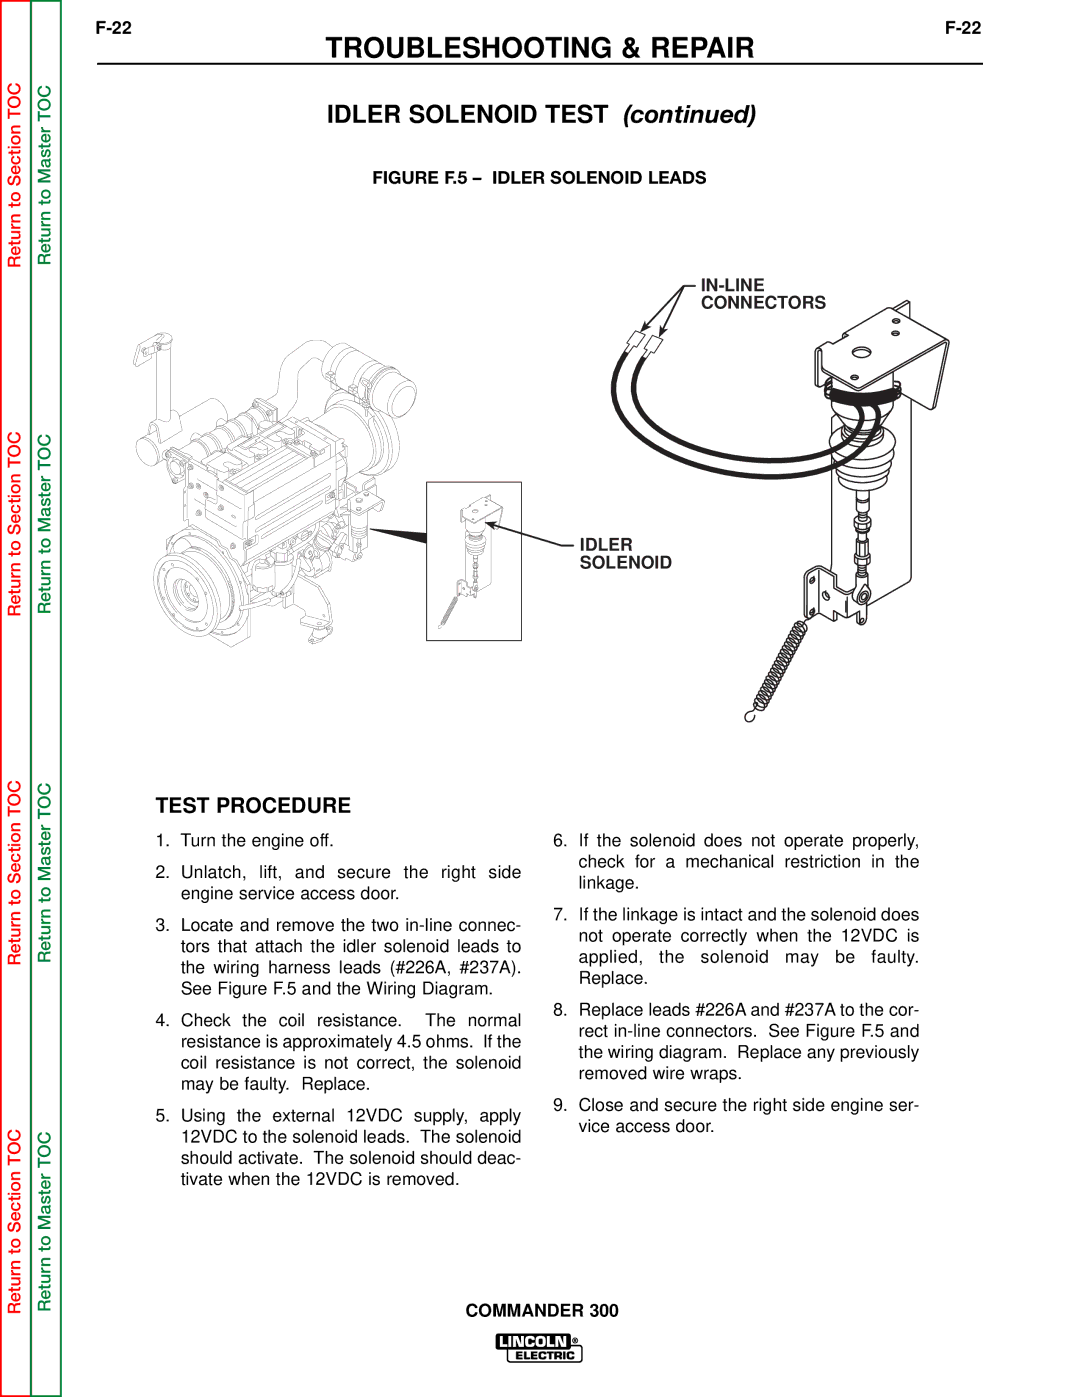
FIGURE F.5 – IDLER SOLENOID LEADS
CONNECTORS
![]() IDLER
IDLER
SOLENOID
Return to Section TOC
Return to Section TOC
Return to Master TOC
Return to Master TOC
TEST PROCEDURE
1.Turn the engine off.
2.Unlatch, lift, and secure the right side engine service access door.
3.Locate and remove the two
4.Check the coil resistance. The normal resistance is approximately 4.5 ohms. If the coil resistance is not correct, the solenoid may be faulty. Replace.
5.Using the external 12VDC supply, apply 12VDC to the solenoid leads. The solenoid should activate. The solenoid should deac- tivate when the 12VDC is removed.
6.If the solenoid does not operate properly, check for a mechanical restriction in the linkage.
7.If the linkage is intact and the solenoid does not operate correctly when the 12VDC is applied, the solenoid may be faulty. Replace.
8.Replace leads #226A and #237A to the cor- rect
9.Close and secure the right side engine ser- vice access door.
