INSTALLATION & SETUP
Follow the steps below to convert the keypad to a remote keypad and change its protocol setting.
Step 1
Unplug the projector then lift the front top cover to access the
Step 2
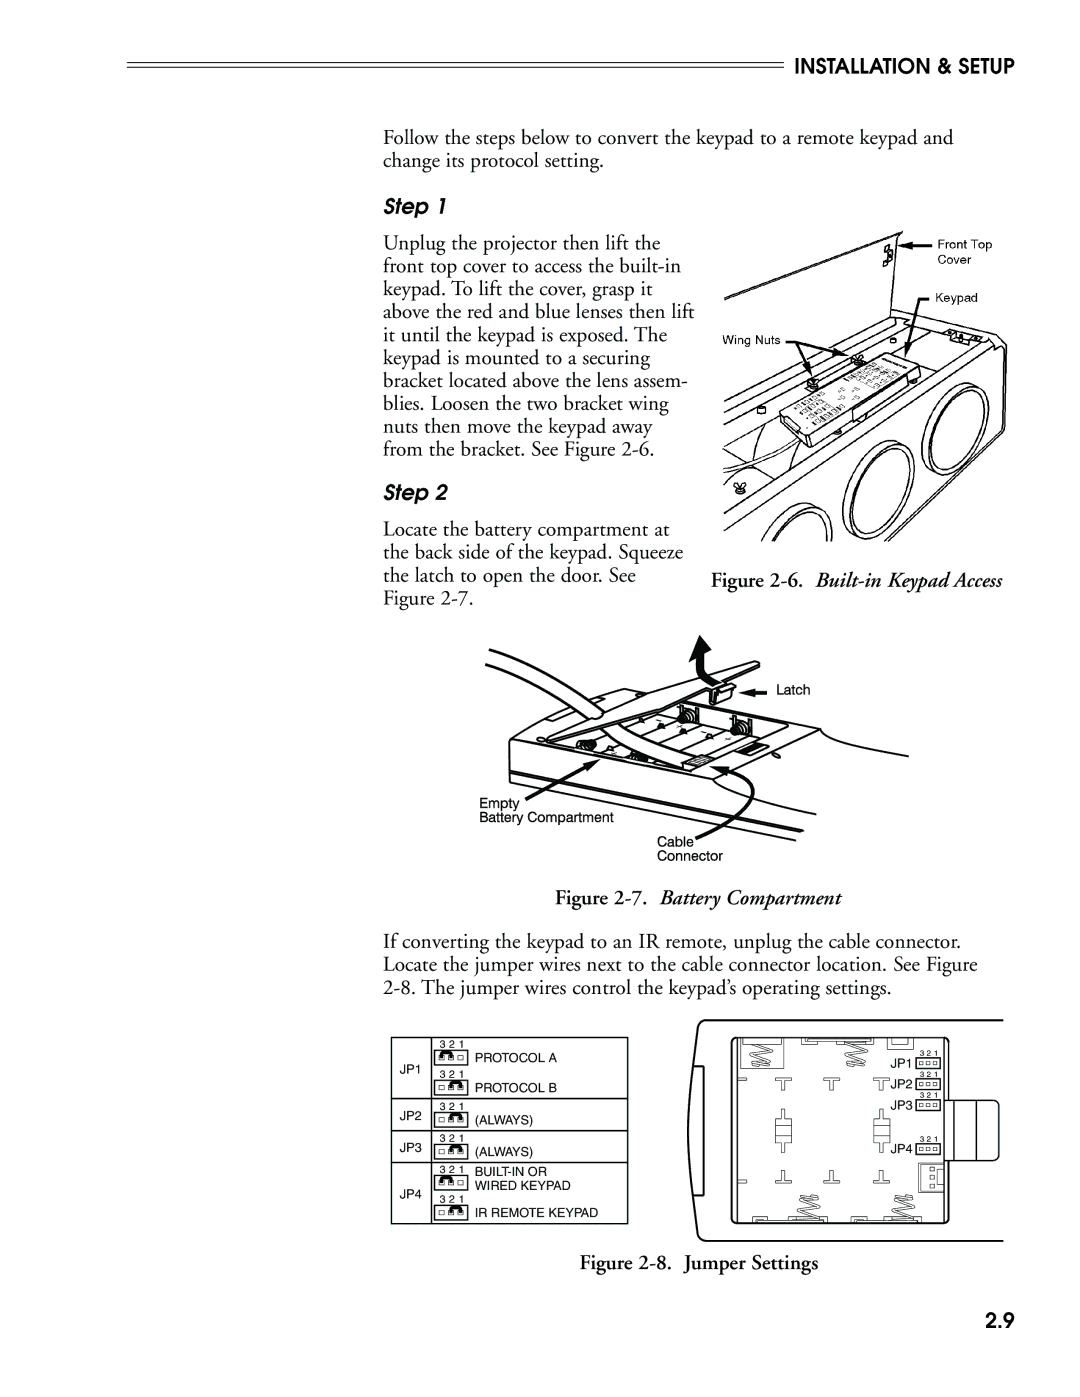
Locate the battery compartment at the back side of the keypad. Squeeze
the latch to open the door. See Figure
Figure 2-7. Battery Compartment
If converting the keypad to an IR remote, unplug the cable connector. Locate the jumper wires next to the cable connector location. See Figure
| 3 2 1 |
|
JP1 |
| PROTOCOL A |
3 2 1 |
| |
|
| |
|
| PROTOCOL B |
|
|
|
JP2 | 3 2 1 |
|
| (ALWAYS) | |
|
| |
|
|
|
JP3 | 3 2 1 |
|
| (ALWAYS) | |
|
| |
|
|
|
| 3 2 1 | |
JP4 |
| WIRED KEYPAD |
3 2 1 |
| |
|
| |
|
| IR REMOTE KEYPAD |
|
|
|
3 2 1 |
JP1 |
3 2 1 |
JP2 |
3 2 1 |
JP3 |
3 2 1
JP4 ![]()
![]()
Figure 2-8. Jumper Settings
2.9