INSTALLATION & SETUP
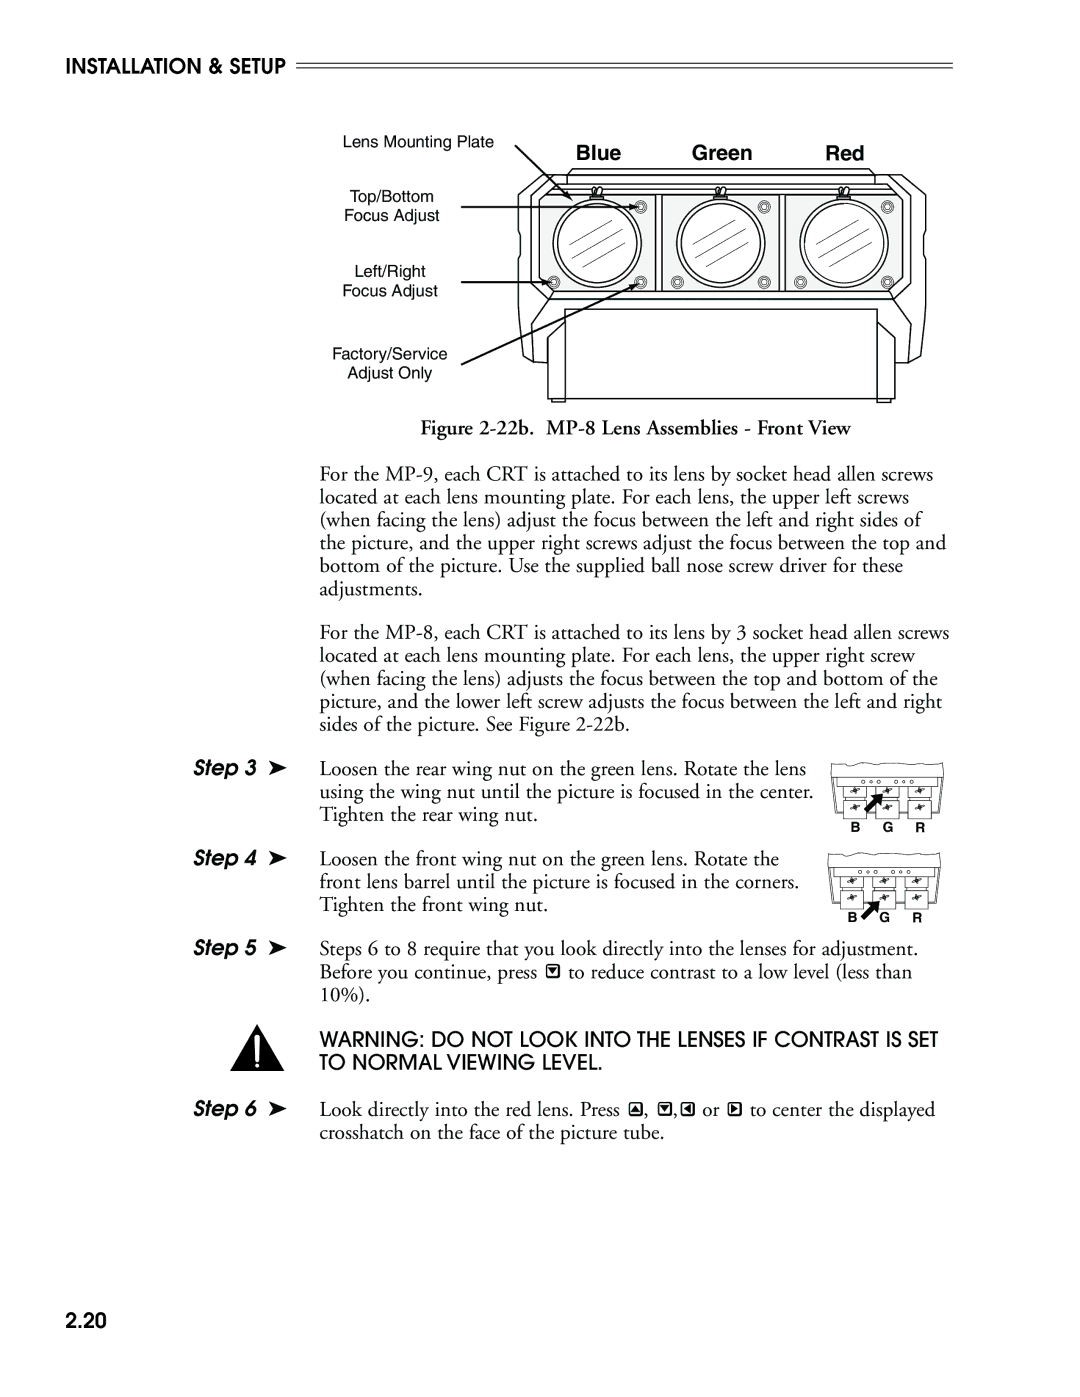
Lens Mounting Plate
Top/Bottom
Focus Adjust
Left/Right
Focus Adjust
Factory/Service
Adjust Only
Blue Green Red
Figure 2-22b. MP-8 Lens Assemblies - Front View
For the
For the
Step 3 ➤ Loosen the rear wing nut on the green lens. Rotate the lens using the wing nut until the picture is focused in the center. Tighten the rear wing nut.
B G R
Step 4 ➤ Loosen the front wing nut on the green lens. Rotate the front lens barrel until the picture is focused in the corners. Tighten the front wing nut.
B | G | R |
Step 5 ➤ Steps 6 to 8 require that you look directly into the lenses for adjustment. Before you continue, press ![]() to reduce contrast to a low level (less than 10%).
to reduce contrast to a low level (less than 10%).
WARNING: DO NOT LOOK INTO THE LENSES IF CONTRAST IS SET TO NORMAL VIEWING LEVEL.
Step 6 ➤ Look directly into the red lens. Press ![]() ,
, ![]() ,
, ![]() or
or ![]() to center the displayed crosshatch on the face of the picture tube.
to center the displayed crosshatch on the face of the picture tube.
2.20