INSTALLATION & SETUP
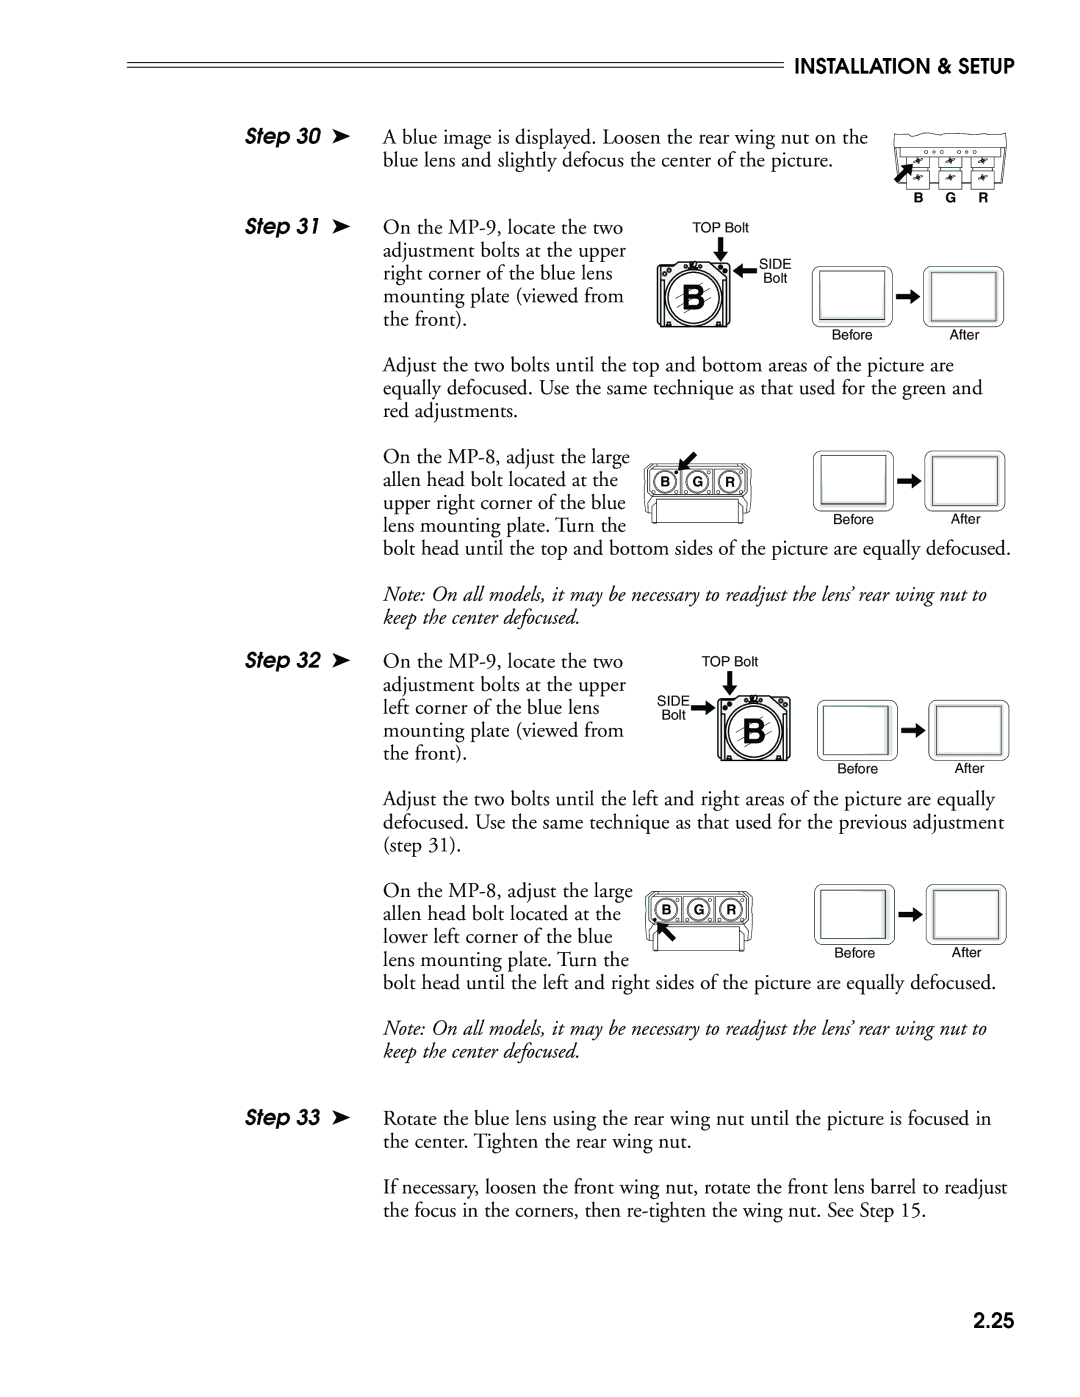
Step 30 ➤ A blue image is displayed. Loosen the rear wing nut on the blue lens and slightly defocus the center of the picture.
B G R
Step 31 ➤ On the
TOP Bolt |
|
SIDE |
|
Bolt |
|
B |
|
Before | After |
Adjust the two bolts until the top and bottom areas of the picture are equally defocused. Use the same technique as that used for the green and red adjustments.
On the |
|
| |
allen head bolt located at the | B G R |
| |
upper right corner of the blue | Before | After | |
lens mounting plate. Turn the | |||
|
|
bolt head until the top and bottom sides of the picture are equally defocused.
Note: On all models, it may be necessary to readjust the lens’ rear wing nut to keep the center defocused.
Step 32 ➤ On the
| TOP Bolt |
|
SIDE |
|
|
Bolt | B |
|
|
| |
| Before | After |
Adjust the two bolts until the left and right areas of the picture are equally defocused. Use the same technique as that used for the previous adjustment (step 31).
On the | B G R |
| |
allen head bolt located at the |
| ||
lower left corner of the blue | Before | After | |
lens mounting plate. Turn the | |||
|
|
bolt head until the left and right sides of the picture are equally defocused.
Note: On all models, it may be necessary to readjust the lens’ rear wing nut to keep the center defocused.
Step 33 ➤ Rotate the blue lens using the rear wing nut until the picture is focused in the center. Tighten the rear wing nut.
If necessary, loosen the front wing nut, rotate the front lens barrel to readjust the focus in the corners, then
2.25