8.7.7 Set-up of block (Step 6)
It is possible to set the block for each group as an operation block. This operation block can be also used for the charge calculation.
Set the block groups. [Procedure]
1)Select a floor using the “![]() /
/ ![]() ” button
” button
From the Block Settings window, use the “ /![]() ” button to select the floor.
” button to select the floor.
2)Click the group icon.
Select the Group icon to be added to a block by clicking on it. More than one group may be selected at one time. Click on a selected group to deselect it .
(The selected icon is displayed with red frame.)
3)Click [Block Set ] button.
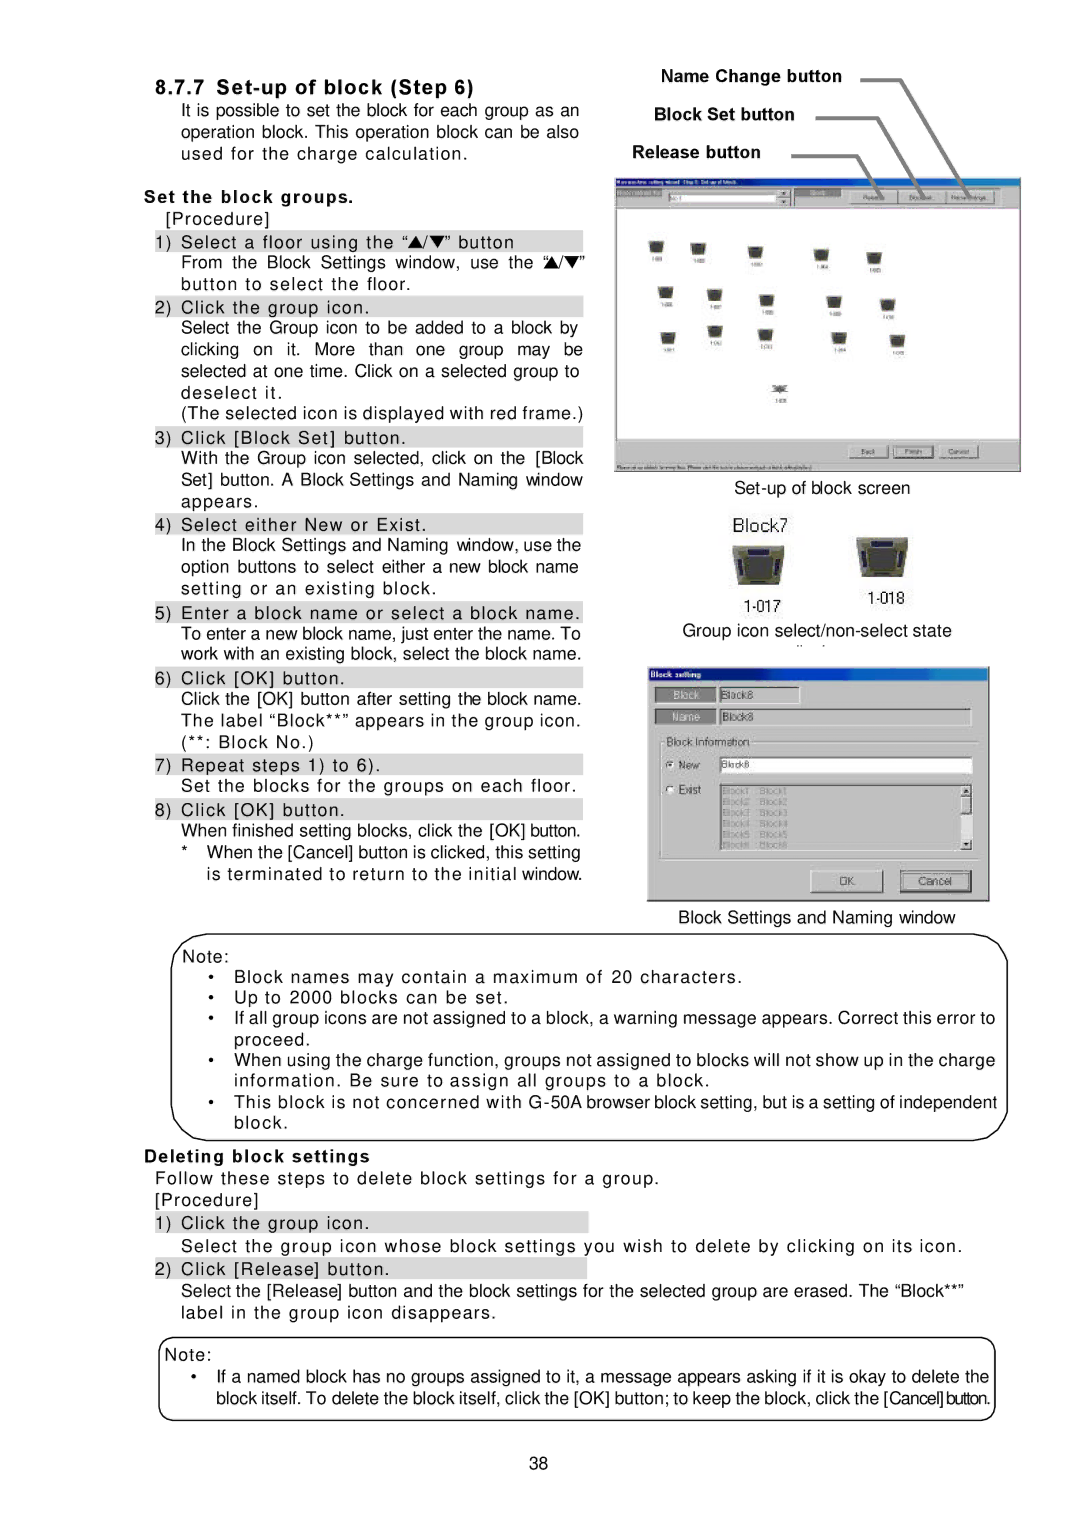
With the Group icon selected, click on the [Block Set] button. A Block Settings and Naming window appears.
4)Select either New or Exist.
In the Block Settings and Naming window, use the option buttons to select either a new block name setting or an existing block.
5)Enter a block name or select a block name. To enter a new block name, just enter the name. To work with an existing block, select the block name.
6)Click [OK] button.
Click the [OK] button after setting the block name. The label “Block**” appears in the group icon. (**: Block No.)
7)Repeat steps 1) to 6).
Set the blocks for the groups on each floor.
8)Click [OK] button.
When finished setting blocks, click the [OK] button.
*When the [Cancel] button is clicked, this setting is terminated to return to the initial window.
Name Change button
Block Set button
Release button
Group icon
Block Settings and Naming window
Note:
•Block names may contain a maximum of 20 characters.
•Up to 2000 blocks can be set.
•If all group icons are not assigned to a block, a warning message appears. Correct this error to proceed.
•When using the charge function, groups not assigned to blocks will not show up in the charge information. Be sure to assign all groups to a block.
•This block is not concerned with
Deleting block settings
Follow these steps to delete block settings for a group. [Procedure]
1)Click the group icon.
Select the group icon whose block settings you wish to delete by clicking on its icon.
2)Click [Release] button.
Select the [Release] button and the block settings for the selected group are erased. The “Block**” label in the group icon disappears.
Note:
•If a named block has no groups assigned to it, a message appears asking if it is okay to delete the block itself. To delete the block itself, click the [OK] button; to keep the block, click the [Cancel] button.
38
