8 . 8 Watt Hour Meter
Set the connection to the watt hour meter.
WHM setup sets the serial ports which connect to watt hour meters and the number of watt hour meters, address, WHM name, and maximum integrated value. It can be set for With WHM connection only.
Maintenance Tip (Caution)
When changing the contents of settings related to the energy monitoring functions, be sure to compile (date specification) the charge information up to the previous day and print it out or have the result in hand before making changes to the settings. If charge information is not processed, the charge information will not be apportioned correctly.
The monthly bill consists of a) + b) + standard charge
a)Charge information from the start of the current charge period to the day prior to any changes
b)Charge information from the day after any changes to the end of the current charge period There may be a discrepancy in the charge information just before or after a change to these settings.
*For details on setting charge periods, refer to Managemet manual section “9.3
8 . 8 . 1 Setting Procedures and Restrictions
Before setting or changing WHM, check the precautions.
Check before WHM setup. [Procedure]
1)Click [Watt hour meter set
From the Initial window, click on the [Watt hour meter set
2)Click [OK] button after checking the display contents. If there is no problem when the contents of the alarm displayed are checked, click the [OK] button.
*If the [Cancel] button is clicked, the settings are interrupted and the screen returns to the initial window.
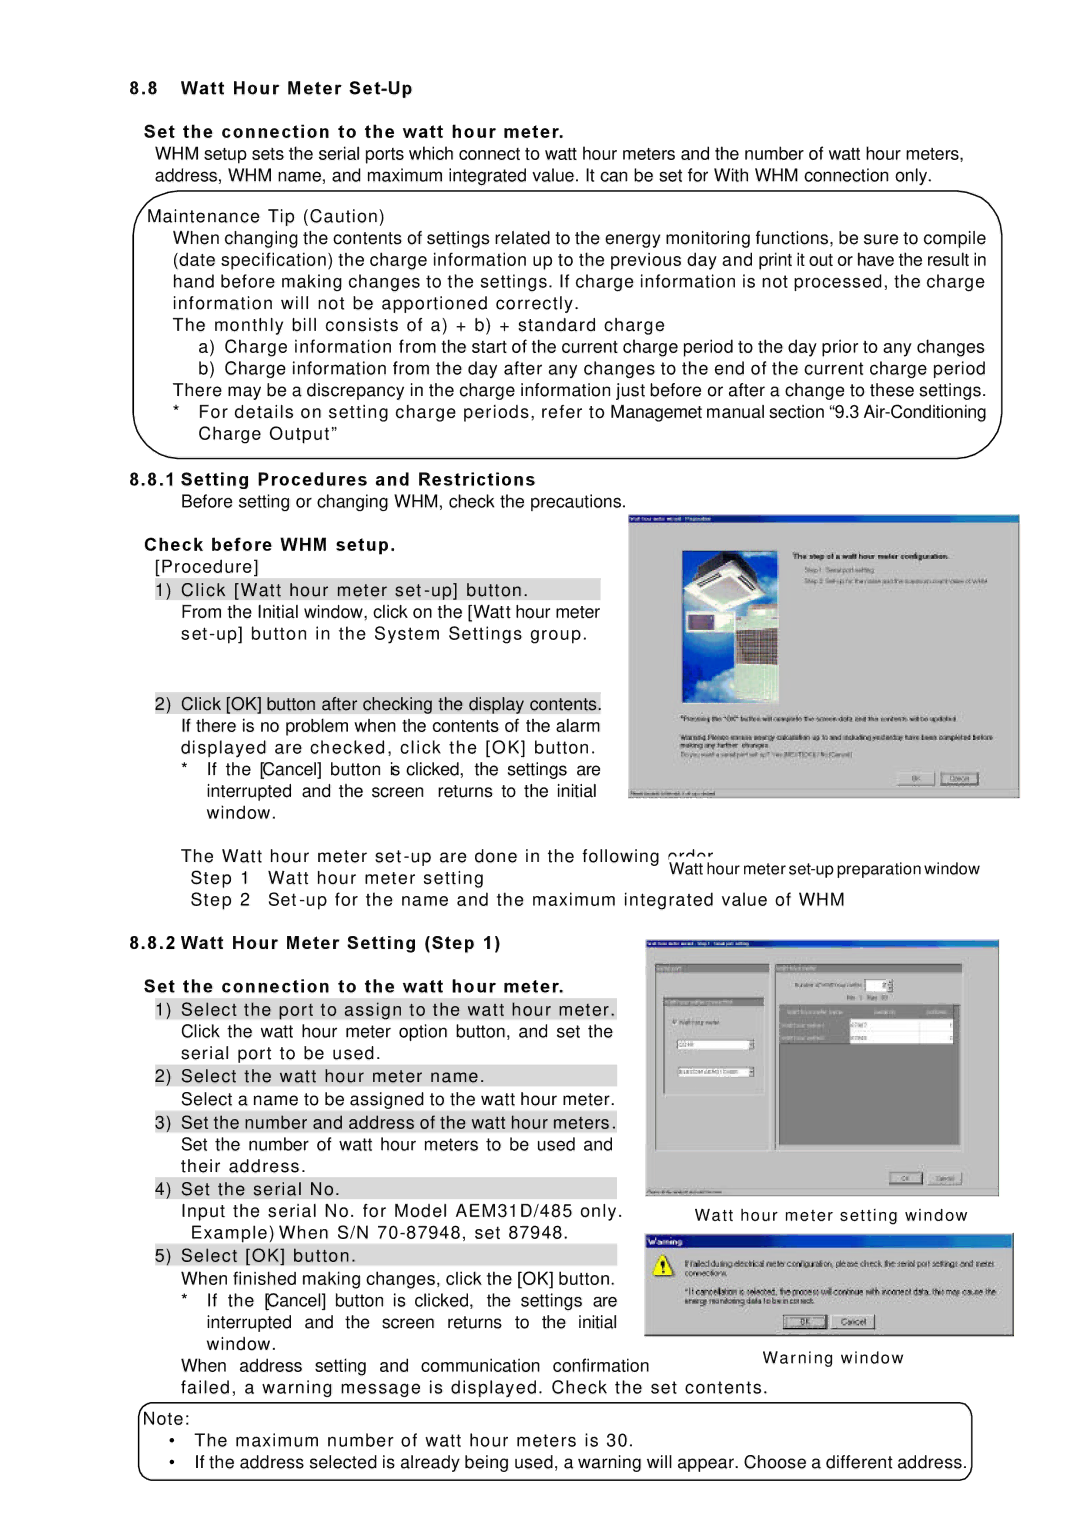
The Watt hour meter set
Step 1 Watt hour meter settingWatt hour meter
8 . 8 . 2 Watt Hour Meter Setting (Step 1)
Set the connection to the watt hour meter.
1) | Select the port to assign to the watt hour meter. |
|
|
| Click the watt hour meter option button, and set the |
| |
| serial port to be used. |
| |
2) | Select the watt hour meter name. |
|
|
| Select a name to be assigned to the watt hour meter. |
| |
3) | Set the number and address of the watt hour meters . |
|
|
| Set the number of watt hour meters to be used and |
| |
| their address. |
| |
4) | Set the serial No. |
|
|
| Input the serial No. for Model AEM31D/485 only. | Watt hour meter setting window | |
| Example) When S/N |
| |
5) | Select [OK] button. |
|
|
| When finished making changes, click the [OK] button. |
| |
| * If the [Cancel] button is clicked, the settings are |
| |
| interrupted and the screen returns to the initial |
| |
window.
When address setting and communication confirmation | Warning window |
| |
failed, a warning message is displayed. Check the set contents. | |
Note:
•The maximum number of watt hour meters is 30.
•If the address selected is already being used,40 a warning will appear. Choose a different address.