8.10 Time Set-up

The time set -up function comes in two types, date/time set -ups and time monitor set -ups .

Function

Contents

Date/time set -up

Sets the date/time of all G-50A units connected to the PC (personal computer)


as soon as the PC date/time is set.

Time monitor

Confirms the difference in time between the time reference machine (G-50


No.1) of this system and all G-50A units except for No. 1 and the PC.

*PC means a personal computer on which the integrated software TG -2000A operates.

<Precautions for using this function>

For this system, the G-50A main unit collects the operation data of the air conditioner from the indoor unit to which the G-50A is connected in order to calculate the air-conditioning charge on the basis of the data using the set capacity and charge unit cost. When there is a difference in time between the G-50A main unit and PC on which the integrated centralized control software TG -2000A operates, it becomes unable to correctly execute the calculation.

Consequently, the time adjustment is executed everyday between the integrated software and G-50A to correct the difference in time between each unit. (The time adjustment is based on the No.01 G-50A.) Because of the reasons shown above, it is not basically necessary for this system to adjust the time manually, except for the initial setting. Therefore, when the charging function is used, do not adjust the time unnecessarily.

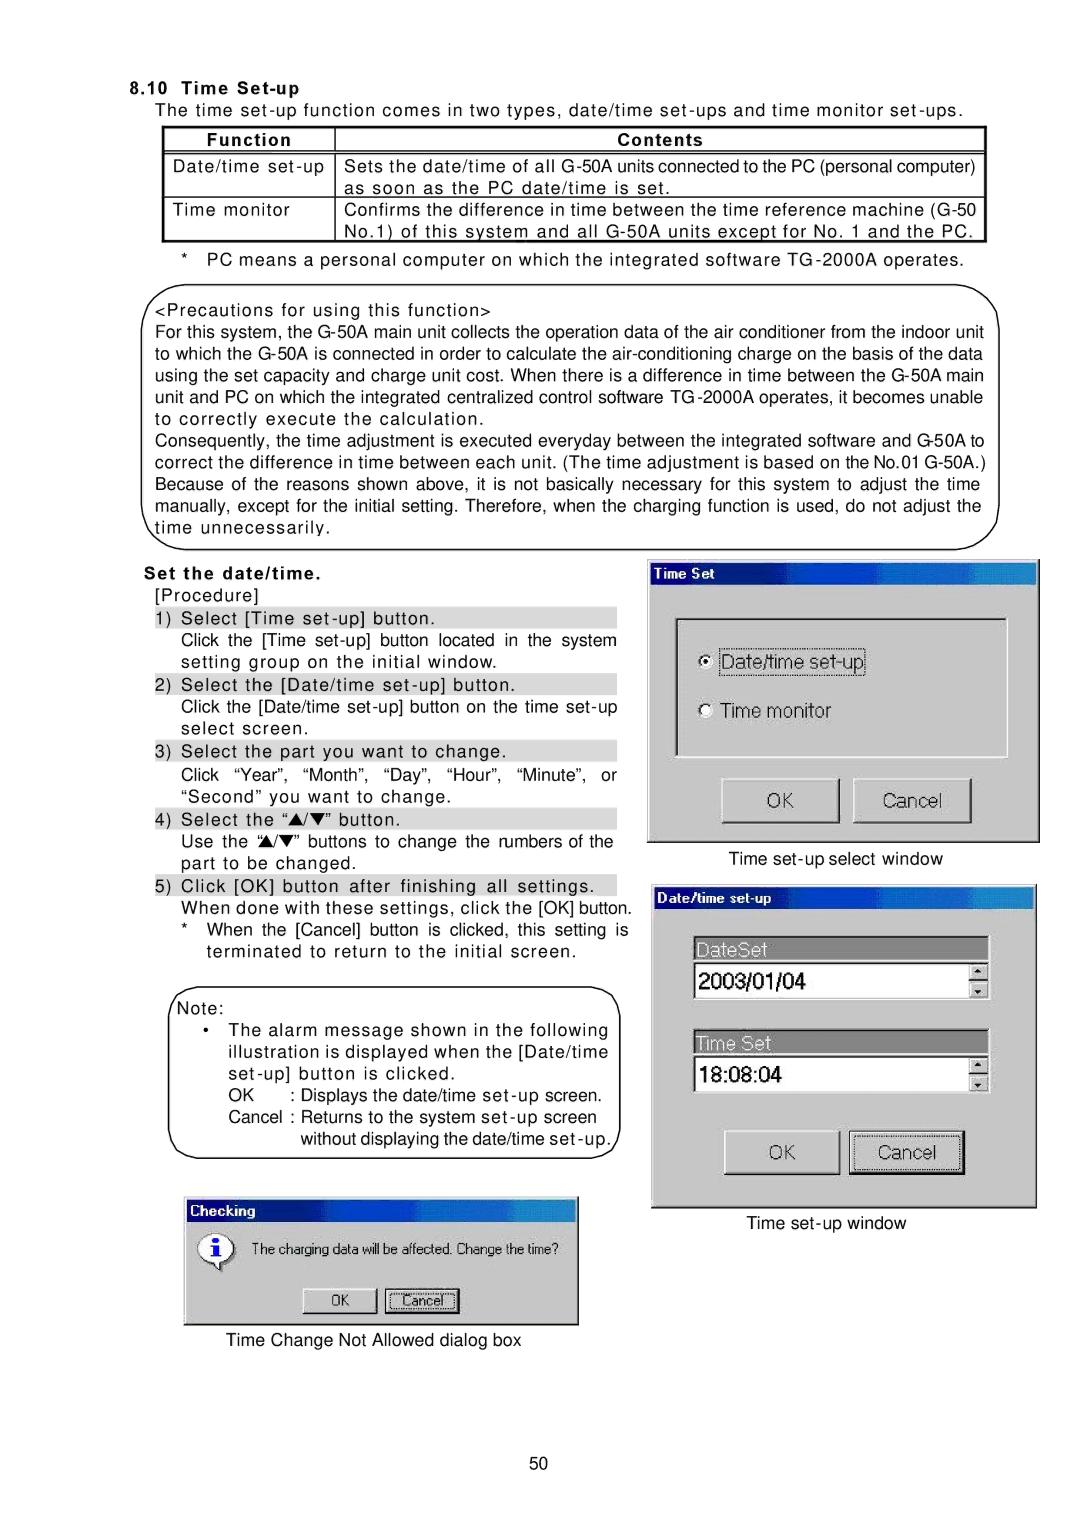
Set the date/time . [Procedure]

1)Select [Time set -up] button.

Click the [Time set-up] button located in the system setting group on the initial window.

2)Select the [Date/time set -up] button.

Click the [Date/time set-up] button on the time set-up select screen.

3)Select the part you want to change.

Click “Year”, “Month”, “Day”, “Hour”, “Minute”, or “Second” you want to change.

4)Select the “/ ” button.

Use the “ /” buttons to change the numbers of the

part to be changed.

Time set-up select window

5)Click [OK] button after finishing all settings. When done with these settings, click the [OK] button.

*When the [Cancel] button is clicked, this setting is terminated to return to the initial screen.

Note:

The alarm message shown in the following illustration is displayed when the [Date/time set -up] button is clicked.

OK : Displays the date/time set -up screen.

Cancel : Returns to the system set -up screen without displaying the date/time set -up.

Time set-up window

Time Change Not Allowed dialog box

50

Page 53
Image 53
Mitsubishi Electronics TG-2000A operation manual Time Set-up, Function Contents, Set the date/time . Procedure