4.Flow of Site Adjustment
4.1Flow of Site Adjustment
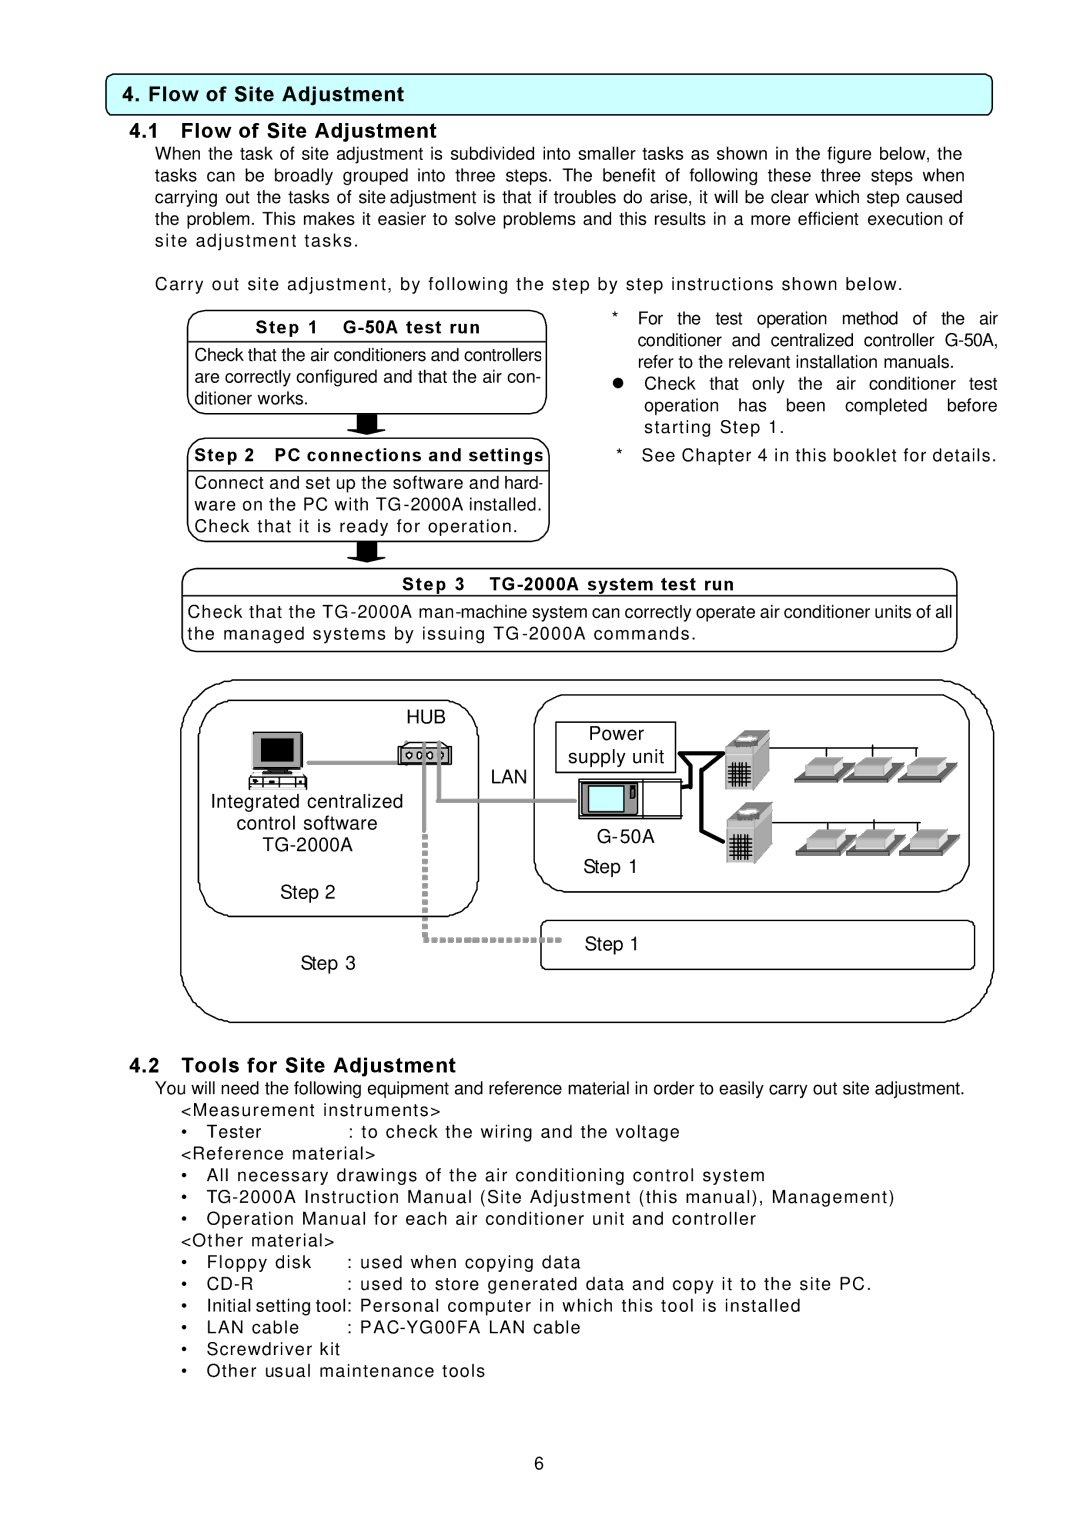
When the task of site adjustment is subdivided into smaller tasks as shown in the figure below, the tasks can be broadly grouped into three steps. The benefit of following these three steps when carrying out the tasks of site adjustment is that if troubles do arise, it will be clear which step caused the problem. This makes it easier to solve problems and this results in a more efficient execution of site adjustment tasks.
Carry out site adjustment, by following the step by step instructions shown below.
Step 1 G-50A test run
Check that the air conditioners and controllers are correctly configured and that the air con- ditioner works.
Step 2 PC connections and settings
Connect and set up the software and hard- ware on the PC with TG
*For the test operation method of the air conditioner and centralized controller
•Check that only the air conditioner test operation has been completed before starting Step 1.
*See Chapter 4 in this booklet for details.
Step 3 TG-2000A system test run
Check that the TG
HUB
![]()
![]()
![]() LAN Inte
LAN Inte![]() grated
grated ![]() centralized
centralized
control software
Step 2
Step 3
Power
supply unit
G- 50A
Step 1
Step 1
4.2Tools for Site Adjustment
You will need the following equipment and reference material in order to easily carry out site adjustment. <Measurement instruments>
• Tester: to check the wiring and the voltage <Reference material>
•All necessary drawings of the air conditioning control system
•
•Operation Manual for each air conditioner unit and controller
<Ot her material> |
| |
• | Floppy disk | : used when copying data |
• |
| : used to store generated data and copy it to the site PC. |
• | Initial setting tool: Personal computer in which this tool is installed | |
• | LAN cable | : |
•Screwdriver kit
•Other usual maintenance tools
6
