Chapter 4 - Hardware Description
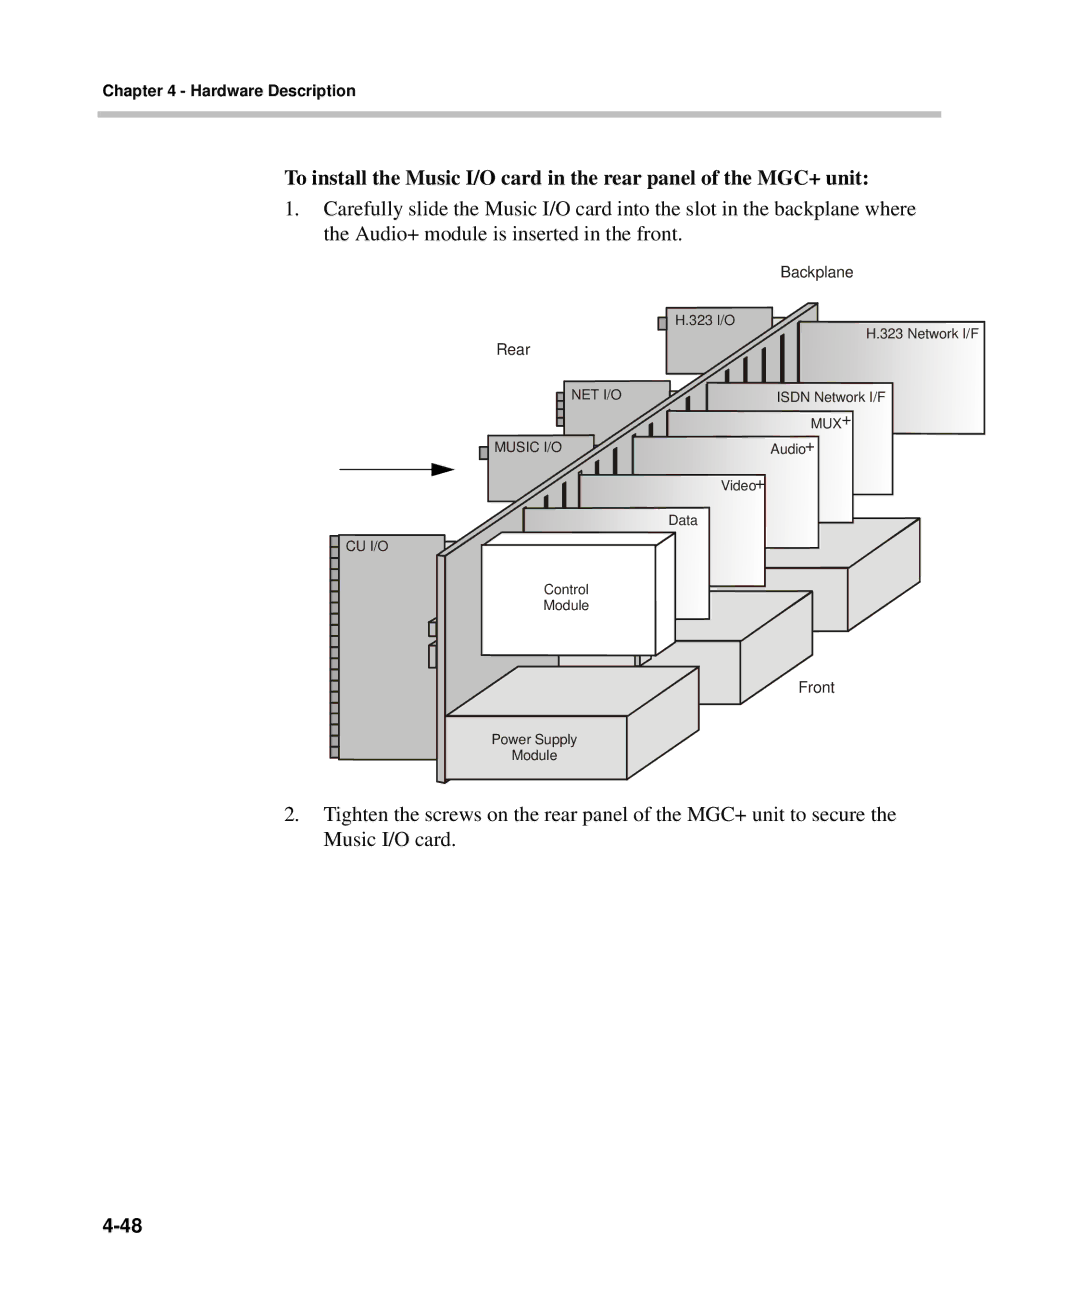
To install the Music I/O card in the rear panel of the MGC+ unit:
1.Carefully slide the Music I/O card into the slot in the backplane where the Audio+ module is inserted in the front.
|
|
|
|
|
|
|
|
|
|
|
|
| Backplane | ||
|
|
|
|
|
|
|
|
|
|
|
| H.323 I/O |
|
| H.323 Network I/F |
|
|
|
|
|
|
|
|
|
|
|
|
|
| ||
|
|
|
| Rear |
|
|
|
| |||||||
|
|
|
|
|
|
|
|
| |||||||
|
|
|
|
|
| NET I/O |
|
| ISDN Network I/F | ||||||
|
|
|
|
|
|
|
| ||||||||
|
|
|
|
|
|
|
| ||||||||
|
|
|
|
|
|
|
|
|
|
|
|
|
| MUX+ | |
|
|
|
|
|
|
|
|
|
|
|
|
|
| ||
|
|
|
|
|
|
|
|
|
|
|
|
|
| ||
|
|
|
| MUSIC I/O |
|
|
|
|
| Audio+ | |||||
|
|
|
|
|
|
|
|
| |||||||
|
|
|
|
|
|
|
|
|
|
|
| Video+ | |||
|
|
|
|
|
|
|
|
|
|
|
| ||||
|
|
|
|
|
|
|
|
|
|
|
| Data | |||
| CU I/O |
|
|
|
|
| |||||||||
|
|
|
|
|
| ||||||||||
|
|
|
|
|
| ||||||||||
|
|
|
| Control |
|
|
|
|
| ||||||
|
|
|
|
|
|
|
|
| |||||||
|
|
|
|
|
|
|
|
| |||||||
|
|
|
|
|
|
|
|
| |||||||
|
|
|
|
|
|
|
|
| |||||||
|
|
|
| Module |
|
|
|
|
| ||||||
|
|
|
|
|
|
|
|
| |||||||
|
|
|
|
|
|
|
|
|
|
|
|
|
|
|
|
|
|
|
|
|
|
|
|
|
|
|
|
|
|
|
|
|
|
|
|
|
|
|
|
|
|
|
|
|
|
|
|
|
|
|
|
|
|
|
|
|
|
|
|
|
|
|
|
|
|
|
|
|
|
|
|
|
|
|
|
|
|
|
|
Front
Power Supply
Module
2.Tighten the screws on the rear panel of the MGC+ unit to secure the Music I/O card.
