Chapter 3
Specifying The Points While the Song Plays Back
1.Press [PLAY] to begin playback of the song.
2.When you reach the desired location for the beginning of the loop, hold down [LOOP] and press [TAP].
3.Continue holding down [LOOP], and when you reach the desired location for the end of the loop, press [TAP] once again.
4.Press [STOP].
Making Fine Adjustments to the Loop
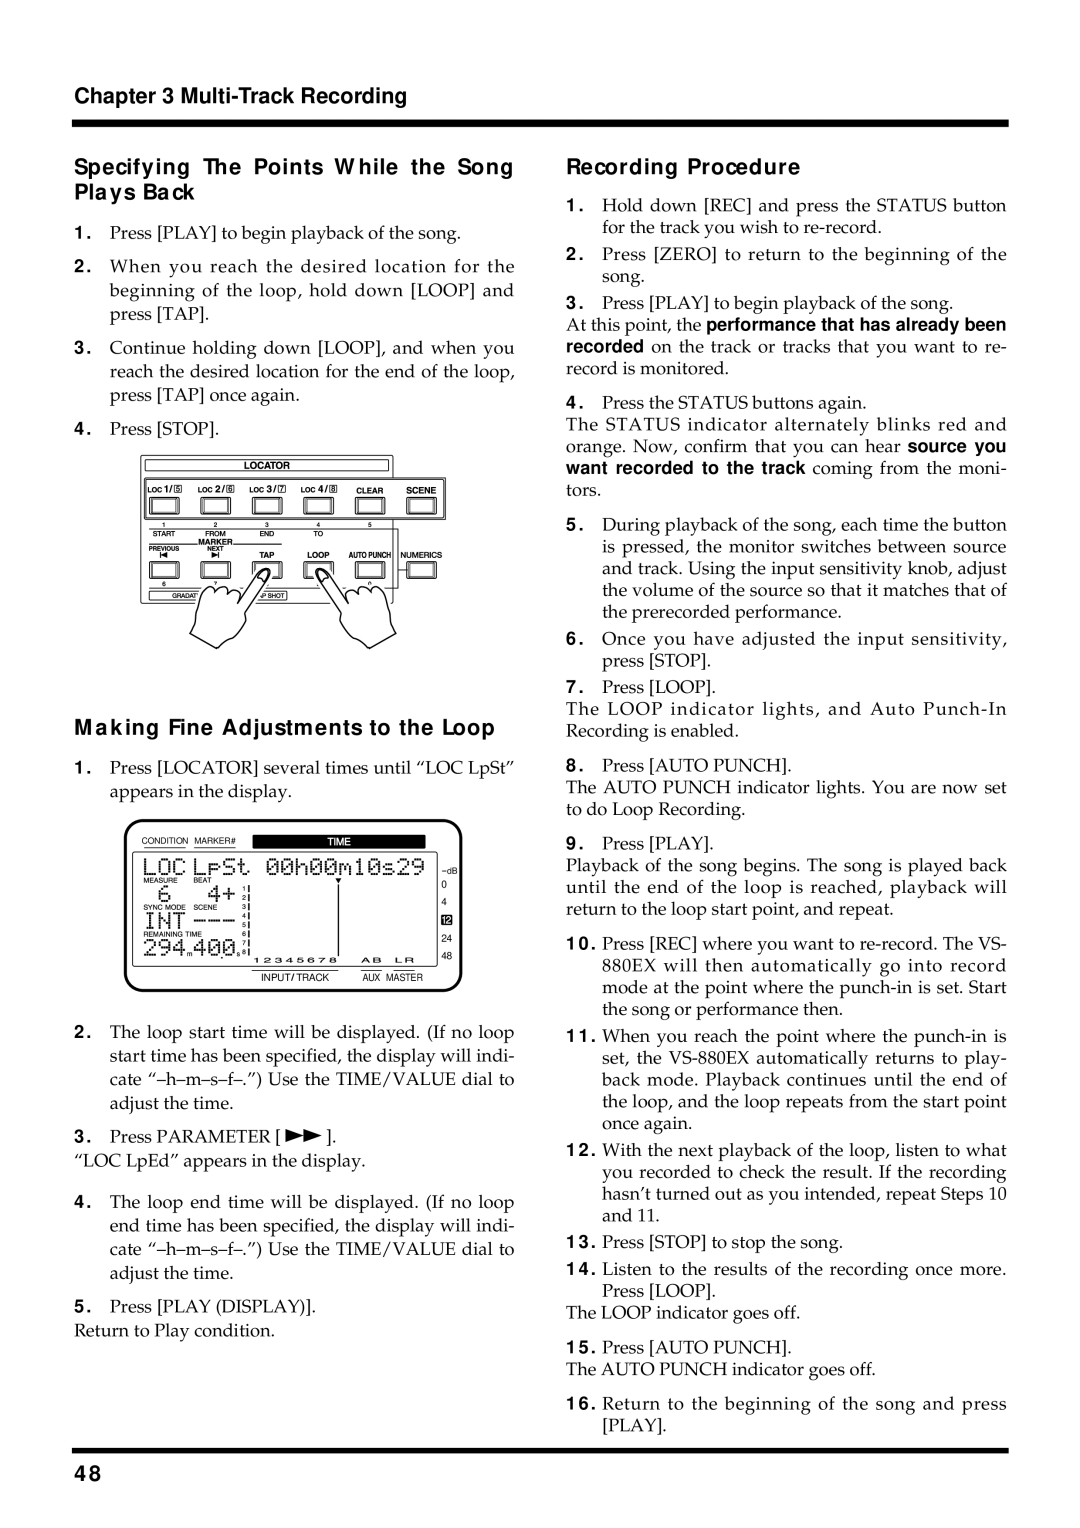
1.Press [LOCATOR] several times until “LOC LpSt” appears in the display.
CONDITION MARKER# | TIME | ||||
|
|
|
|
|
|
dB
0
4
12
24
48
INPUT TRACK | AUX MASTER |
2.The loop start time will be displayed. (If no loop start time has been specified, the display will indi- cate
3.Press PARAMETER [ ![]() ].
].
“LOC LpEd” appears in the display.
4.The loop end time will be displayed. (If no loop end time has been specified, the display will indi- cate
5.Press [PLAY (DISPLAY)].
Return to Play condition.
Recording Procedure
1.Hold down [REC] and press the STATUS button for the track you wish to
2.Press [ZERO] to return to the beginning of the song.
3.Press [PLAY] to begin playback of the song.
At this point, the performance that has already been recorded on the track or tracks that you want to re- record is monitored.
4.Press the STATUS buttons again.
The STATUS indicator alternately blinks red and orange. Now, confirm that you can hear source you want recorded to the track coming from the moni- tors.
5.During playback of the song, each time the button is pressed, the monitor switches between source and track. Using the input sensitivity knob, adjust the volume of the source so that it matches that of the prerecorded performance.
6.Once you have adjusted the input sensitivity, press [STOP].
7.Press [LOOP].
The LOOP indicator lights, and Auto
8.Press [AUTO PUNCH].
The AUTO PUNCH indicator lights. You are now set to do Loop Recording.
9.Press [PLAY].
Playback of the song begins. The song is played back until the end of the loop is reached, playback will return to the loop start point, and repeat.
10.Press [REC] where you want to
11.When you reach the point where the
12.With the next playback of the loop, listen to what you recorded to check the result. If the recording hasn’t turned out as you intended, repeat Steps 10 and 11.
13.Press [STOP] to stop the song.
14.Listen to the results of the recording once more. Press [LOOP].
The LOOP indicator goes off.
15.Press [AUTO PUNCH].
The AUTO PUNCH indicator goes off.
16.Return to the beginning of the song and press [PLAY].
48