2
3
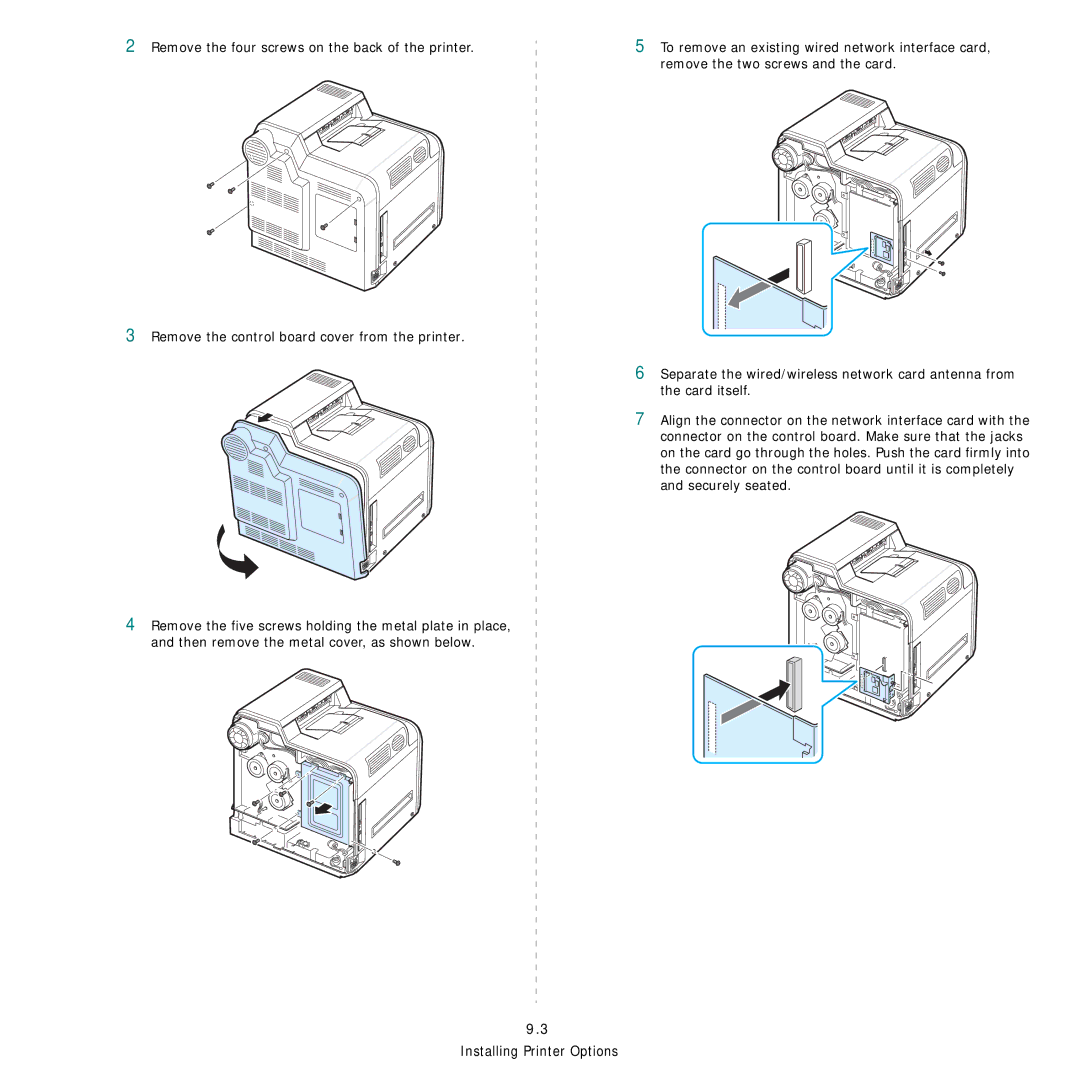
Remove the four screws on the back of the printer.
Remove the control board cover from the printer.
5To remove an existing wired network interface card, remove the two screws and the card.
6Separate the wired/wireless network card antenna from the card itself.
7Align the connector on the network interface card with the connector on the control board. Make sure that the jacks on the card go through the holes. Push the card firmly into the connector on the control board until it is completely and securely seated.
4Remove the five screws holding the metal plate in place,
and then remove the metal cover, as shown below.
9.3