TallyGenicom Intelliprint 8026DN Color Laser Printer User Guide
Job Library
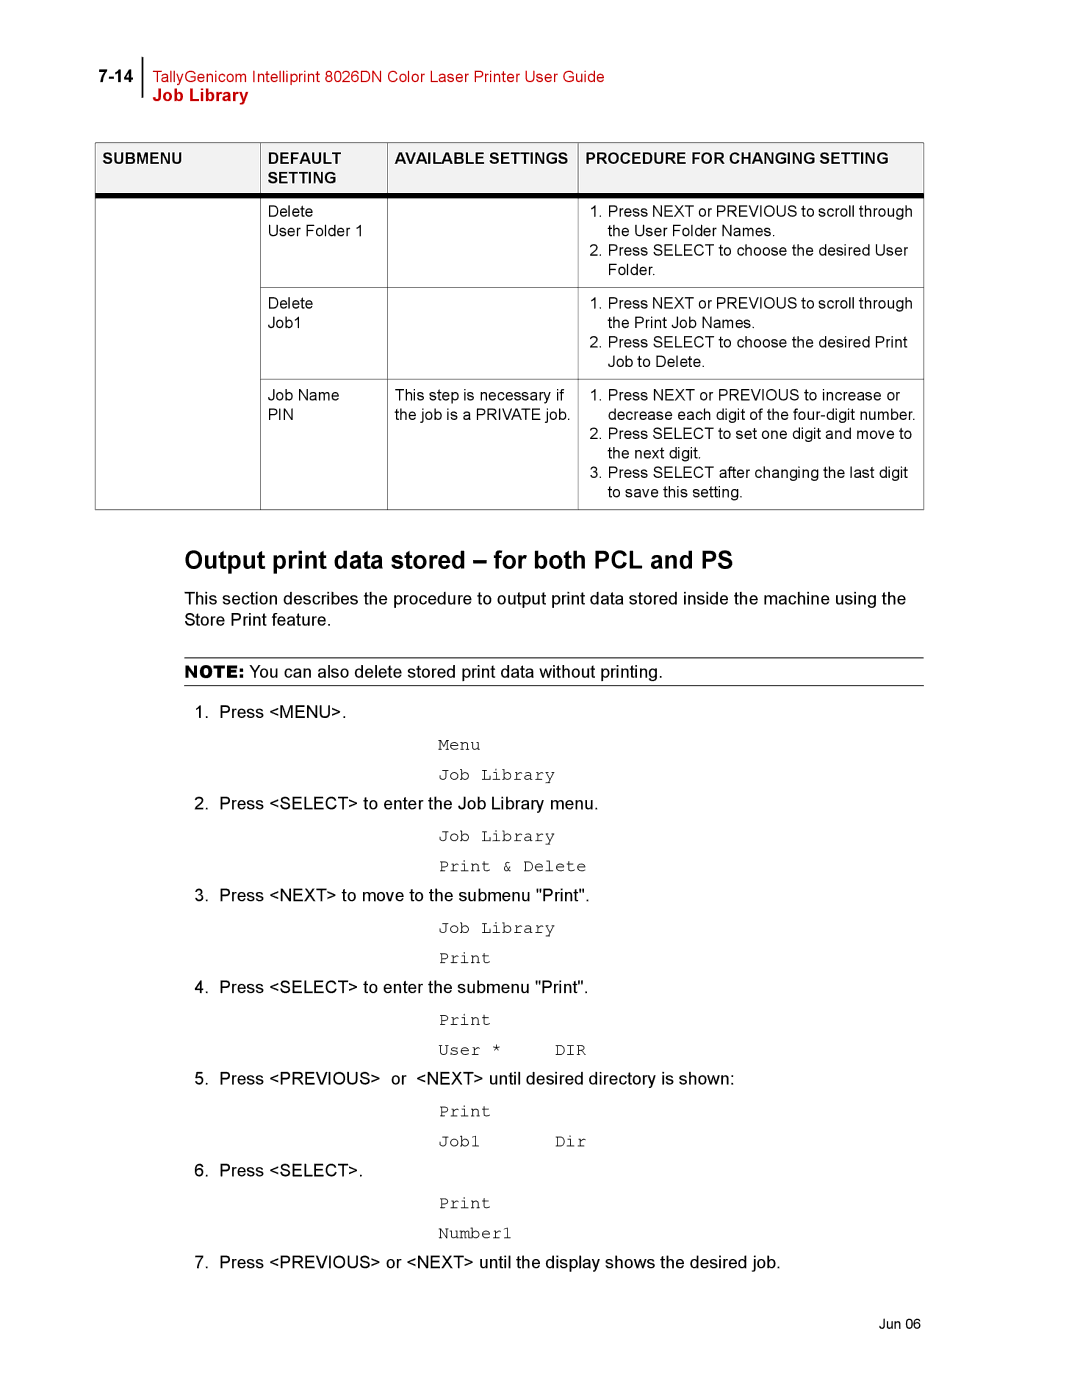
SUBMENU | DEFAULT | AVAILABLE SETTINGS | PROCEDURE FOR CHANGING SETTING | |
| SETTING |
|
|
|
| Delete |
| 1. | Press NEXT or PREVIOUS to scroll through |
| User Folder 1 |
|
| the User Folder Names. |
|
|
| 2. | Press SELECT to choose the desired User |
|
|
|
| Folder. |
|
|
|
|
|
| Delete |
| 1. | Press NEXT or PREVIOUS to scroll through |
| Job1 |
|
| the Print Job Names. |
|
|
| 2. | Press SELECT to choose the desired Print |
|
|
|
| Job to Delete. |
|
|
|
| |
| Job Name | This step is necessary if | 1. Press NEXT or PREVIOUS to increase or | |
| PIN | the job is a PRIVATE job. |
| decrease each digit of the |
|
|
| 2. | Press SELECT to set one digit and move to |
|
|
|
| the next digit. |
|
|
| 3. | Press SELECT after changing the last digit |
|
|
|
| to save this setting. |
|
|
|
|
|
Output print data stored – for both PCL and PS
This section describes the procedure to output print data stored inside the machine using the Store Print feature.
NOTE: You can also delete stored print data without printing.
1. Press <MENU>.
Menu
Job Library
2.Press <SELECT> to enter the Job Library menu.
Job Library Print & Delete
3.Press <NEXT> to move to the submenu "Print".
Job Library Print
4.Press <SELECT> to enter the submenu "Print".
User * | DIR |
5. Press <PREVIOUS> or <NEXT> until desired directory is shown:
Job1 Dir
6. Press <SELECT>.
Number1
7. Press <PREVIOUS> or <NEXT> until the display shows the desired job.