6 INTERNET FAX
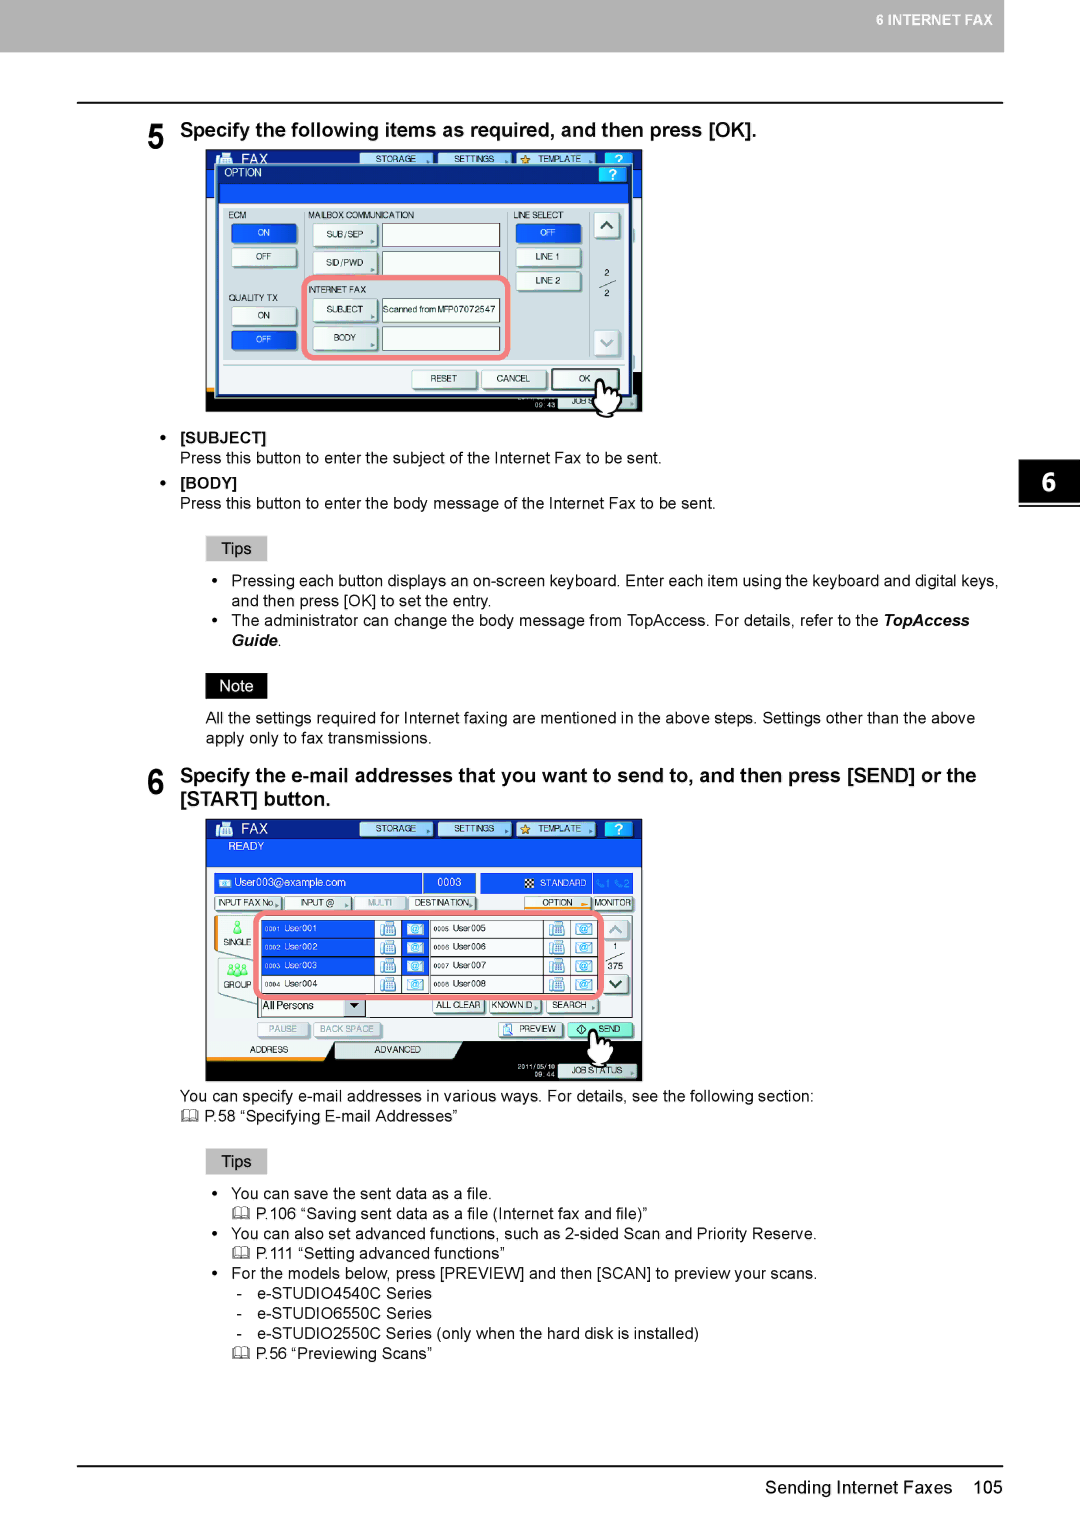
5 Specify the following items as required, and then press [OK].
y[SUBJECT]
Press this button to enter the subject of the Internet Fax to be sent.
y[BODY]
Press this button to enter the body message of the Internet Fax to be sent.
yPressing each button displays an
yThe administrator can change the body message from TopAccess. For details, refer to the TopAccess Guide.
All the settings required for Internet faxing are mentioned in the above steps. Settings other than the above apply only to fax transmissions.
6 Specify the
You can specify
P.58 “Specifying
yYou can save the sent data as a file.
P.106 “Saving sent data as a file (Internet fax and file)”
yYou can also set advanced functions, such as
yFor the models below, press [PREVIEW] and then [SCAN] to preview your scans.
-
-
-
Sending Internet Faxes 105