3 USEFUL FUNCTIONS
Specifying E-mail Addresses
To specify
Up to 400 addresses can be specified.
P.58 “Entering an
P.60 “Selecting from the address book”
P.61 “Refining your search”
P.61 “Searching the address book with ID numbers”
P.62 “Searching the address book with search strings”
P.64 “Searching the LDAP server with search strings”
P.66 “Selecting groups”
P.67 “Searching for groups with ID numbers”
P.69 “Searching for groups by name”
P.71 “Viewing/Deleting specified
The screen displays in the following procedures are examples of the Scan to
Entering an e-mail Addresses
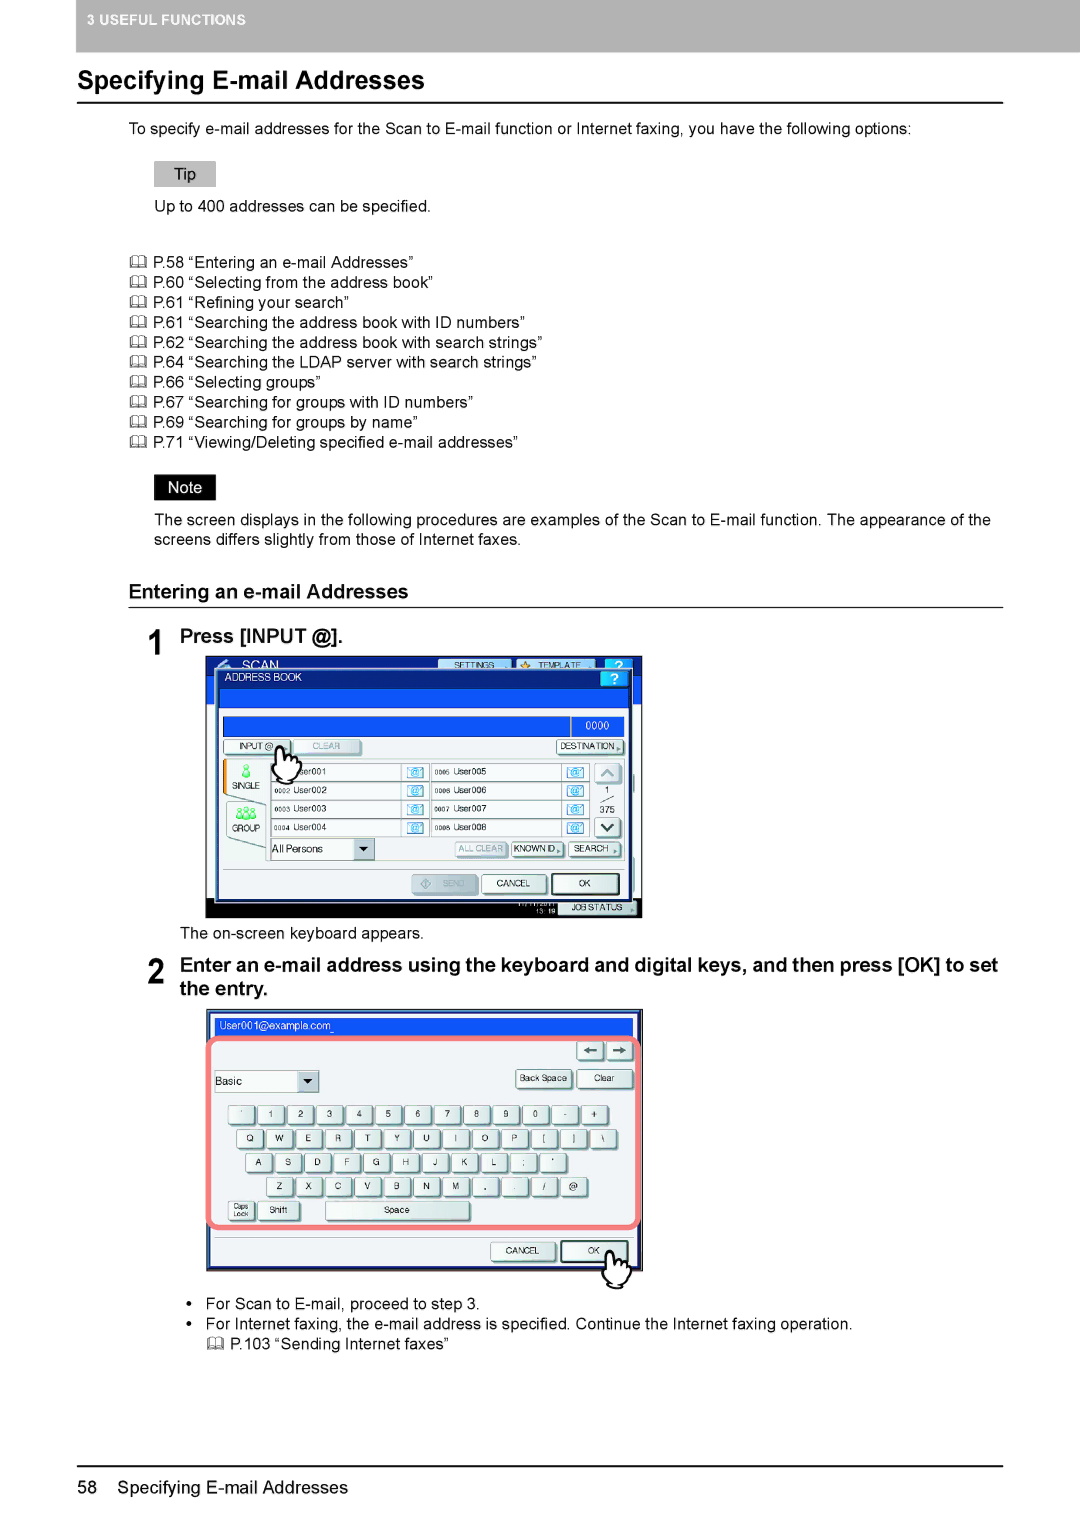
1 Press [INPUT @].
| The | ||
2 | Enter an | ||
the entry. | |||
|
|
|
|
|
|
|
|
yFor Scan to
yFor Internet faxing, the
