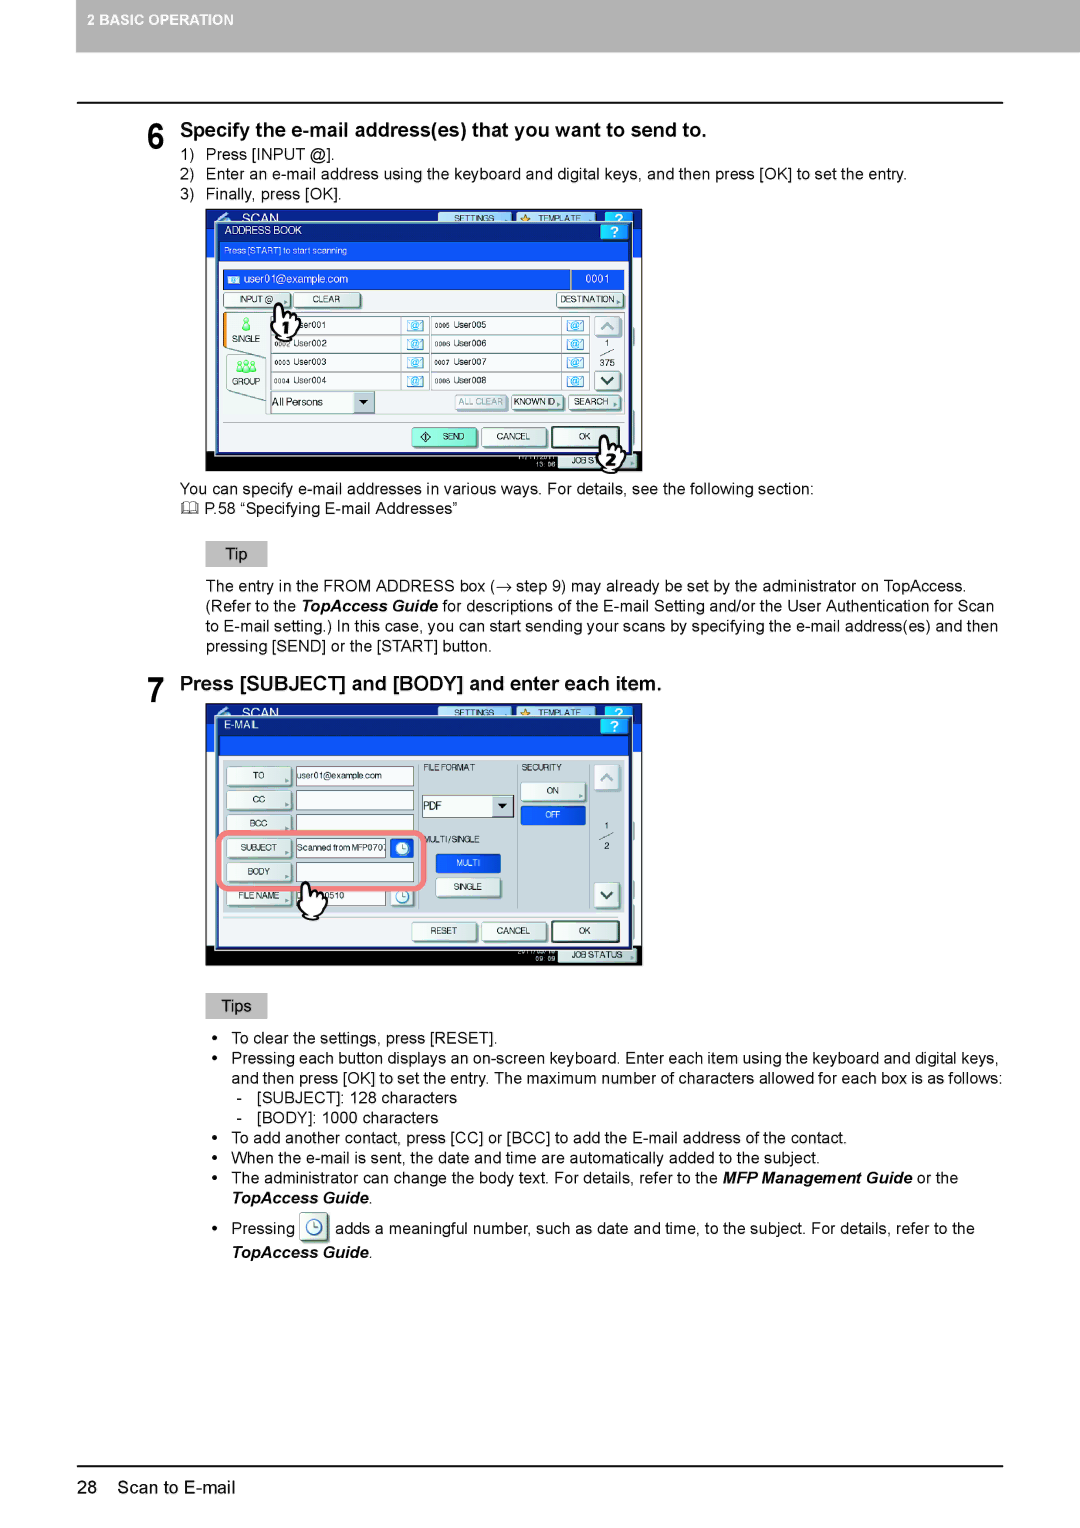
Toshiba 306SE, 556. 656, 6540C, 5540C Press SUBJECT and BODY and enter each item, Scan to E-mail

Models: 2540C 5540C 6540C 756 306SE 856 3040C 206L 356 256SE 4540C 3540C 356SE 256 556SE 556. 656 2040C 6550C 306 456 456SE

1 124
Download 124 pages 46.92 Kb
Page 30
Image 30
7 Press [SUBJECT] and [BODY] and enter each item.

2 BASIC OPERATION

6 Specify the e-mail address(es) that you want to send to. 1) Press [INPUT @].

2) Enter an e-mail address using the keyboard and digital keys, and then press [OK] to set the entry.

3) Finally, press [OK].

You can specify e-mail addresses in various ways. For details, see the following section:

P.58 “Specifying E-mail Addresses”

The entry in the FROM ADDRESS box (step 9) may already be set by the administrator on TopAccess. (Refer to the TopAccess Guide for descriptions of the E-mail Setting and/or the User Authentication for Scan to E-mail setting.) In this case, you can start sending your scans by specifying the e-mail address(es) and then pressing [SEND] or the [START] button.

7 Press [SUBJECT] and [BODY] and enter each item.

yTo clear the settings, press [RESET].

yPressing each button displays an on-screen keyboard. Enter each item using the keyboard and digital keys, and then press [OK] to set the entry. The maximum number of characters allowed for each box is as follows:

-[SUBJECT]: 128 characters

-[BODY]: 1000 characters

yTo add another contact, press [CC] or [BCC] to add the E-mail address of the contact.

yWhen the e-mail is sent, the date and time are automatically added to the subject.

yThe administrator can change the body text. For details, refer to the MFP Management Guide or the TopAccess Guide.

yPressing 28 Scan to E-mail adds a meaningful number, such as date and time, to the subject. For details, refer to the TopAccess Guide.

28 Scan to E-mail

Page 30
Image 30
Toshiba 306SE, 556. 656, 6540C, 5540C, 6550C, 456SE, 856, 556SE, 756 Press SUBJECT and BODY and enter each item, Scan to E-mail