2 BASIC OPERATION
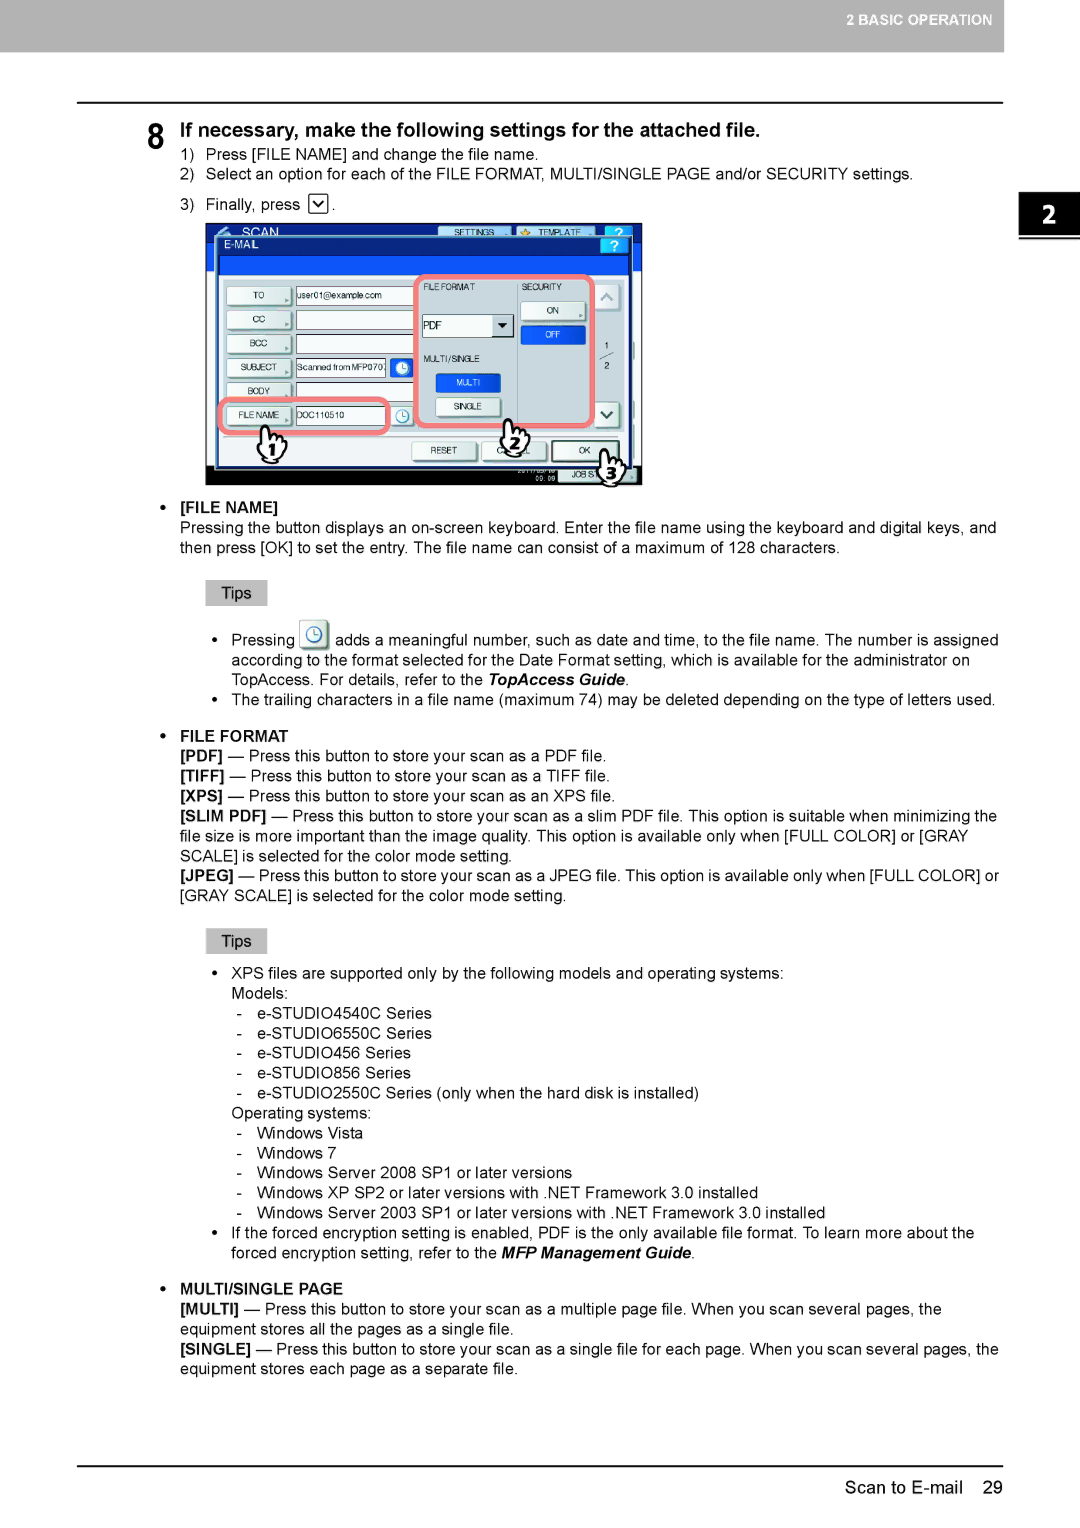
8 | If necessary, make the following settings for the attached file. | |||
1) | Press [FILE NAME] and change the file name. | |||
| 2) | Select an option for each of the FILE FORMAT, MULTI/SINGLE PAGE and/or SECURITY settings. | ||
| 3) | Finally, press | . |
|
|
|
|
|
|
|
|
|
|
|
y[FILE NAME]
Pressing the button displays an
yPressing ![]() adds a meaningful number, such as date and time, to the file name. The number is assigned according to the format selected for the Date Format setting, which is available for the administrator on TopAccess. For details, refer to the TopAccess Guide.
adds a meaningful number, such as date and time, to the file name. The number is assigned according to the format selected for the Date Format setting, which is available for the administrator on TopAccess. For details, refer to the TopAccess Guide.
yThe trailing characters in a file name (maximum 74) may be deleted depending on the type of letters used.
yFILE FORMAT
[PDF] — Press this button to store your scan as a PDF file. [TIFF] — Press this button to store your scan as a TIFF file. [XPS] — Press this button to store your scan as an XPS file.
[SLIM PDF] — Press this button to store your scan as a slim PDF file. This option is suitable when minimizing the file size is more important than the image quality. This option is available only when [FULL COLOR] or [GRAY SCALE] is selected for the color mode setting.
[JPEG] — Press this button to store your scan as a JPEG file. This option is available only when [FULL COLOR] or [GRAY SCALE] is selected for the color mode setting.
yXPS files are supported only by the following models and operating systems: Models:
-
-
-
-
-
Operating systems:
-Windows Vista
-Windows 7
-Windows Server 2008 SP1 or later versions
-Windows XP SP2 or later versions with .NET Framework 3.0 installed
-Windows Server 2003 SP1 or later versions with .NET Framework 3.0 installed
yIf the forced encryption setting is enabled, PDF is the only available file format. To learn more about the forced encryption setting, refer to the MFP Management Guide.
yMULTI/SINGLE PAGE
[MULTI] — Press this button to store your scan as a multiple page file. When you scan several pages, the equipment stores all the pages as a single file.
[SINGLE] — Press this button to store your scan as a single file for each page. When you scan several pages, the equipment stores each page as a separate file.
Scan to