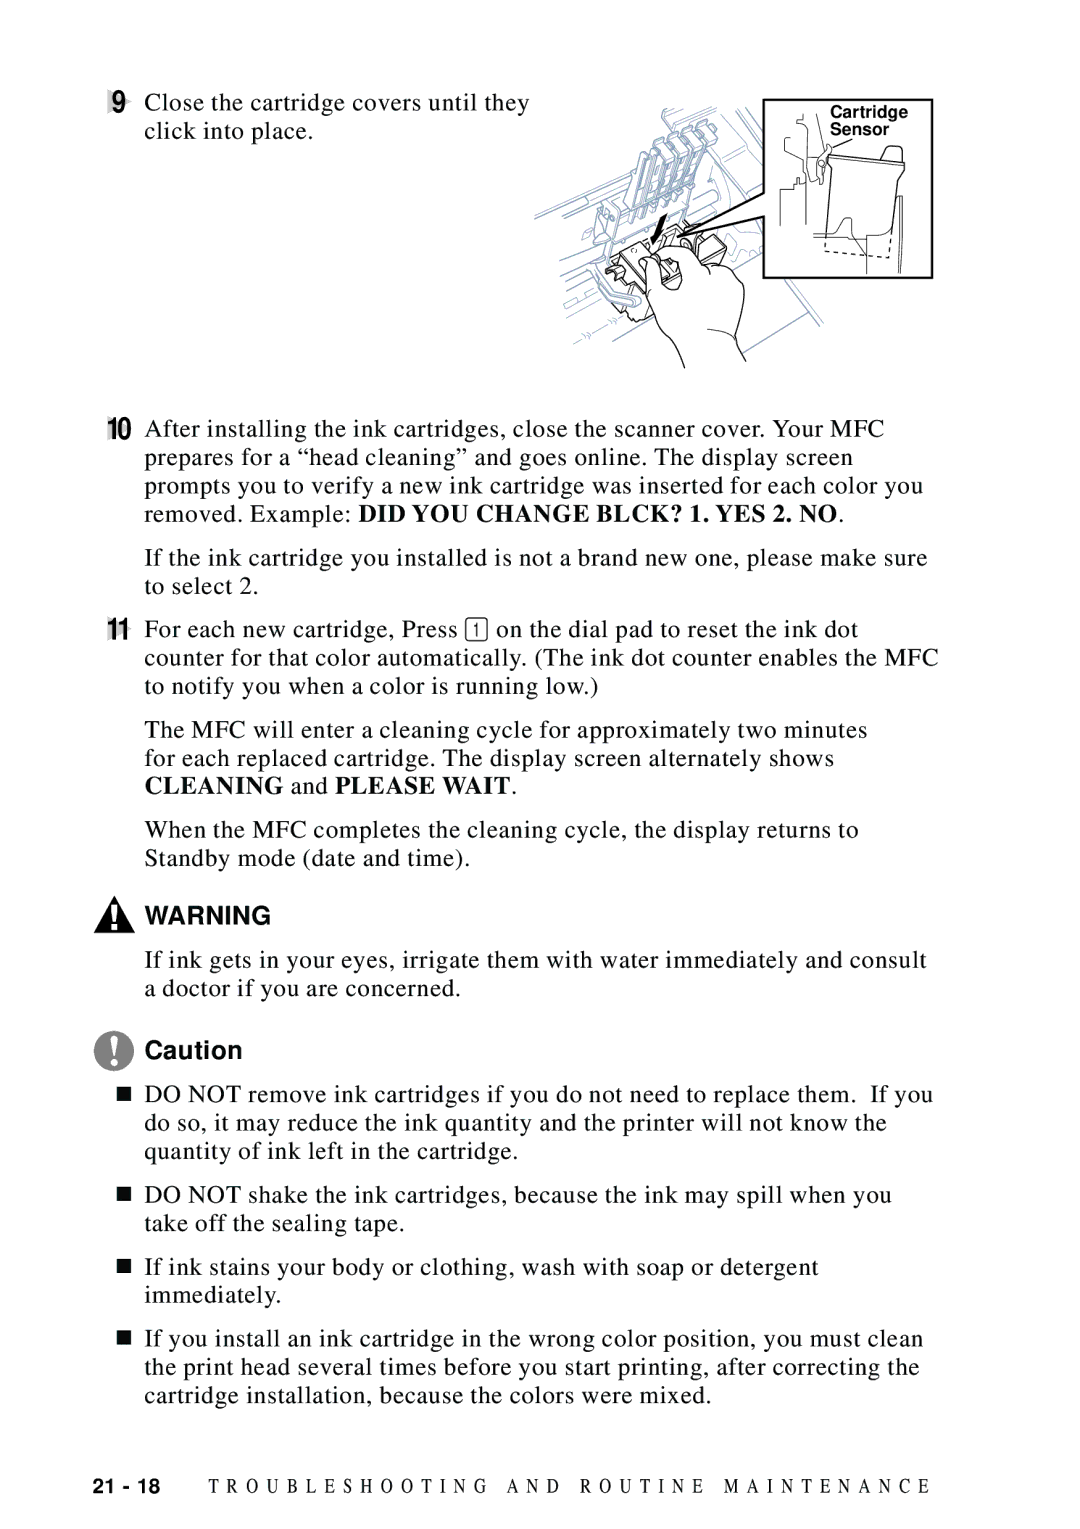
9 Close the cartridge covers until they | Cartridge |
click into place. | Sensor |
10After installing the ink cartridges, close the scanner cover. Your MFC prepares for a “head cleaning” and goes online. The display screen prompts you to verify a new ink cartridge was inserted for each color you removed. Example: DID YOU CHANGE BLCK? 1. YES 2. NO.
If the ink cartridge you installed is not a brand new one, please make sure to select 2.
11For each new cartridge, Press 1 on the dial pad to reset the ink dot counter for that color automatically. (The ink dot counter enables the MFC to notify you when a color is running low.)
The MFC will enter a cleaning cycle for approximately two minutes for each replaced cartridge. The display screen alternately shows CLEANING and PLEASE WAIT.
When the MFC completes the cleaning cycle, the display returns to Standby mode (date and time).
![]() WARNING
WARNING
If ink gets in your eyes, irrigate them with water immediately and consult a doctor if you are concerned.
![]() Caution
Caution
■DO NOT remove ink cartridges if you do not need to replace them. If you do so, it may reduce the ink quantity and the printer will not know the quantity of ink left in the cartridge.
■DO NOT shake the ink cartridges, because the ink may spill when you take off the sealing tape.
■If ink stains your body or clothing, wash with soap or detergent immediately.
■If you install an ink cartridge in the wrong color position, you must clean the print head several times before you start printing, after correcting the cartridge installation, because the colors were mixed.
21 - 18 | T R O U B L E S H O O T I N G A N D R O U T I N E M A I N T E N A N C E |
