Chapter 3 Using the Ease Menu and Niagara SCX Web Interface
Niagara SCX Web Interface
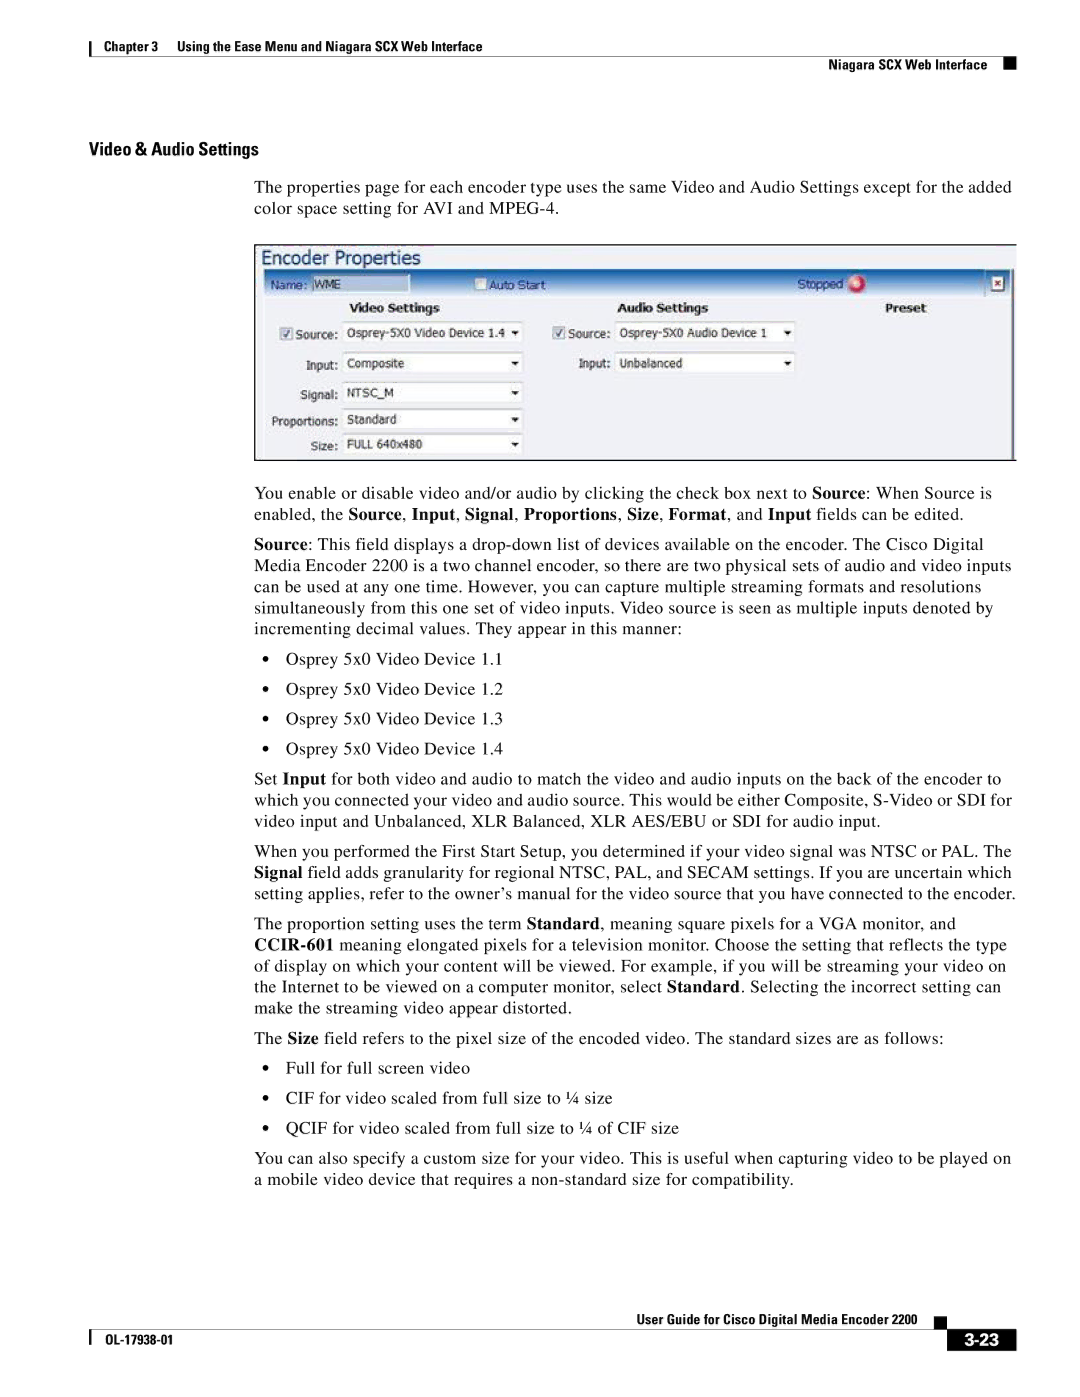
Video & Audio Settings
The properties page for each encoder type uses the same Video and Audio Settings except for the added color space setting for AVI and
You enable or disable video and/or audio by clicking the check box next to Source: When Source is enabled, the Source, Input, Signal, Proportions, Size, Format, and Input fields can be edited.
Source: This field displays a
•Osprey 5x0 Video Device 1.1
•Osprey 5x0 Video Device 1.2
•Osprey 5x0 Video Device 1.3
•Osprey 5x0 Video Device 1.4
Set Input for both video and audio to match the video and audio inputs on the back of the encoder to which you connected your video and audio source. This would be either Composite,
When you performed the First Start Setup, you determined if your video signal was NTSC or PAL. The Signal field adds granularity for regional NTSC, PAL, and SECAM settings. If you are uncertain which setting applies, refer to the owner’s manual for the video source that you have connected to the encoder.
The proportion setting uses the term Standard, meaning square pixels for a VGA monitor, and
The Size field refers to the pixel size of the encoded video. The standard sizes are as follows:
•Full for full screen video
•CIF for video scaled from full size to ¼ size
•QCIF for video scaled from full size to ¼ of CIF size
You can also specify a custom size for your video. This is useful when capturing video to be played on a mobile video device that requires a
|
| User Guide for Cisco Digital Media Encoder 2200 |
|
| |
|
|
| |||
|
|
|
|
| |
|
|
|
| ||