10Rotate the processor shield upward and out of the way. See Figure
11Lift the processor out of the socket and leave the release lever up so that the socket is ready for the new processor.
CAUTION: Be careful not to bend any of the pins on the ZIF socket when removing the processor. Bending the pins can permanently damage the system board.
If you are permanently removing a processor from socket CPU2, you must install a processor blank and a
NOTE: In
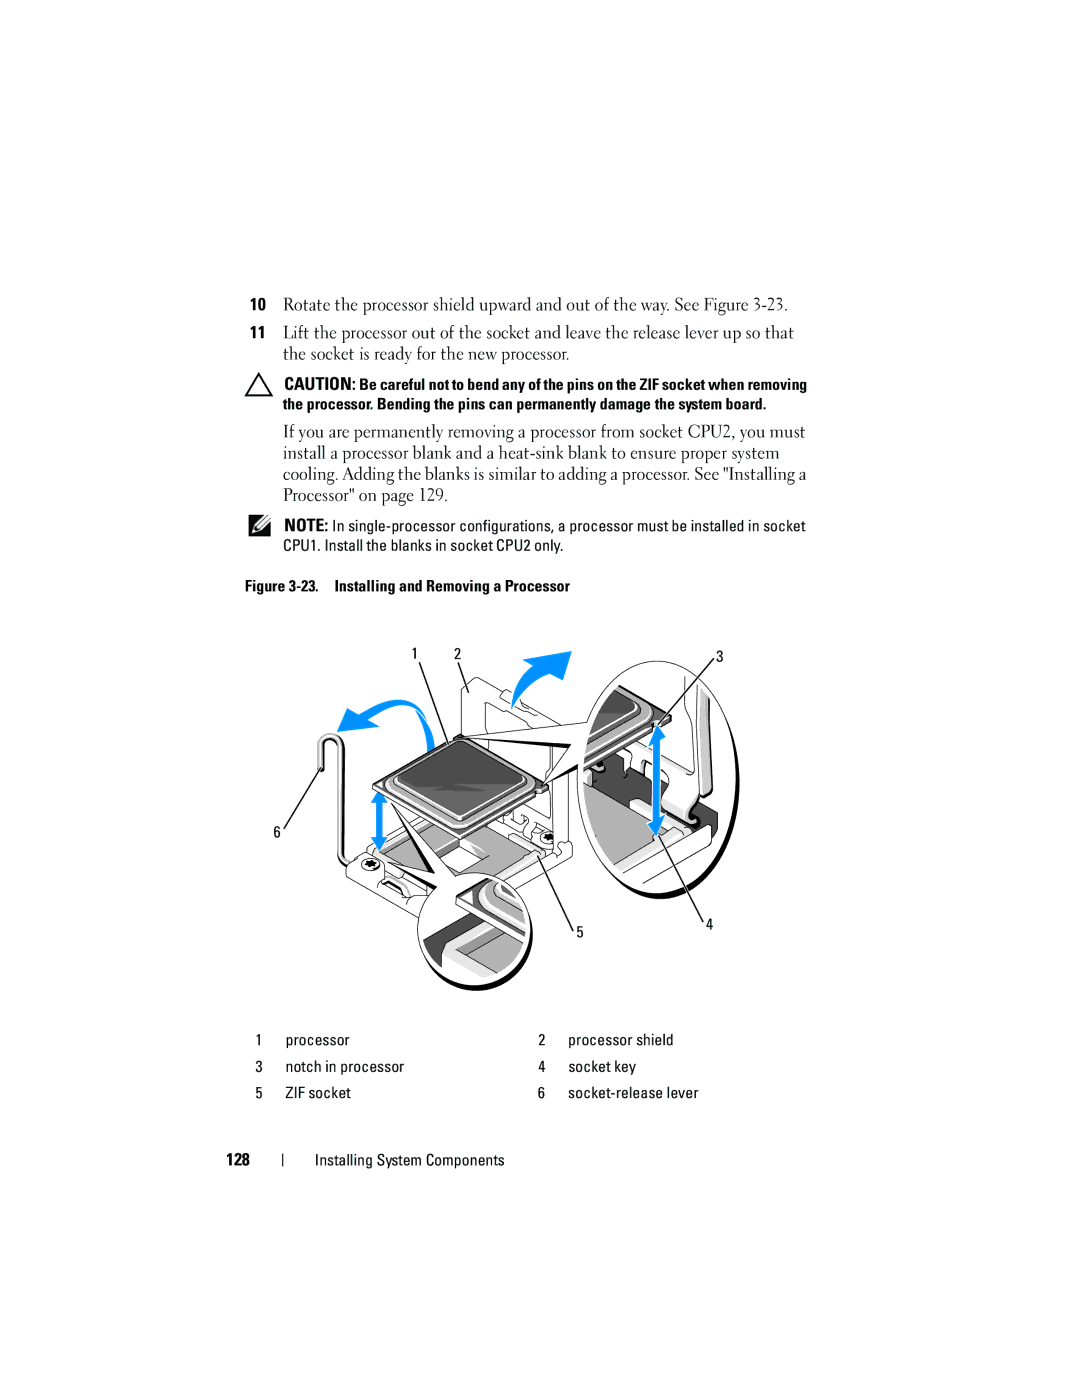
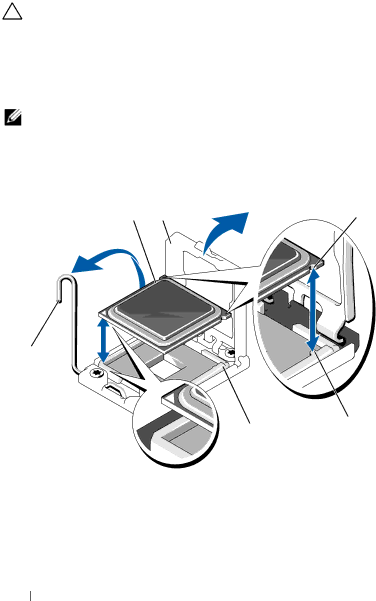
Figure 3-23. Installing and Removing a Processor
1 | 2 | 3 |
6
54
1 | processor | 2 | processor shield |
3 | notch in processor | 4 | socket key |
5 | ZIF socket | 6 |