System and Control Options
7.10.1Turn Automatic Sequencing On or Off
Use automatic sequencing to set up a schedule for rotation of redundant devices. For example, three devices might be in operating mode while a fourth device is in standby mode. Every two days, the AC8 returns the standby device to operating mode and places one of the operating devices on standby.
When zones are used, the AC8 manages the rotation sequence for each zone separately, so each zone might have one device in operating mode and one in standby mode.
NOTE
Auto sequencing will not function in a zone with any devices defined as Not Used. All outputs in the zone must be defined as Operating or Standby (see 7.7 - Setup System - Setup Outputs).
Auto sequencing is OFF (deactivated) by default. When auto sequencing is activated (ON or 12h, for a
•An output device in Standby mode is returned to Operating mode.
•An output device that is Operating is put in Standby mode.
When more than one device is in Standby mode or turned On, the AC8 performs the operations in a sequence that rotates the order. For example, in a sequence set up to occur every two days:
• Monday: | Device 1 is placed on Standby, and Devices 2, 3 and 4 operate. |
• Wednesday: | Device 2 is placed on Standby, and Devices 1, 3 and 4 operate. |
• Friday: | Device 3 is placed on Standby, and Devices 1, 2 and 4 operate. |
• Sunday: | Device 4 is placed on Standby, and Devices 1, 2 and 3 operate. |
NOTE
The AC8 will not cycle outputs that have been manually forced On or Off through the Override Output Menu or the hardware switch (see 7.12 - Override Output).
To change the auto sequencing settings:
1. From the Setup System Operation Menu, use the arrows ↑↓ to choose Auto Sequencing, then press Enter ↵ .
Activate or Deactivate
2. In the Activate / Deactivate screen, use the arrows ↑↓ to choose one of three options:
a. ON for intervals of every 1 to 99 days, then press Enter ↵ and proceed to Step 3.
b. 12h for an interval of every 12 hours, then press Enter ↵ and proceed to Step 4.
c. OFF to deactivate auto sequencing, then press Enter ↵ to return to the previous menu.
Specify Start Time and Interval: Every 1 to 99 Days
3.Select the interval for how often the sequencing should occur in the Every 03 Days field. The default is 3 days; valid entries range from 0 to 99 days.
• For each digit, use the arrows ↑↓ to choose a number from 0 to 9, then press Enter ↵ to advance to the next digit.
• When finished, press Enter ↵ to set the time of day.
Specify Start Time: Every 12 Hours
4.Specify the time of day the sequencing should begin in the At 00:00 field. The format is HH:MM for hours and minutes.
•Use the arrows ↑↓ to choose from available entries for hours
•Use the arrows ↑↓ to select minutes
•When finished, press Enter ↵ again.
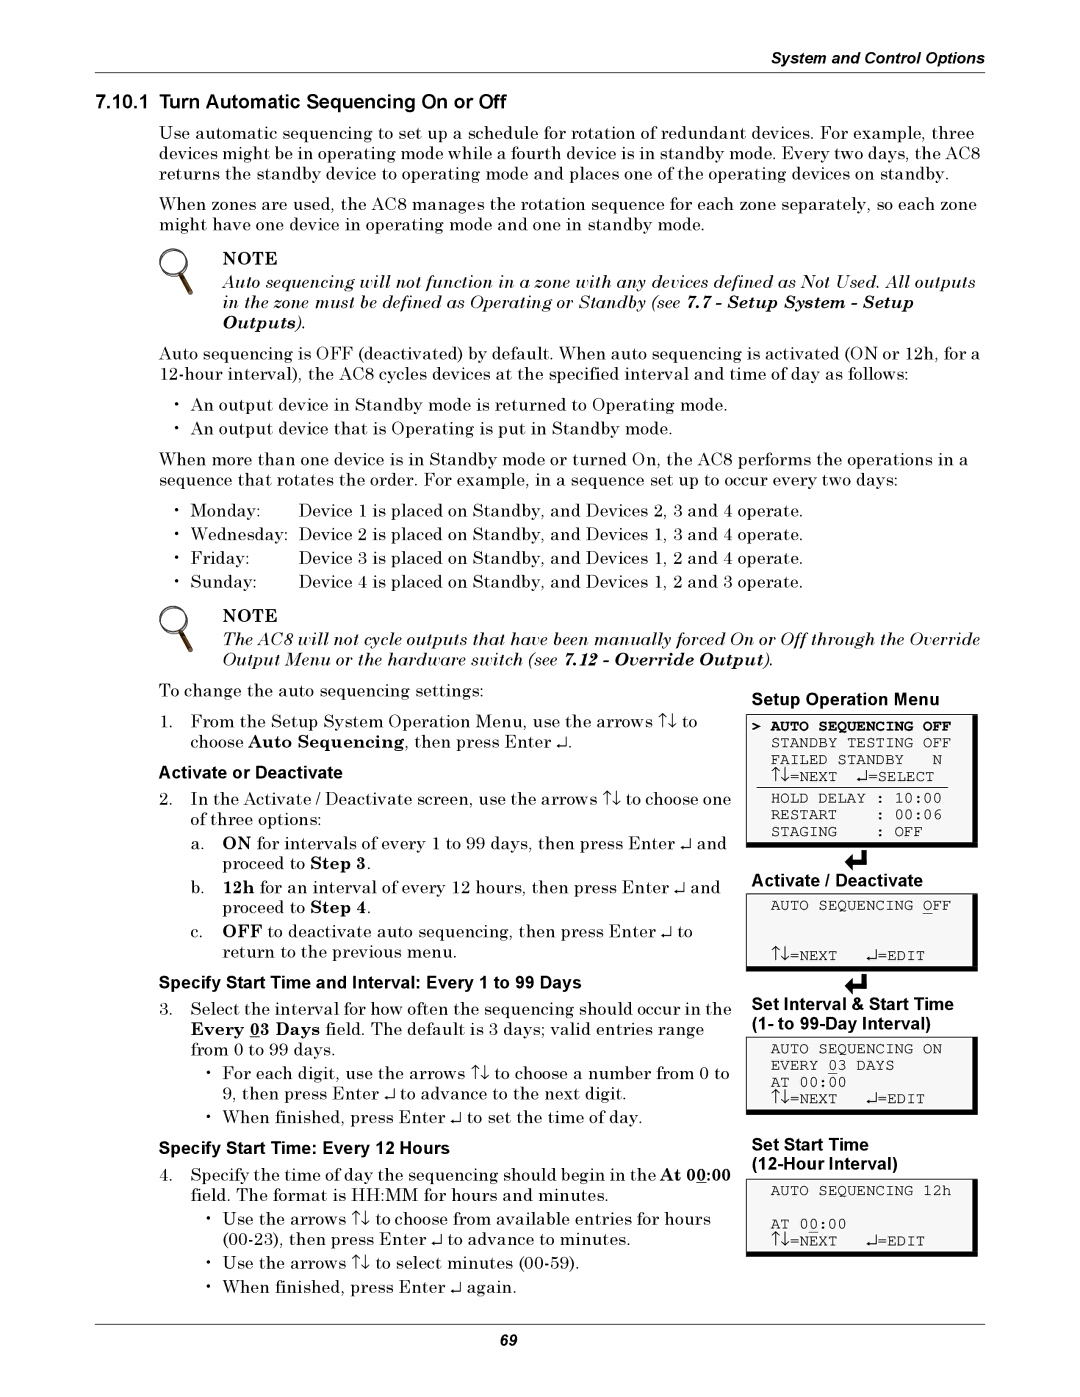
Setup Operation Menu
>AUTO SEQUENCING OFF STANDBY TESTING OFF
FAILED STANDBY N | ||
↑↓ =NEXT | ↵ | =SELECT |
|
| |
HOLD DELAY | : 10:00 | |
RESTART |
| : 00:06 |
STAGING |
| : OFF |
Activate / Deactivate
AUTO SEQUENCING OFF
↑↓ =NEXT ↵ =EDIT
Set Interval & Start Time (1- to
AUTO SEQUENCING ON
EVERY 03 | DAYS |
AT 00:00 | ↵ =EDIT |
↑↓ =NEXT |
Set Start Time
AUTO SEQUENCING 12h
AT 00:00 | ↵ =EDIT |
↑↓ =NEXT |
69