FRONT PANEL
1 | 2 | 3 |
| 4 | 5 | 6 | 7 | 8 | 9 | |||||||||||
|
|
|
|
|
|
|
|
|
|
|
|
|
|
|
|
|
|
|
|
|
|
|
|
|
|
|
|
|
|
|
|
|
|
|
|
|
|
|
|
|
|
|
|
|
|
|
|
|
|
|
|
|
|
|
|
|
|
|
|
|
|
|
|
|
|
|
|
|
|
|
|
|
|
|
|
|
|
|
|
|
|
|
|
|
|
|
|
|
|
|
|
|
|
|
|
|
|
|
|
|
|
|
|
|
|
|
|
|
|
|
|
|
|
|
|
|
|
|
|
|
|
|
|
|
|
|
|
|
|
|
|
|
|
|
|
|
|
|
|
|
|
|
|
|
|
|
|
|
|
|
|
|
|
|
|
|
|
|
|
|
|
|
|
|
|
|
|
|
|
|
|
|
|
|
|
|
|
|
|
|
|
|
|
|
|
|
|
|
|
|
|
|
|
|
|
|
|
|
|
|
|
|
|
|
|
|
|
|
|
|
|
|
|
|
|
|
|
|
|
|
|
|
|
|
|
|
|
|
|
|
10 | 11 | 12 | 13 | 14 | 15 |
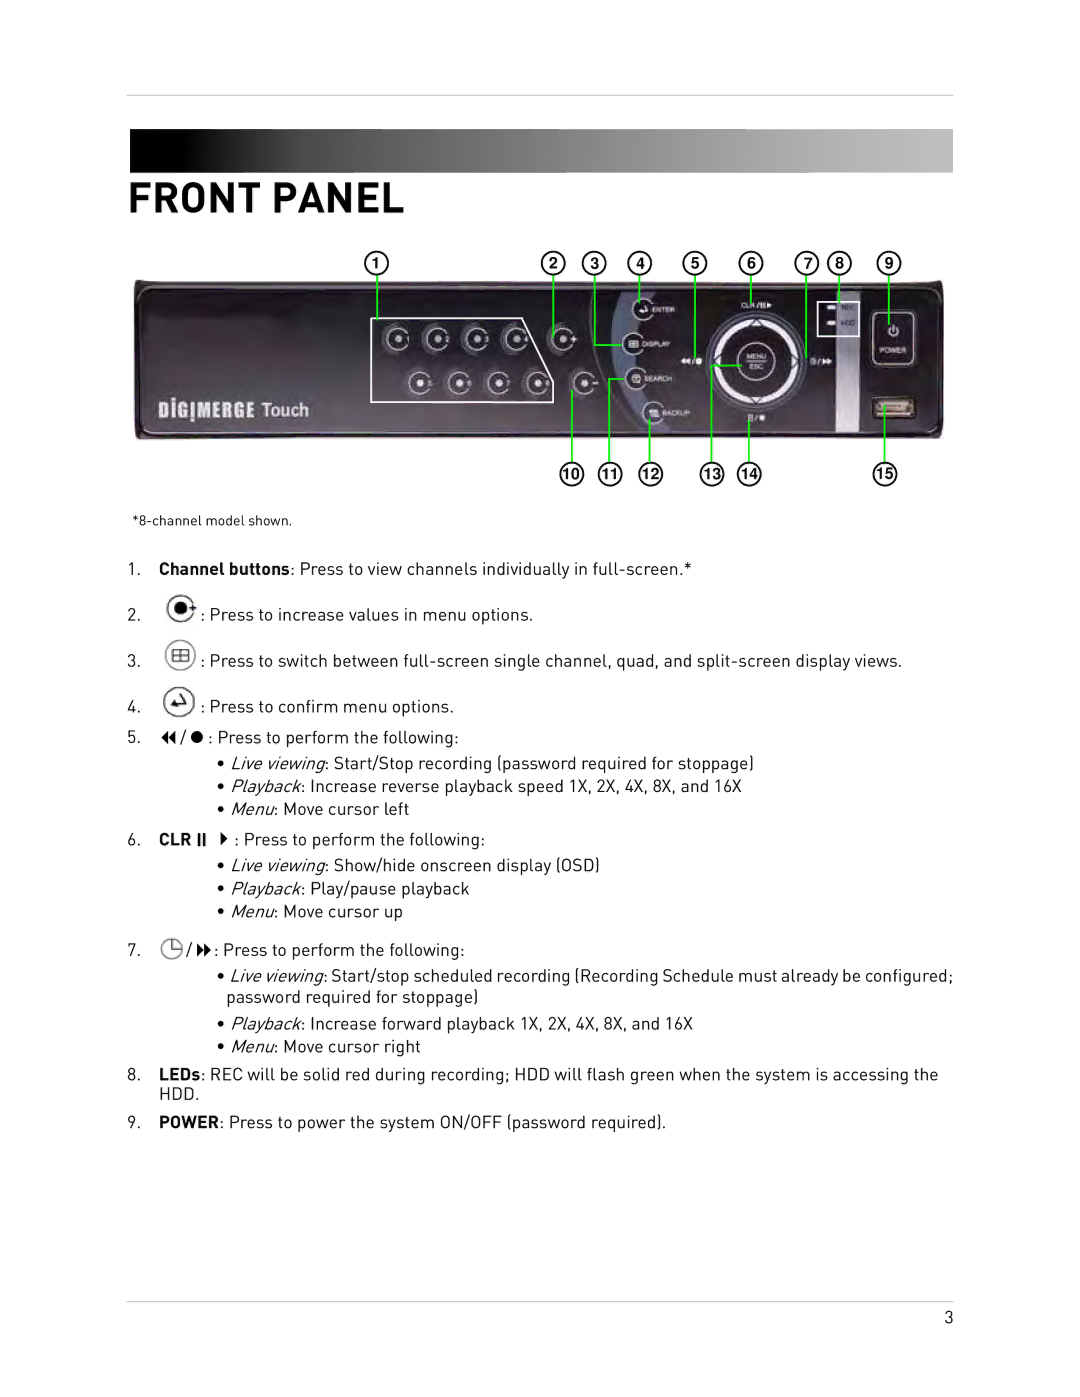
1.Channel buttons: Press to view channels individually in
2.![]() : Press to increase values in menu options.
: Press to increase values in menu options.
3.![]() : Press to switch between
: Press to switch between
4.![]() : Press to confirm menu options.
: Press to confirm menu options.
5./ : Press to perform the following:
•Live viewing: Start/Stop recording (password required for stoppage)
•Playback: Increase reverse playback speed 1X, 2X, 4X, 8X, and 16X
•Menu: Move cursor left
6.CLR : Press to perform the following:
•Live viewing: Show/hide onscreen display (OSD)
•Playback: Play/pause playback
•Menu: Move cursor up
7.![]() / : Press to perform the following:
/ : Press to perform the following:
•Live viewing: Start/stop scheduled recording (Recording Schedule must already be configured; password required for stoppage)
•Playback: Increase forward playback 1X, 2X, 4X, 8X, and 16X
•Menu: Move cursor right
8.LEDs: REC will be solid red during recording; HDD will flash green when the system is accessing the HDD.
9.POWER: Press to power the system ON/OFF (password required).
3