Using the Main Menu
2.Under ALARM SETUP, configure the following:
•RECORD TIME: Set from 10~300 seconds (in increments of 10 seconds).
•RECORD CAMERA: Select ALL or 1:1. If you select ALL, the system will record on all channels; if you select 1:1, the system will only record for the designated channel
•ALARM BUZZER: Select ON/OFF. If ON, the system will sound a beep when the external alarm is triggered
•ALARM OUT1: Set the type of Alarm Out video (external monitor required, not included). Select SYSTEM, VIDEO LOSS, MOTION, ALL ALARM, or ALARM IN1~8, and then select ON/OFF.
Figure 16.1 Alarm Setup
3.Press ENTER to save your settings. Press CANCEL/ESC to close remaining menu windows.
NOTE:Alarmrecordingwilltakepriorityover continuous recording, even if a camera is disabled in standard recording parameters.
TIP!
If an alarm is triggered on
the system, press the Cancel/ESC button to cancel the buzzer (if enabled). Cancelling the buzzer will not stop recording.
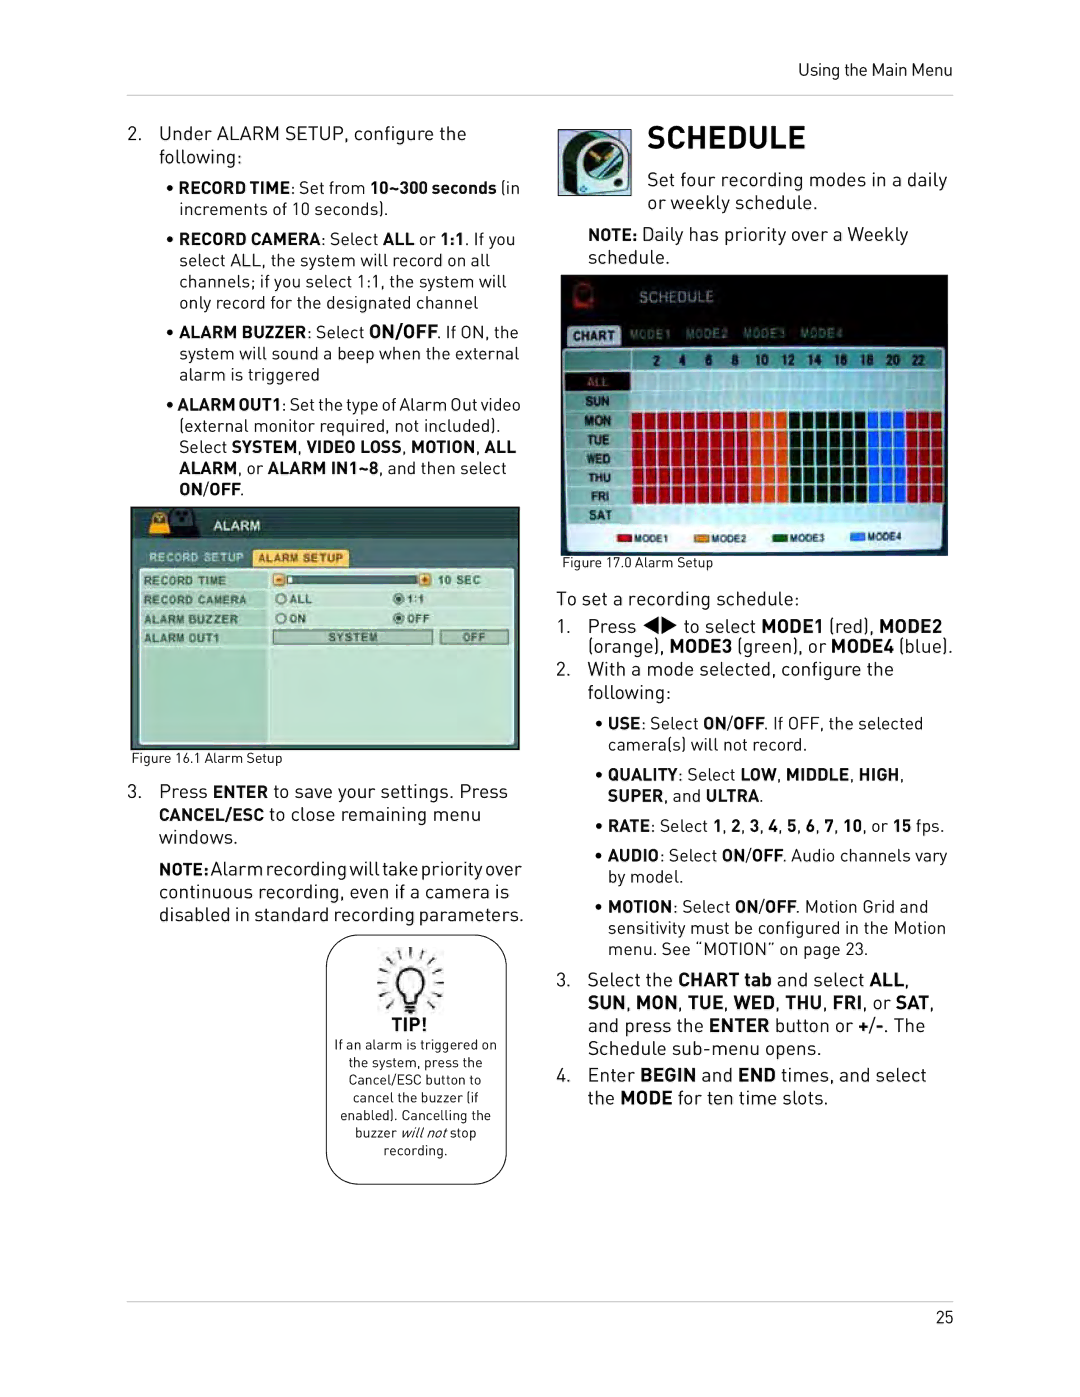
SCHEDULE
Set four recording modes in a daily or weekly schedule.
NOTE: Daily has priority over a Weekly schedule.
Figure 17.0 Alarm Setup
To set a recording schedule:
1.Press WX to select MODE1 (red), MODE2 (orange), MODE3 (green), or MODE4 (blue).
2.With a mode selected, configure the following:
•USE: Select ON/OFF. If OFF, the selected camera(s) will not record.
•QUALITY: Select LOW, MIDDLE, HIGH, SUPER, and ULTRA.
•RATE: Select 1, 2, 3, 4, 5, 6, 7, 10, or 15 fps.
•AUDIO: Select ON/OFF. Audio channels vary by model.
•MOTION: Select ON/OFF. Motion Grid and sensitivity must be configured in the Motion menu. See “MOTION” on page 23.
3.Select the CHART tab and select ALL, SUN, MON, TUE, WED, THU, FRI, or SAT, and press the ENTER button or
4.Enter BEGIN and END times, and select the MODE for ten time slots.
25