Backup
6.Under ACTION, select START and press ENTER. If your backup data spans more than one disc, the system will eject the completed disc and prompt you to insert a new blank disc. Backup will continue as normal.
7.Once backup is complete, press CANCEL/ESC to close remaining windows.
8.You will be prompted to
prompt, and / to resume Continuous Recording; press ![]() / to resume Schedule Recording.
/ to resume Schedule Recording.
Time Search and Backup
Use the Time Search menu to set a Time Range, then use the Backup menu to backup critical video to a USB flash drive, external USB HDD, or external USB
To set the Time Range:
1.Press the ![]() button on the front panel or remote control.
button on the front panel or remote control.
2.Press WX to select the month.
3.PressT to move the cursor to the calendar. The date is highlighted with a black square.
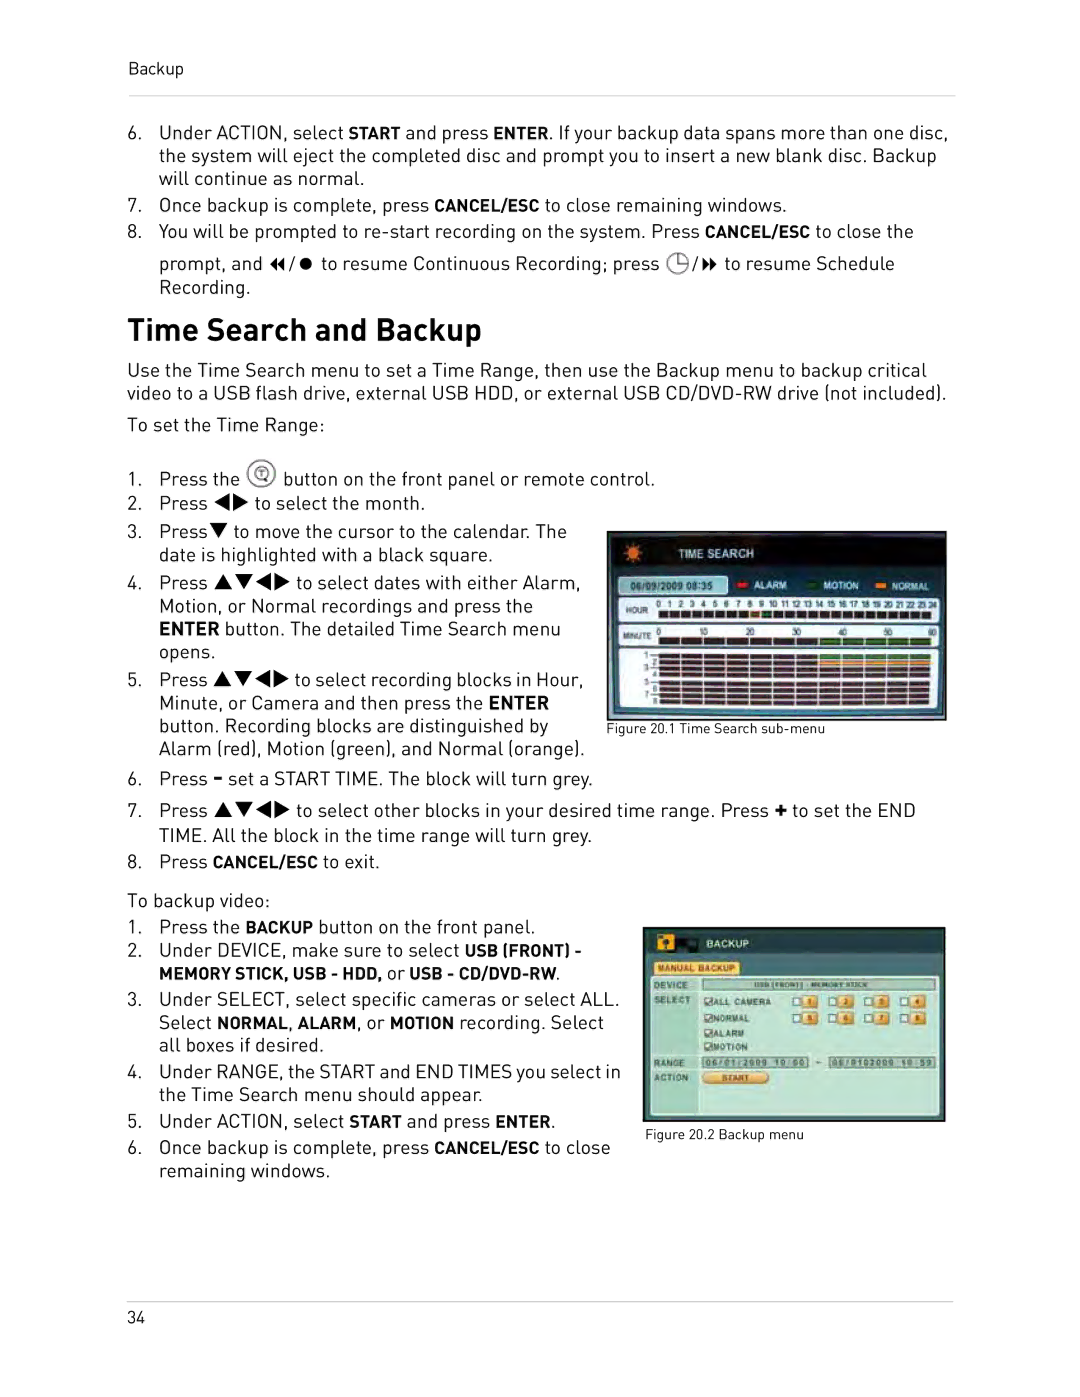
4.Press STWX to select dates with either Alarm, Motion, or Normal recordings and press the ENTER button. The detailed Time Search menu opens.
5.Press STWX to select recording blocks in Hour, Minute, or Camera and then press the ENTER
button. Recording blocks are distinguished by Alarm (red), Motion (green), and Normal (orange).
6.Press - set a START TIME. The block will turn grey.
7.Press STWX to select other blocks in your desired time range. Press + to set the END TIME. All the block in the time range will turn grey.
8.Press CANCEL/ESC to exit.
To backup video:
1.Press the BACKUP button on the front panel.
2.Under DEVICE, make sure to select USB (FRONT) - MEMORY STICK, USB - HDD, or USB -
3.Under SELECT, select specific cameras or select ALL. Select NORMAL, ALARM, or MOTION recording. Select all boxes if desired.
4.Under RANGE, the START and END TIMES you select in the Time Search menu should appear.
5.Under ACTION, select START and press ENTER.
Figure 20.2 Backup menu
6.Once backup is complete, press CANCEL/ESC to close remaining windows.
34