USING THE SYSTEM
To power the system ON/OFF:
1.Connect the power cable to the port on the rear panel.
2.Press the POWER button on the front panel or remote control.
NOTE: You need to press the Power button for initial startup only. The system will load the live viewing screen on subsequent resets.
NOTE: You will need to input your system password (by default, 000000) to power off the system.
Quick Setup
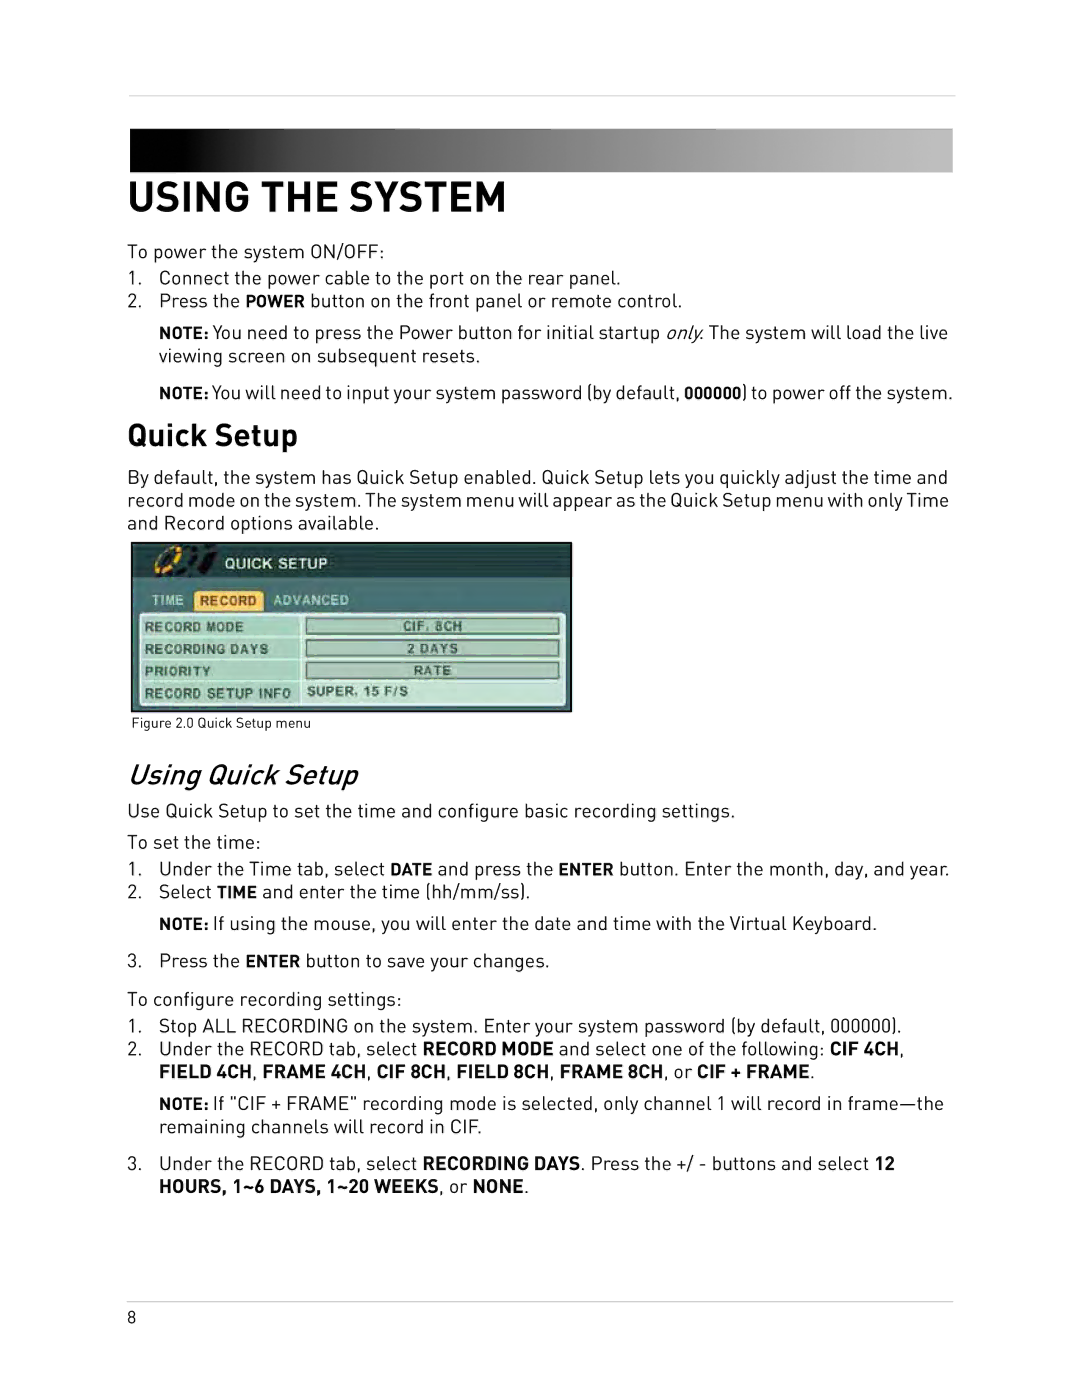
By default, the system has Quick Setup enabled. Quick Setup lets you quickly adjust the time and record mode on the system. The system menu will appear as the Quick Setup menu with only Time and Record options available.
Figure 2.0 Quick Setup menu
Using Quick Setup
Use Quick Setup to set the time and configure basic recording settings.
To set the time:
1.Under the Time tab, select DATE and press the ENTER button. Enter the month, day, and year.
2.Select TIME and enter the time (hh/mm/ss).
NOTE: If using the mouse, you will enter the date and time with the Virtual Keyboard.
3.Press the ENTER button to save your changes.
To configure recording settings:
1.Stop ALL RECORDING on the system. Enter your system password (by default, 000000).
2.Under the RECORD tab, select RECORD MODE and select one of the following: CIF 4CH, FIELD 4CH, FRAME 4CH, CIF 8CH, FIELD 8CH, FRAME 8CH, or CIF + FRAME.
NOTE: If "CIF + FRAME" recording mode is selected, only channel 1 will record in
3.Under the RECORD tab, select RECORDING DAYS. Press the +/ - buttons and select 12 HOURS, 1~6 DAYS, 1~20 WEEKS, or NONE.
8