Remote Setup
SCHEDULE
NOTE: Daily has priority over a Weekly schedule.
Figure 37.0 Schedule options
To set a recording schedule:
1.Select MODE1 (red), MODE2 (orange), MODE3 (green), or MODE4 (blue) and configure the following:
Figure 37.1 Mode tab options
•USE: Select ON/OFF. If OFF, the selected camera(s) will not record.
•QUALITY: Select LOW, MIDDLE, HIGH, SUPER, and ULTRA.
•RATE: Select 1, 2, 3, 4, 5, 6, 7, 10, or 15 fps.
•AUDIO: Select ON/OFF. Audio channels vary by model.
•MOTION: Select ON/OFF
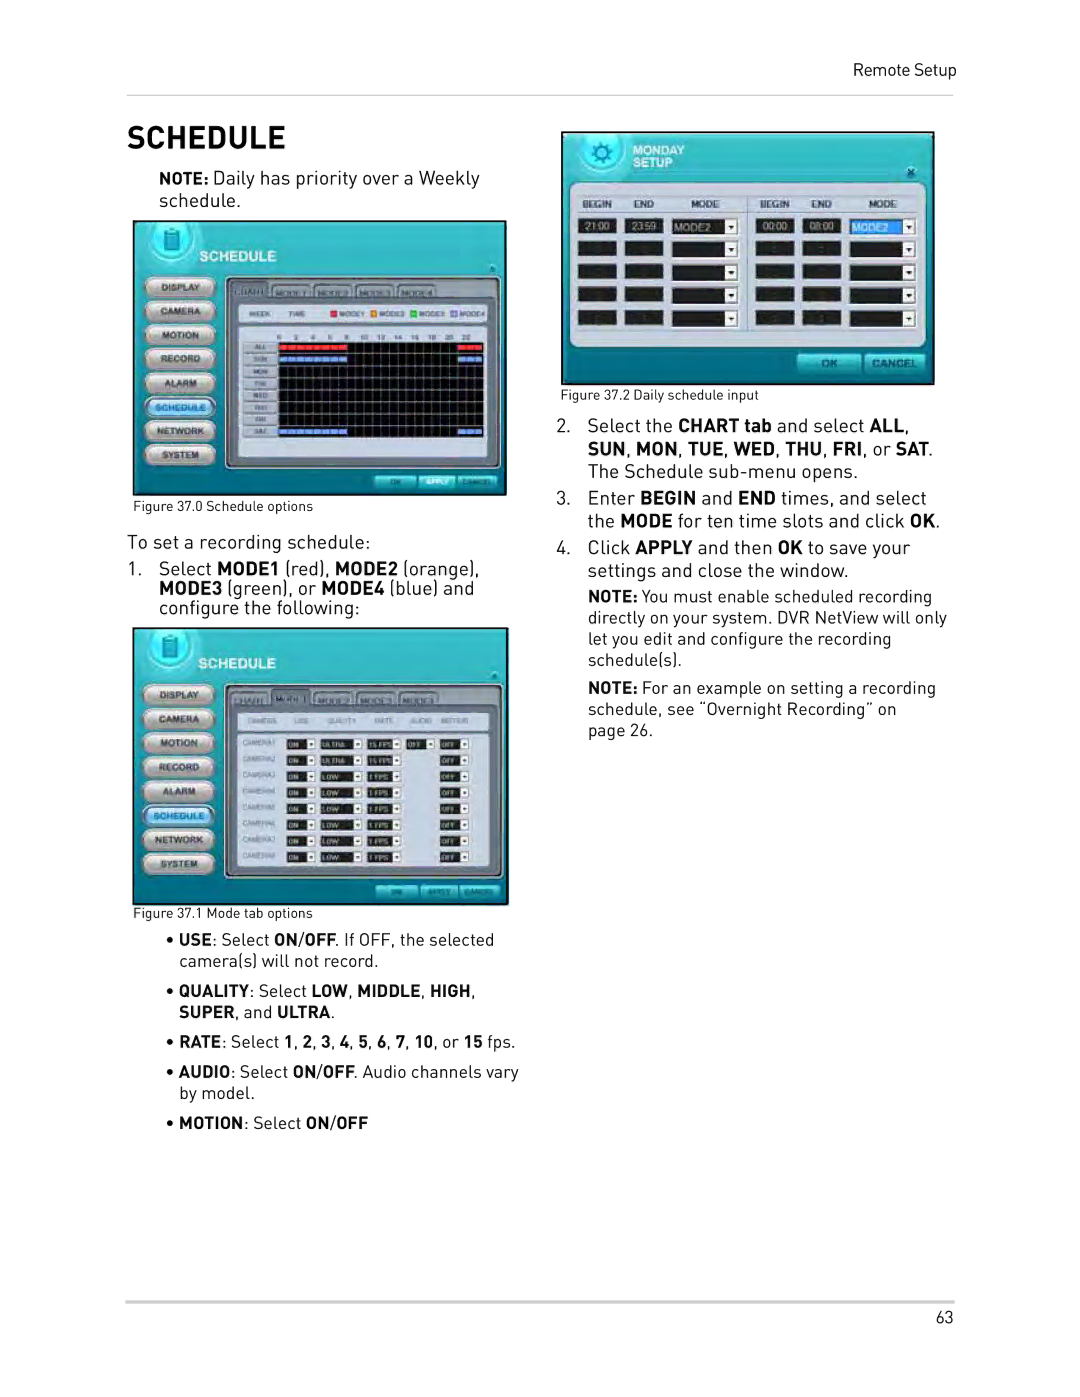
Figure 37.2 Daily schedule input
2.Select the CHART tab and select ALL, SUN, MON, TUE, WED, THU, FRI, or SAT. The Schedule
3.Enter BEGIN and END times, and select the MODE for ten time slots and click OK.
4.Click APPLY and then OK to save your settings and close the window.
NOTE: You must enable scheduled recording directly on your system. DVR NetView will only let you edit and configure the recording schedule(s).
NOTE: For an example on setting a recording schedule, see “Overnight Recording” on page 26.
63