FARGO Electronics Inc.
7.3.2 Adjusting the Transfer Tension
This procedure positions the image correctly on the card. Refer to Section 7.3.1 for proper sequence.
1.Choose MENU, Print Test Image, and Gray/Align YMC to print a test card.
2.Record the Transfer Tension value on the test card last printed.
3.Examine the test card.
4.Select MENU, Setup Printer, and Transfer Tension.
NOTE
Reducing the Transfer Tension too much may cause slack in the Film
5.Press SELECT to save the value.
6.Print a test card as described in step 1.
7.Repeat steps 1 to 7 until the Film is applied smoothly to the card — without wrinkles or creases.
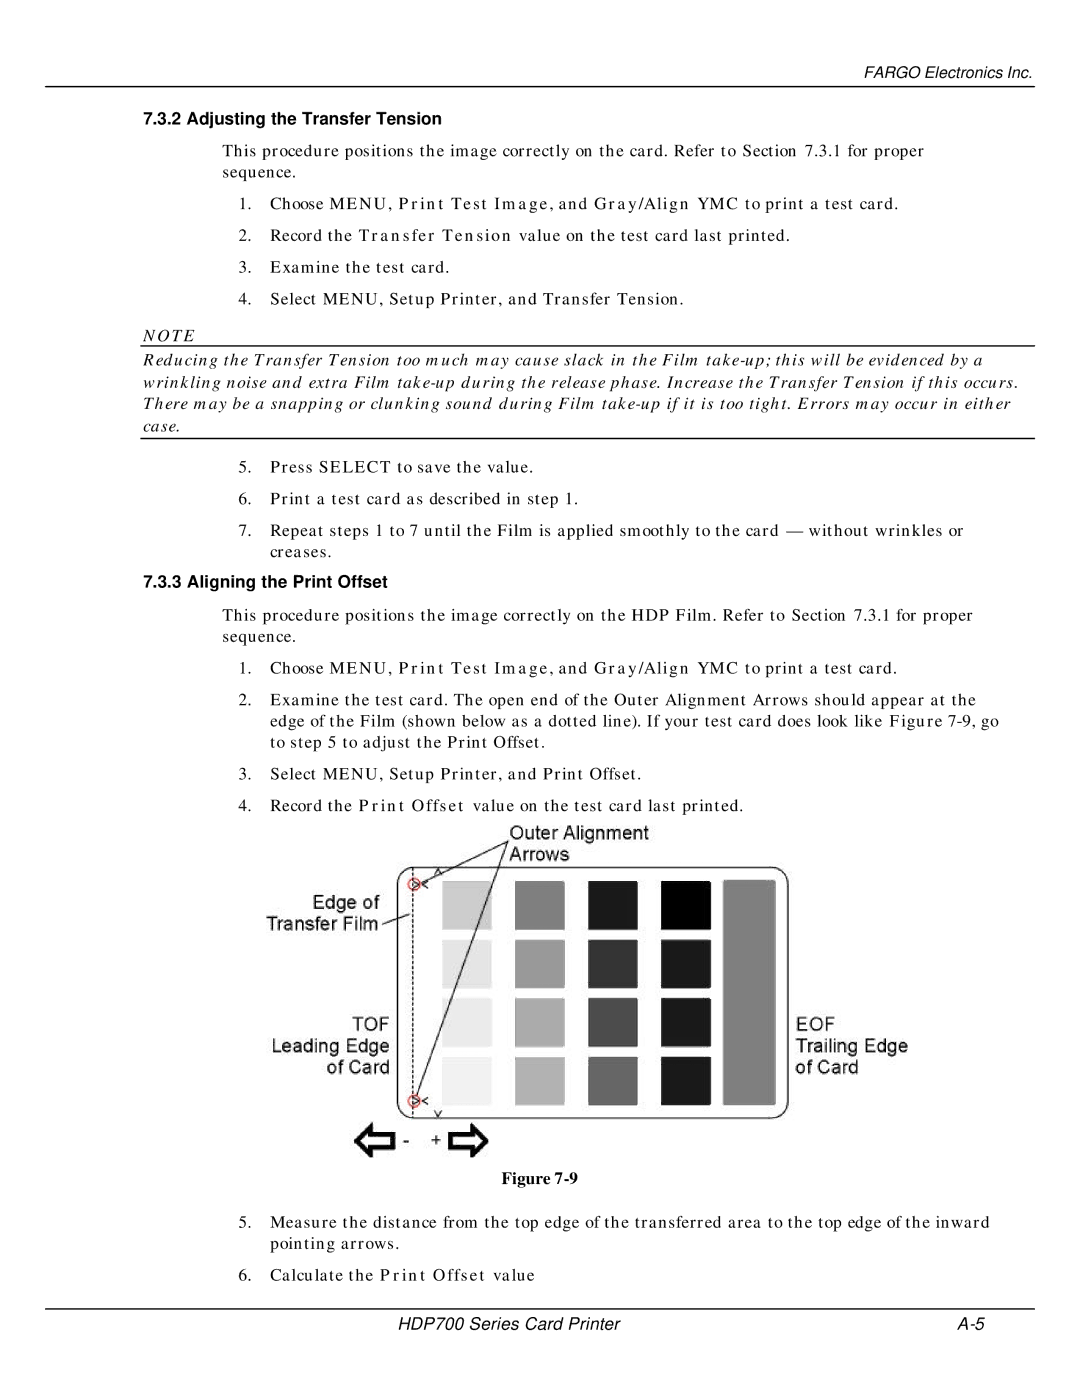
7.3.3Aligning the Print Offset
This procedure positions the image correctly on the HDP Film. Refer to Section 7.3.1 for proper sequence.
1.Choose MENU, Print Test Image, and Gray/Align YMC to print a test card.
2.Examine the test card. The open end of the Outer Alignment Arrows should appear at the edge of the Film (shown below as a dotted line). If your test card does look like Figure
3.Select MENU, Setup Printer, and Print Offset.
4.Record the Print Offset value on the test card last printed.
Figure
5.Measure the distance from the top edge of the transferred area to the top edge of the inward pointing arrows.
6.Calculate the Print Offset value
HDP700 Series Card Printer |