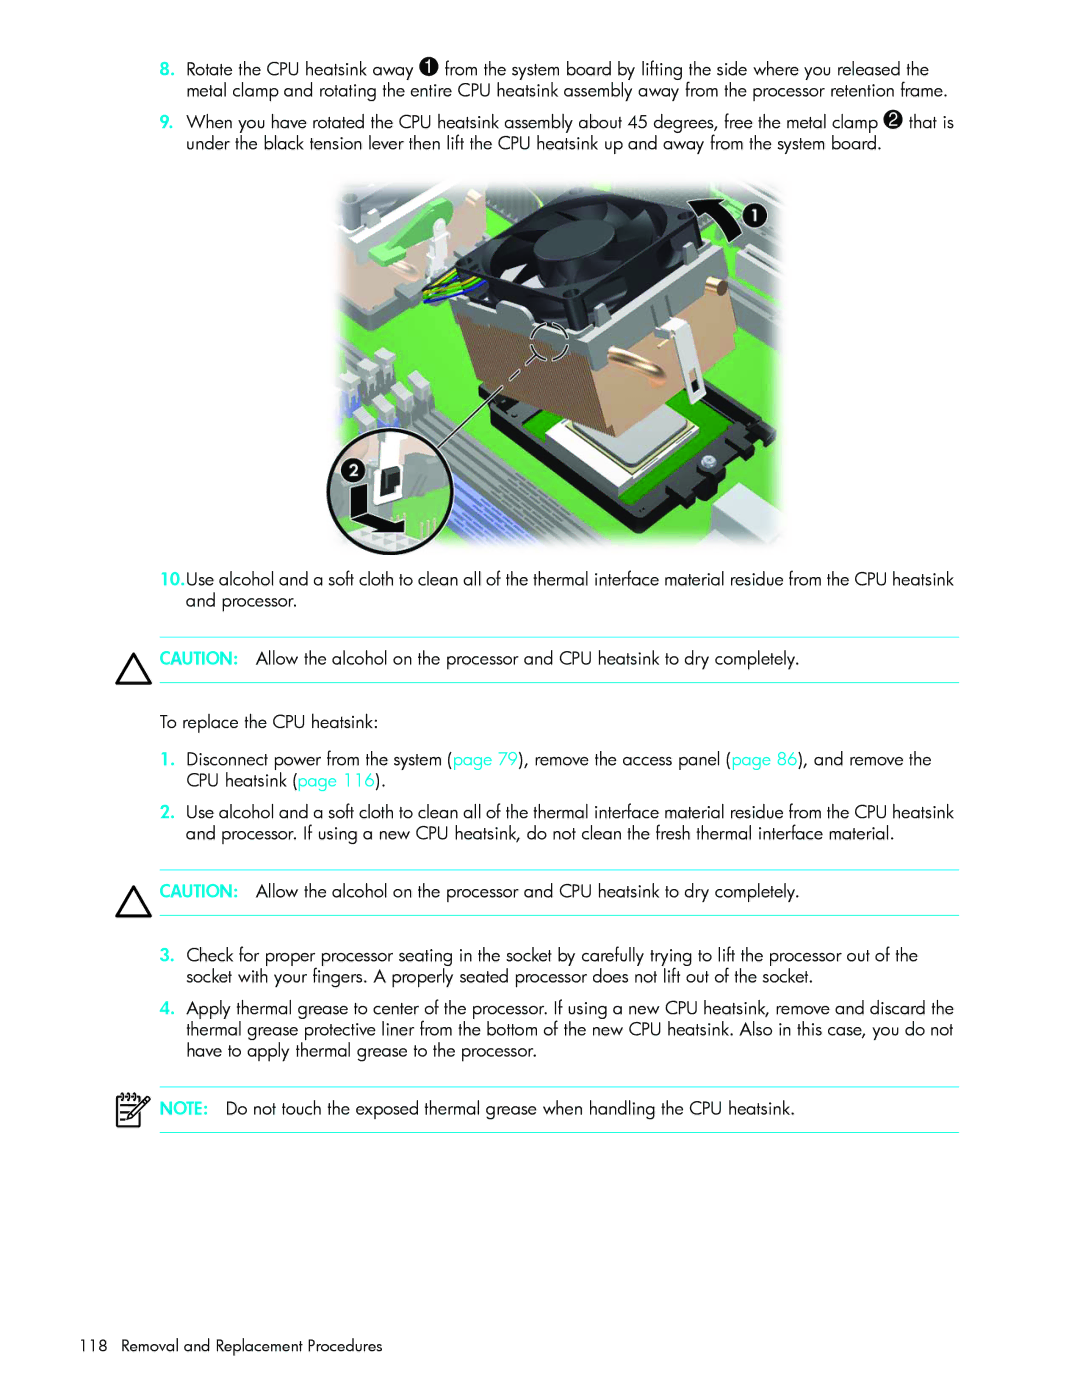
8.Rotate the CPU heatsink away 1 from the system board by lifting the side where you released the metal clamp and rotating the entire CPU heatsink assembly away from the processor retention frame.
9.When you have rotated the CPU heatsink assembly about 45 degrees, free the metal clamp 2 that is under the black tension lever then lift the CPU heatsink up and away from the system board.
10.Use alcohol and a soft cloth to clean all of the thermal interface material residue from the CPU heatsink and processor.
![]() CAUTION: Allow the alcohol on the processor and CPU heatsink to dry completely.
CAUTION: Allow the alcohol on the processor and CPU heatsink to dry completely.
To replace the CPU heatsink:
1.Disconnect power from the system (page 79), remove the access panel (page 86), and remove the CPU heatsink (page 116).
2.Use alcohol and a soft cloth to clean all of the thermal interface material residue from the CPU heatsink and processor. If using a new CPU heatsink, do not clean the fresh thermal interface material.
![]() CAUTION: Allow the alcohol on the processor and CPU heatsink to dry completely.
CAUTION: Allow the alcohol on the processor and CPU heatsink to dry completely.
3.Check for proper processor seating in the socket by carefully trying to lift the processor out of the socket with your fingers. A properly seated processor does not lift out of the socket.
4.Apply thermal grease to center of the processor. If using a new CPU heatsink, remove and discard the thermal grease protective liner from the bottom of the new CPU heatsink. Also in this case, you do not have to apply thermal grease to the processor.
![]() NOTE: Do not touch the exposed thermal grease when handling the CPU heatsink.
NOTE: Do not touch the exposed thermal grease when handling the CPU heatsink.
