Copying
ALL SCENES
REQUIRED DISC SPACE
DVD:2 / DVD(DL):1
PREPARE AN EMPTY DISC
EXECUTERETURN
.
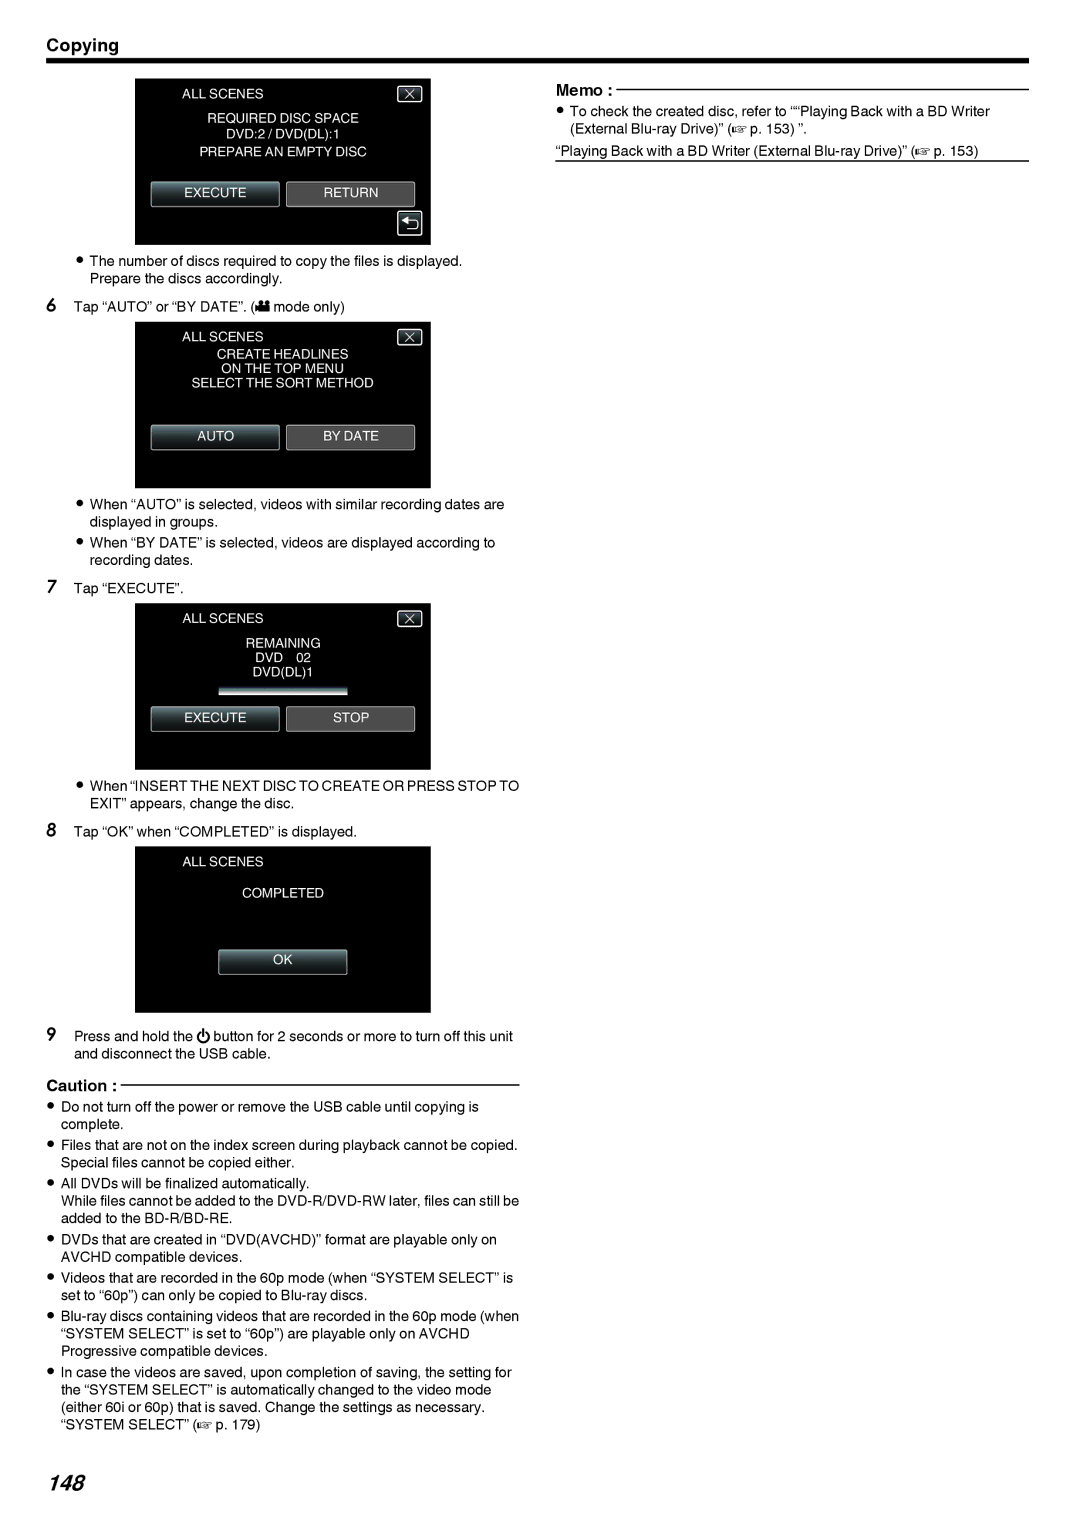
0The number of discs required to copy the files is displayed. Prepare the discs accordingly.
6Tap “AUTO” or “BY DATE”. (A mode only)
ALL SCENES
CREATE HEADLINES
ON THE TOP MENU
SELECT THE SORT METHOD
AUTO | BY DATE |
.
0When “AUTO” is selected, videos with similar recording dates are displayed in groups.
0When “BY DATE” is selected, videos are displayed according to recording dates.
7Tap “EXECUTE”.
ALL SCENES
REMAINING
DVD 02
DVD(DL)1
EXECUTESTOP
.
0When “INSERT THE NEXT DISC TO CREATE OR PRESS STOP TO EXIT” appears, change the disc.
8Tap “OK” when “COMPLETED” is displayed.
ALL SCENES COMPLETED
OK
.
9Press and hold the M button for 2 seconds or more to turn off this unit and disconnect the USB cable.
Caution :
0Do not turn off the power or remove the USB cable until copying is complete.
0Files that are not on the index screen during playback cannot be copied. Special files cannot be copied either.
0All DVDs will be finalized automatically.
While files cannot be added to the
0DVDs that are created in “DVD(AVCHD)” format are playable only on AVCHD compatible devices.
0Videos that are recorded in the 60p mode (when “SYSTEM SELECT” is set to “60p”) can only be copied to
0
0In case the videos are saved, upon completion of saving, the setting for the “SYSTEM SELECT” is automatically changed to the video mode (either 60i or 60p) that is saved. Change the settings as necessary. “SYSTEM SELECT” (A p. 179)
Memo :
0To check the created disc, refer to ““Playing Back with a BD Writer (External
“Playing Back with a BD Writer (External
