Names of Parts
Bottom
.
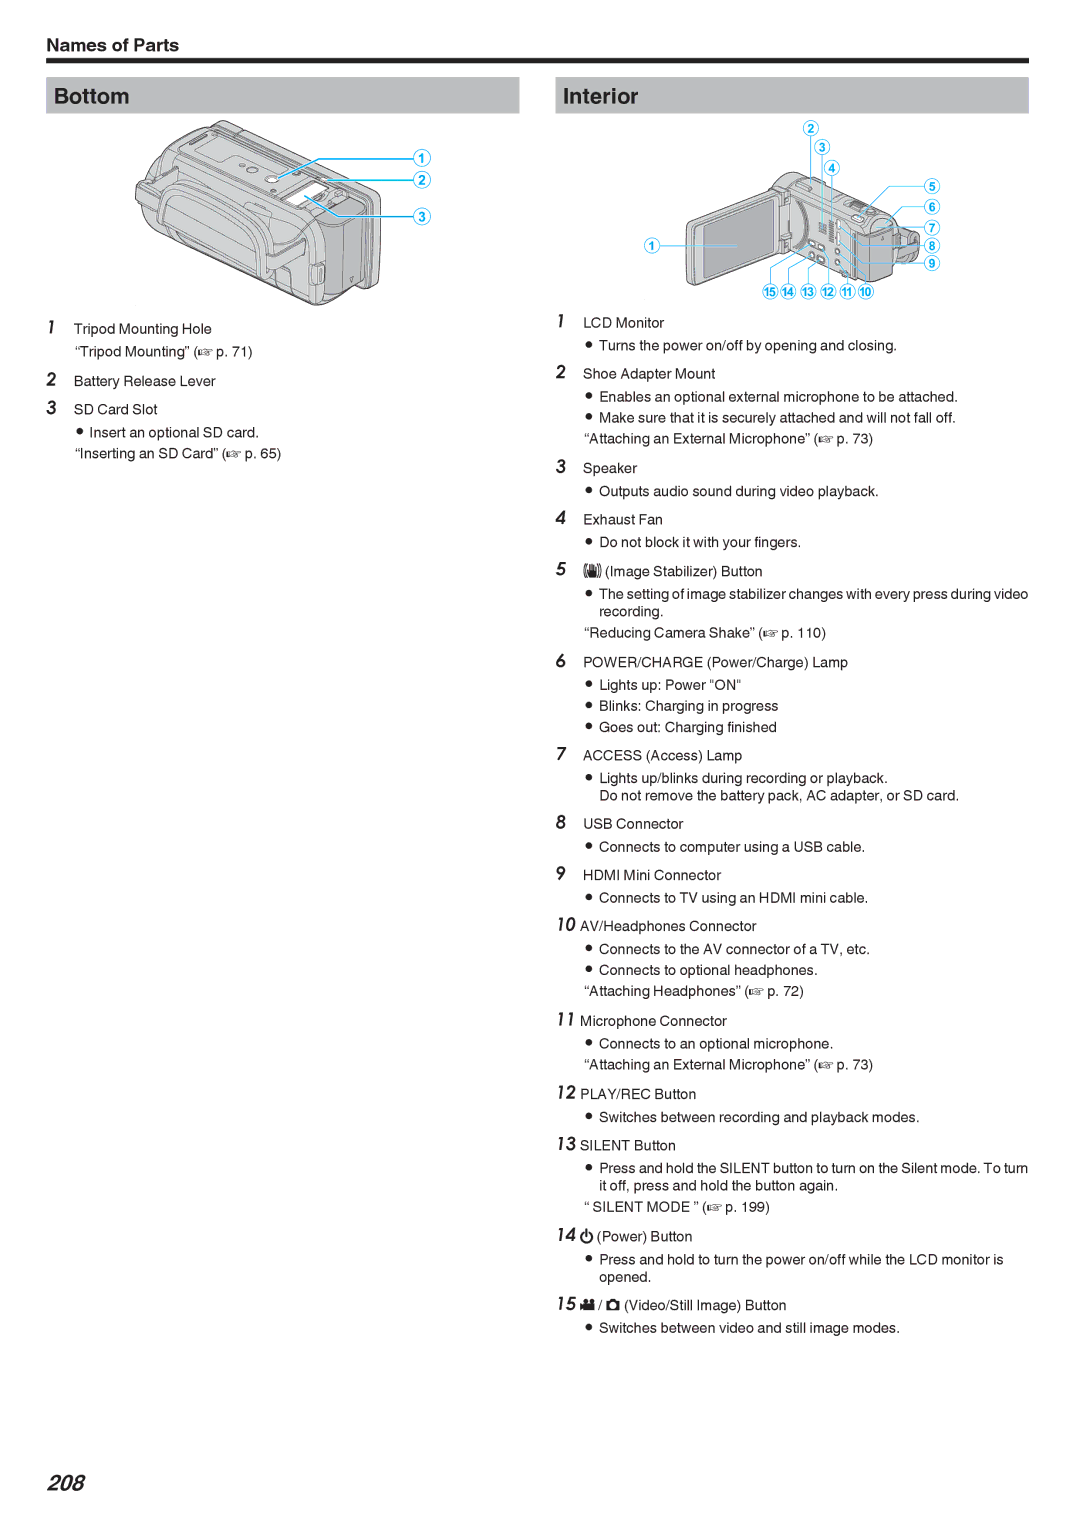
1Tripod Mounting Hole “Tripod Mounting” (A p. 71)
2Battery Release Lever
3SD Card Slot
0 Insert an optional SD card. “Inserting an SD Card” (A p. 65)
Interior
.
1LCD Monitor
0 Turns the power on/off by opening and closing.
2Shoe Adapter Mount
0 Enables an optional external microphone to be attached. 0 Make sure that it is securely attached and will not fall off. “Attaching an External Microphone” (A p. 73)
3Speaker
0 Outputs audio sound during video playback.
4Exhaust Fan
0 Do not block it with your fingers.
5a(Image Stabilizer) Button
0 The setting of image stabilizer changes with every press during video recording.
“Reducing Camera Shake” (A p. 110)
6POWER/CHARGE (Power/Charge) Lamp 0 Lights up: Power "ON"
0 Blinks: Charging in progress
0 Goes out: Charging finished
7ACCESS (Access) Lamp
0 Lights up/blinks during recording or playback.
Do not remove the battery pack, AC adapter, or SD card.
8USB Connector
0 Connects to computer using a USB cable.
9HDMI Mini Connector
0 Connects to TV using an HDMI mini cable.
10 AV/Headphones Connector
0Connects to the AV connector of a TV, etc.
0Connects to optional headphones. “Attaching Headphones” (A p. 72)
11 Microphone Connector
0Connects to an optional microphone. “Attaching an External Microphone” (A p. 73)
12 PLAY/REC Button
0Switches between recording and playback modes.
13 SILENT Button
0Press and hold the SILENT button to turn on the Silent mode. To turn it off, press and hold the button again.
“ SILENT MODE ” (A p. 199) 14 M (Power) Button
0Press and hold to turn the power on/off while the LCD monitor is opened.
15 A / B (Video/Still Image) Button
0Switches between video and still image modes.
