Using
Send Still Images via
A still image is automatically captured and sent via
Children may, for example, send still images to their parents via the camera to inform them of the happenings at home.
.
Memo :
0The size of the still image that is captured in “DETECT/MAIL SETTING” is 640 x 360.
0Operation via connection to a smartphone (or computer) using “OUTSIDE MONITORING” may be performed even during detection standby.
0When the camera is connected to a smartphone (or computer), “DETECT/ MAIL SETTING” will be temporarily unavailable.
0You can set to record videos on this unit automatically during detection. “Recording on this unit” (A p. 28)
0To prevent too many
“Setting detection interval” (A p. 28)
Caution :
0This function is not designed for disaster or crime prevention.
0To prevent the situation of forgetting to turn off the power, this unit will turn off automatically after 10 days of continuous usage.
0While on standby for notification mails, the focus is fixed. Perform the camera settings first, then enable notification mails.
Focus may not be set correctly if the notification mails start before camera settings are made. In this case, disable notification mails temporarily, then enable it again.
0Be careful not to cause too much sending of
Be sure to check the terms of the internet provider in advance to find out if there are any restrictions on the number or size of
0When setting another person as the recipient, be sure to obtain his/her consent in advance.
0If you reply to the received
Check the
0JVC will not be responsible for any trouble that occurs upon the sending of mails.
What You Need
0Wireless LAN router (use a product that has a
0Internet connection
0Account for sending
Necessary Settings
To send
*The above settings are not necessary if they have already been set for other functions.
0Registering an access point
“Registering the Access Points to Connect (“ACCESS POINTS”)” (A p. 36)
0Setting the account for sending
0Registering the recipient’s
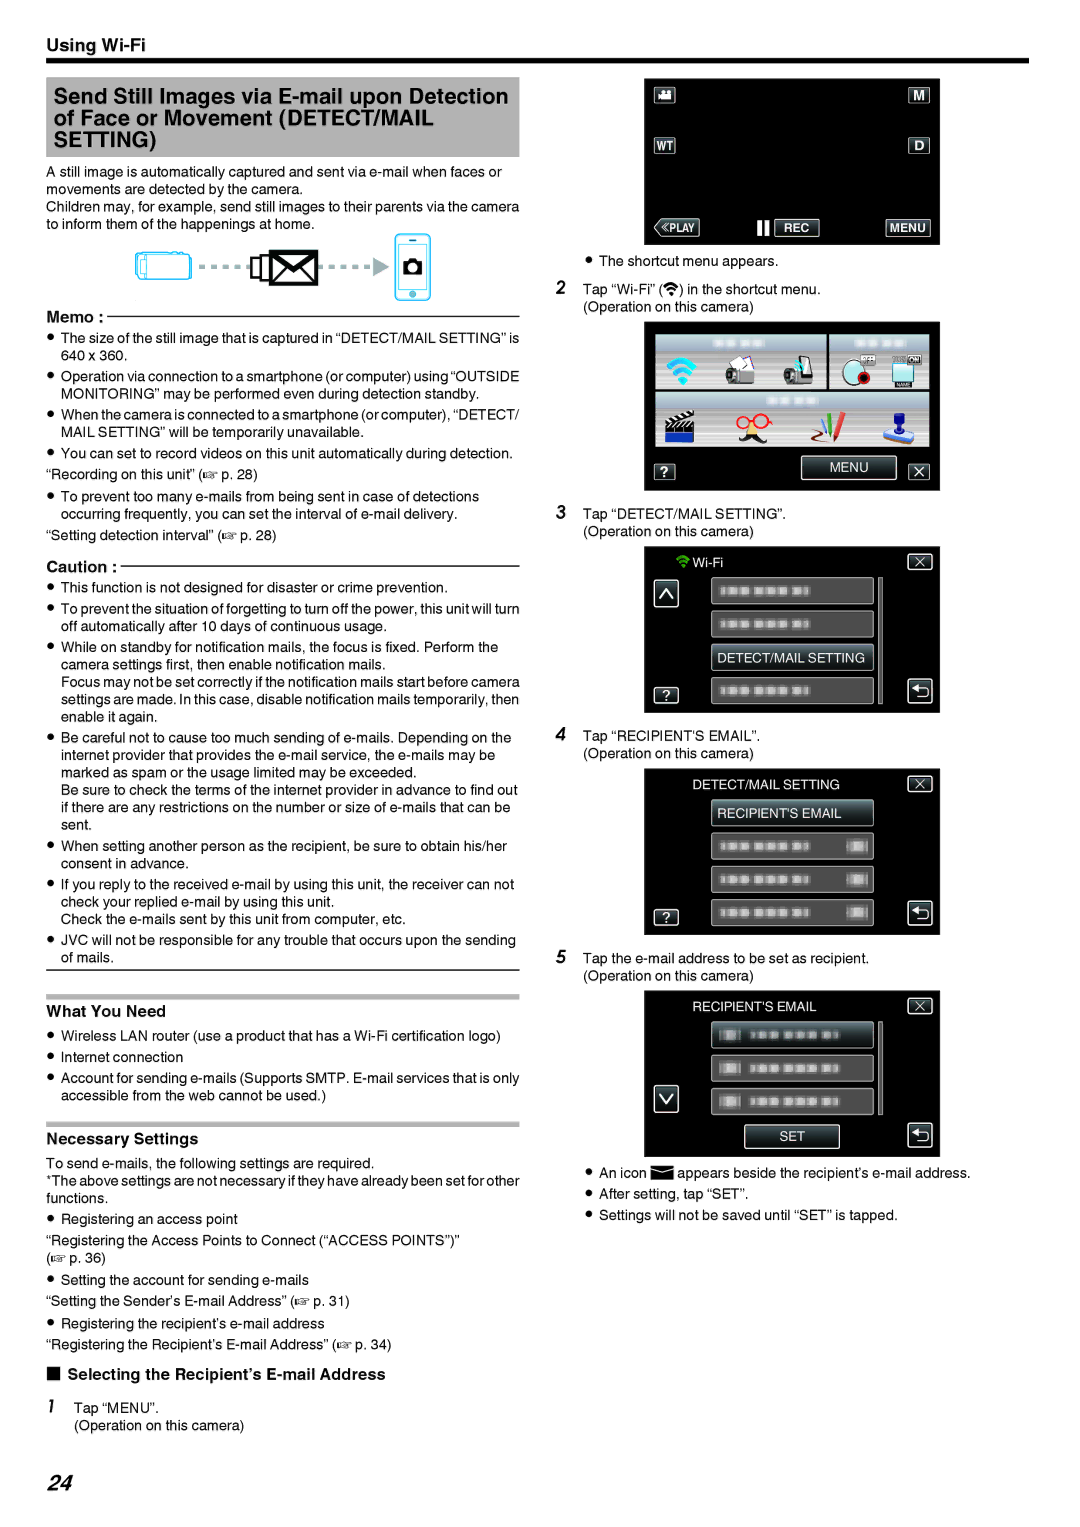
oSelecting the Recipient’s E-mail Address
1 Tap “MENU”.
(Operation on this camera)
≪PLAYREC MENU
.
0The shortcut menu appears.
2Tap
MENU
.
3Tap “DETECT/MAIL SETTING”. (Operation on this camera)
![]()
![]()
DETECT/MAIL SETTING
.
4Tap “RECIPIENT'S EMAIL”. (Operation on this camera)
DETECT/MAIL SETTING
RECIPIENT'S EMAIL
.
5Tap the
RECIPIENT'S EMAIL
SET
.
0An icon aappears beside the recipient’s
0After setting, tap “SET”.
0Settings will not be saved until “SET” is tapped.
24
