Using
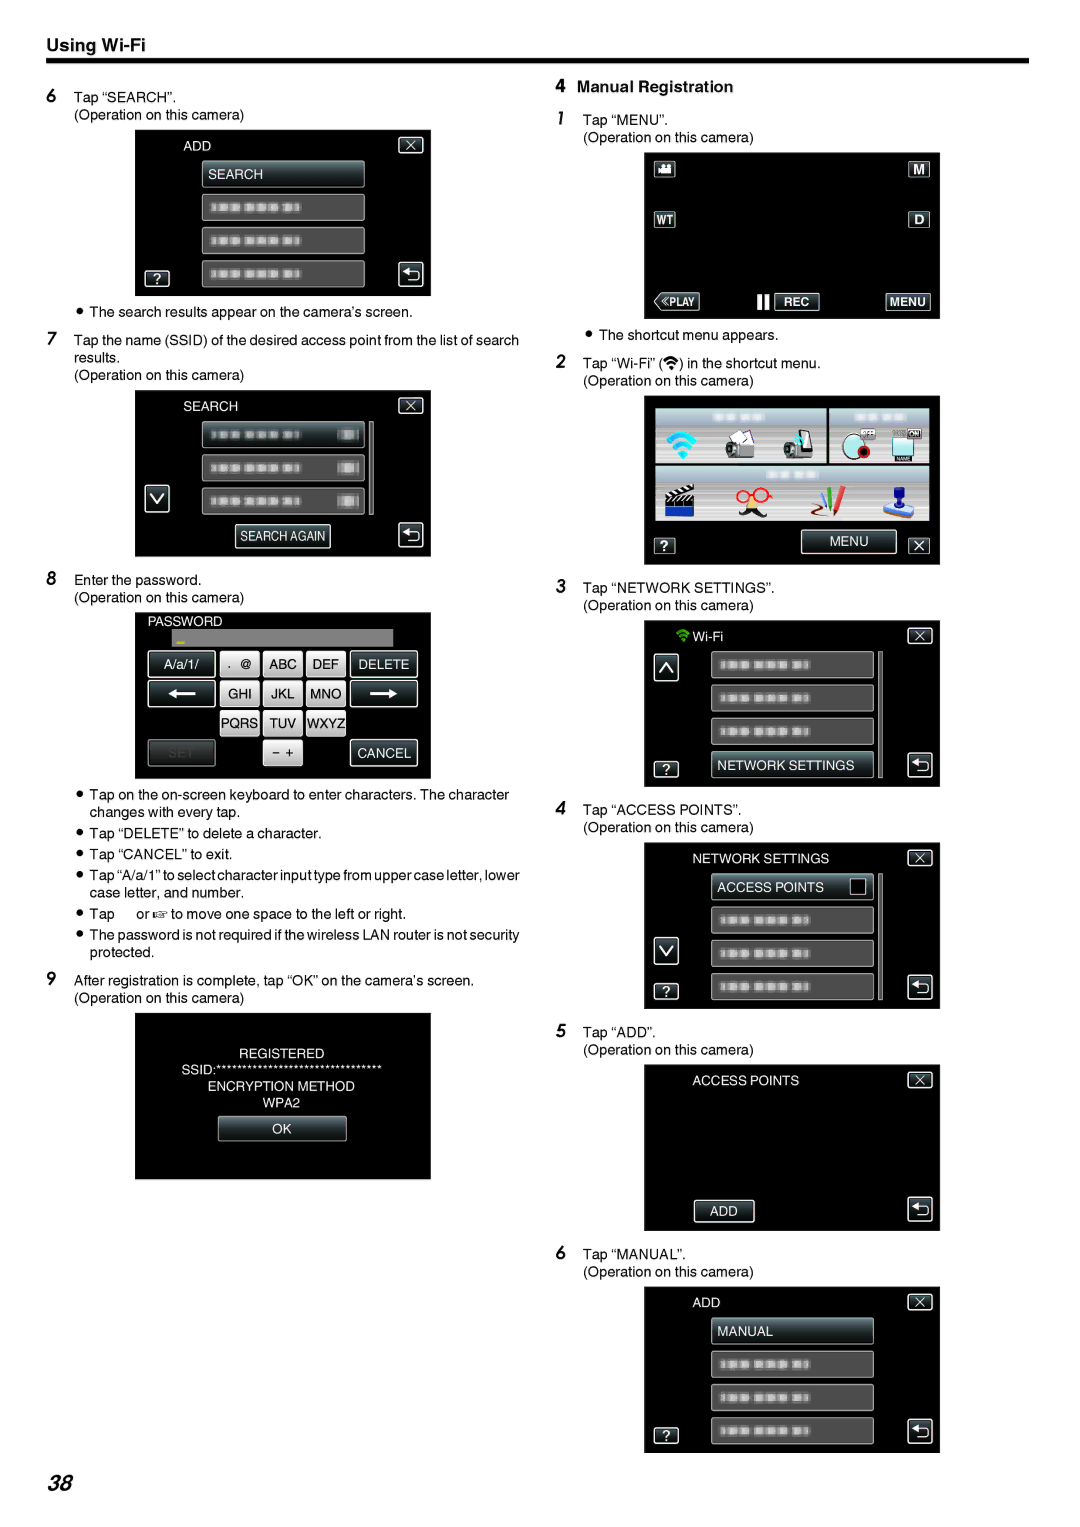
6Tap “SEARCH”. (Operation on this camera)
ADD
SEARCH
.
0The search results appear on the camera’s screen.
7Tap the name (SSID) of the desired access point from the list of search results.
(Operation on this camera)
SEARCH
SEARCH AGAIN
.
8Enter the password. (Operation on this camera)
PASSWORD
DELETE
SET ![]() CANCEL
CANCEL
.
0Tap on the
0Tap “DELETE” to delete a character.
0Tap “CANCEL” to exit.
0Tap “A/a/1” to select character input type from upper case letter, lower case letter, and number.
0Tap E or F to move one space to the left or right.
0The password is not required if the wireless LAN router is not security protected.
9After registration is complete, tap “OK” on the camera’s screen. (Operation on this camera)
WPS
REGISTERED
SSID:********************************
ENCRYPTION METHOD
WPA2
OK
.
oManual Registration
1Tap “MENU”.
(Operation on this camera)
≪PLAYREC MENU
.
0The shortcut menu appears.
2Tap
MENU
.
3Tap “NETWORK SETTINGS”. (Operation on this camera)
![]()
![]()
NETWORK SETTINGS
.
4Tap “ACCESS POINTS”. (Operation on this camera)
NETWORK SETTINGS
ACCESS POINTS
.
5Tap “ADD”.
(Operation on this camera)
ACCESS POINTS
ADD
.
6Tap “MANUAL”. (Operation on this camera)
ADD
MANUAL
.
38