Using
6Enter the DDNS settings (username/password). (Operation on this camera)
USERNAME
DELETE
SET ![]() CANCEL
CANCEL
.
0Tap “USERNAME” or “PASSWORD” to display the respective input screens.
0Tap on the
0Tap “DELETE” to delete a character.
0Tap “CANCEL” to exit.
0Tap “A/a/1” to select character input type from upper case letter, lower case letter, and number.
0Tap E or F to move one space to the left or right.
0After setting, tap “SET”.
Memo :
0Only the JVC dynamic DNS service can be set on this camera.
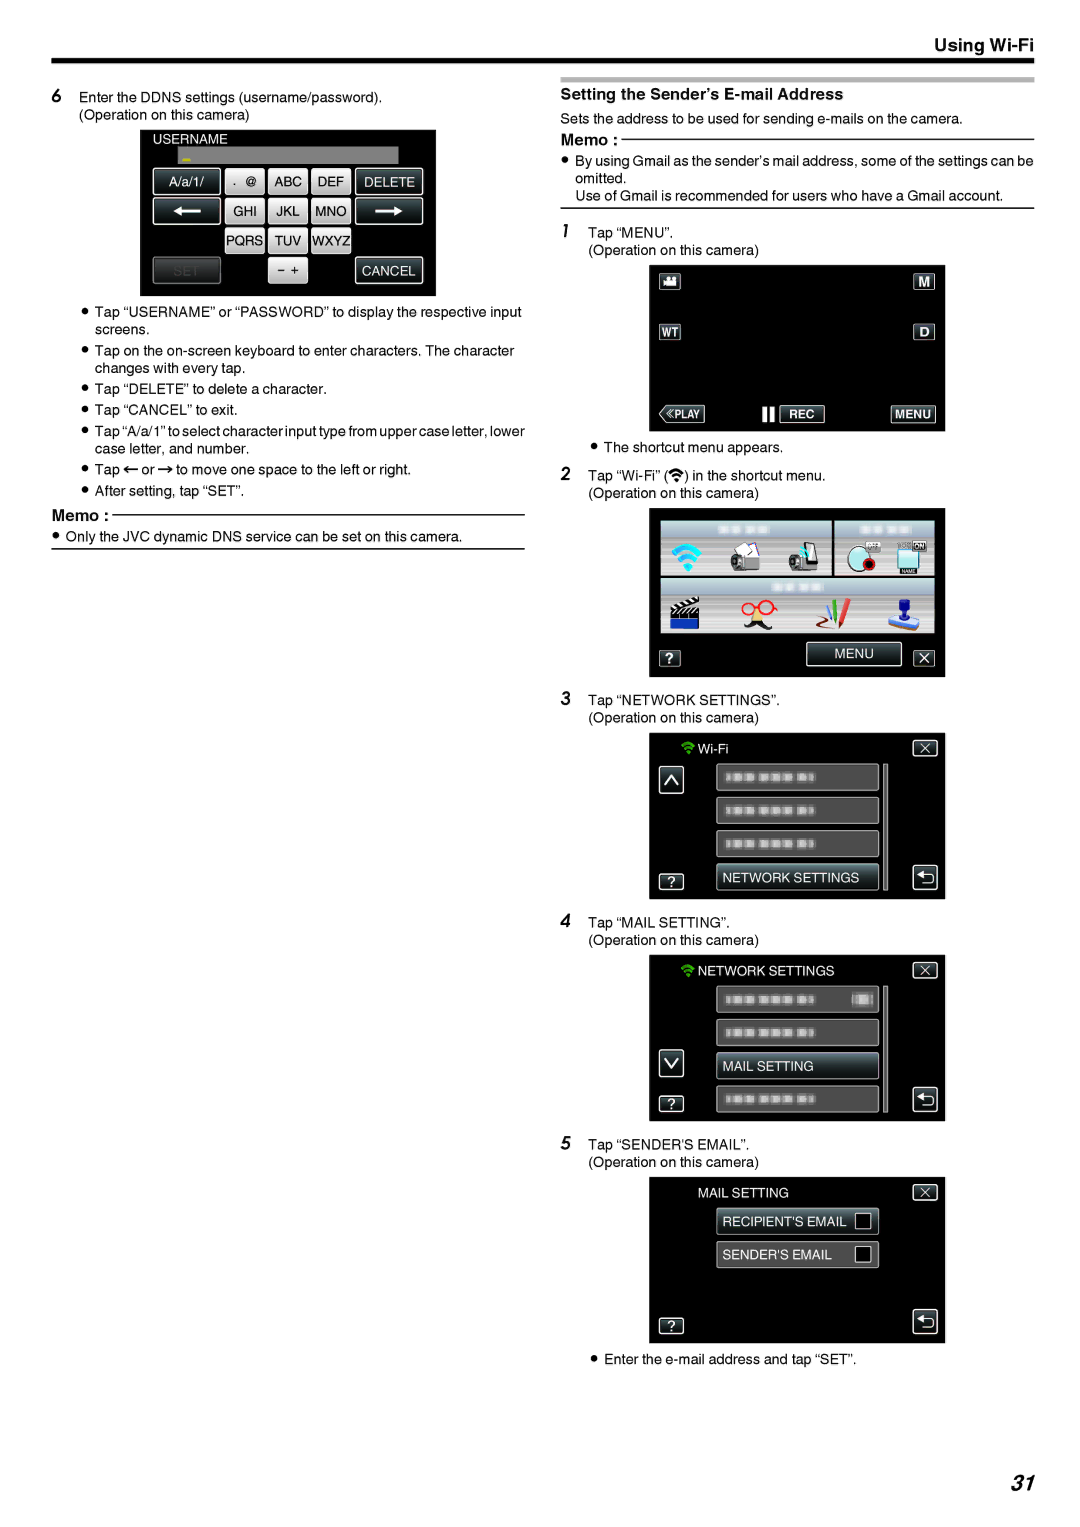
Setting the Sender’s E-mail Address
Sets the address to be used for sending
Memo :
0By using Gmail as the sender’s mail address, some of the settings can be omitted.
Use of Gmail is recommended for users who have a Gmail account.
1Tap “MENU”.
(Operation on this camera)
≪PLAYREC MENU
.
0The shortcut menu appears.
2Tap
MENU
.
3Tap “NETWORK SETTINGS”. (Operation on this camera)
![]()
![]()
![]()
NETWORK SETTINGS
.
4Tap “MAIL SETTING”. (Operation on this camera)
![]()
![]()
![]() NETWORK SETTINGS
NETWORK SETTINGS
MAIL SETTING
.
5Tap “SENDER'S EMAIL”. (Operation on this camera)
MAIL SETTING
RECIPIENT'S EMAIL ![]()
SENDER'S EMAIL
.
0Enter the
31