Getting Started
Holding this Unit
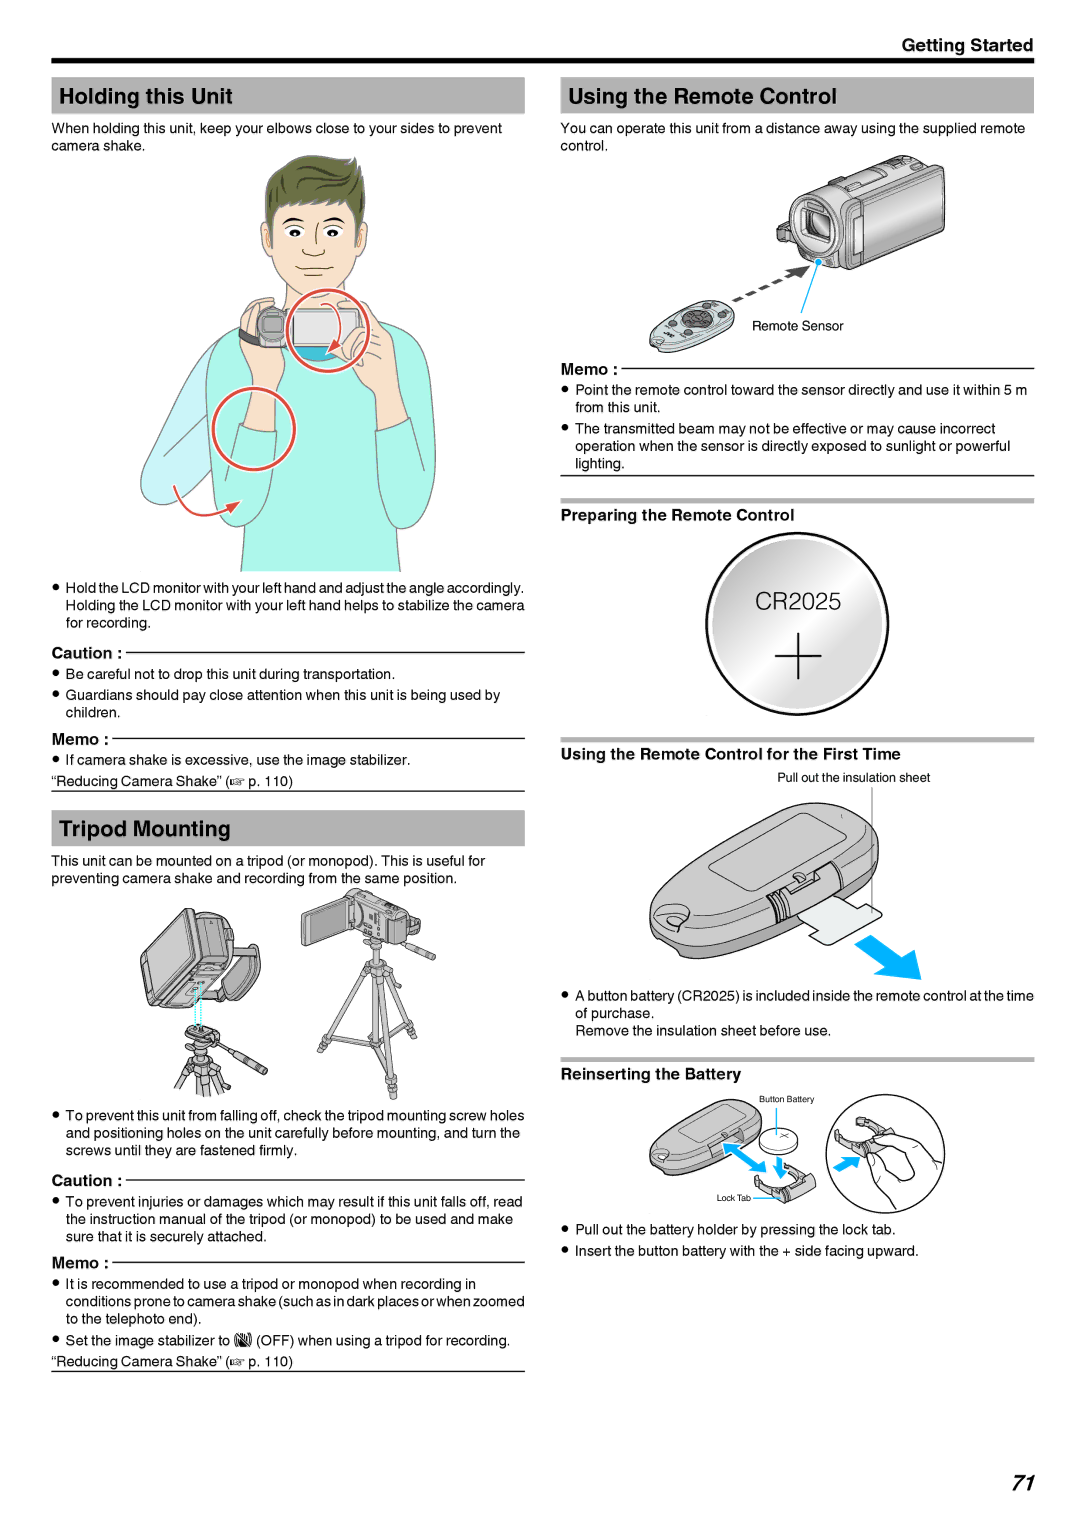
When holding this unit, keep your elbows close to your sides to prevent camera shake.
.
0Hold the LCD monitor with your left hand and adjust the angle accordingly. Holding the LCD monitor with your left hand helps to stabilize the camera for recording.
Caution :
0Be careful not to drop this unit during transportation.
0Guardians should pay close attention when this unit is being used by children.
Memo :
0If camera shake is excessive, use the image stabilizer. “Reducing Camera Shake” (A p. 110)
Using the Remote Control
You can operate this unit from a distance away using the supplied remote control.
Remote Sensor
.
Memo :
0Point the remote control toward the sensor directly and use it within 5 m from this unit.
0The transmitted beam may not be effective or may cause incorrect operation when the sensor is directly exposed to sunlight or powerful lighting.
Preparing the Remote Control
CR2025
.
Using the Remote Control for the First Time
Pull out the insulation sheet
Tripod Mounting
This unit can be mounted on a tripod (or monopod). This is useful for preventing camera shake and recording from the same position.
.
0To prevent this unit from falling off, check the tripod mounting screw holes and positioning holes on the unit carefully before mounting, and turn the screws until they are fastened firmly.
Caution :
0To prevent injuries or damages which may result if this unit falls off, read the instruction manual of the tripod (or monopod) to be used and make sure that it is securely attached.
Memo :
0It is recommended to use a tripod or monopod when recording in conditions prone to camera shake (such as in dark places or when zoomed to the telephoto end).
0Set the image stabilizer to b(OFF) when using a tripod for recording. “Reducing Camera Shake” (A p. 110)
.
0A button battery (CR2025) is included inside the remote control at the time of purchase.
Remove the insulation sheet before use.
Reinserting the Battery
Button Battery
Lock Tab ![]()
![]()
.
0Pull out the battery holder by pressing the lock tab.
0Insert the button battery with the + side facing upward.
71