Using
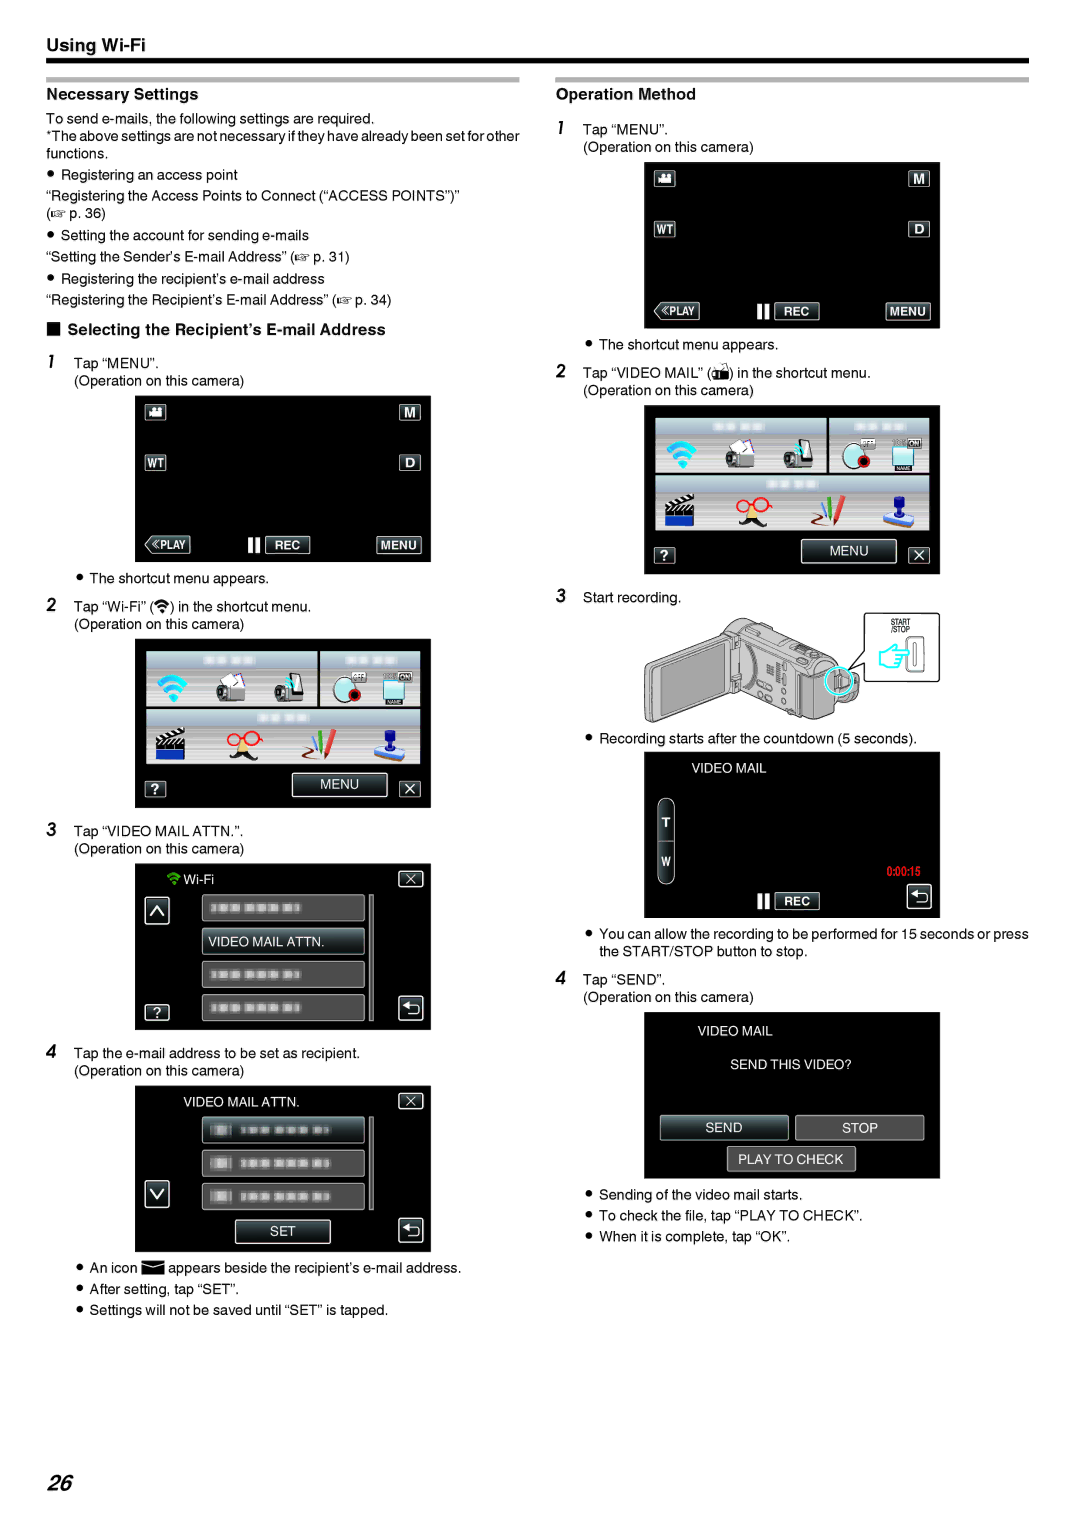
Necessary Settings
To send
*The above settings are not necessary if they have already been set for other functions.
0Registering an access point
“Registering the Access Points to Connect (“ACCESS POINTS”)” (A p. 36)
0Setting the account for sending
0Registering the recipient’s
oSelecting the Recipient’s E-mail Address
1 Tap “MENU”.
(Operation on this camera)
Operation Method
1Tap “MENU”.
(Operation on this camera)
≪PLAYREC MENU
.
0The shortcut menu appears.
2Tap “VIDEO MAIL” (R) in the shortcut menu. (Operation on this camera)
≪PLAYREC MENU
.
0The shortcut menu appears.
2Tap
MENU
.
3Tap “VIDEO MAIL ATTN.”. (Operation on this camera)
![]()
![]()
VIDEO MAIL ATTN.
.
4Tap the
VIDEO MAIL ATTN.
SET
.
0An icon aappears beside the recipient’s
0After setting, tap “SET”.
0Settings will not be saved until “SET” is tapped.
MENU
.
3Start recording.
.
0Recording starts after the countdown (5 seconds).
VIDEO MAIL
0:00:15
REC
.
0You can allow the recording to be performed for 15 seconds or press the START/STOP button to stop.
4Tap “SEND”.
(Operation on this camera)
VIDEO MAIL
SEND THIS VIDEO?
SENDSTOP
PLAY TO CHECK
.
0Sending of the video mail starts.
0To check the file, tap “PLAY TO CHECK”.
0When it is complete, tap “OK”.
26