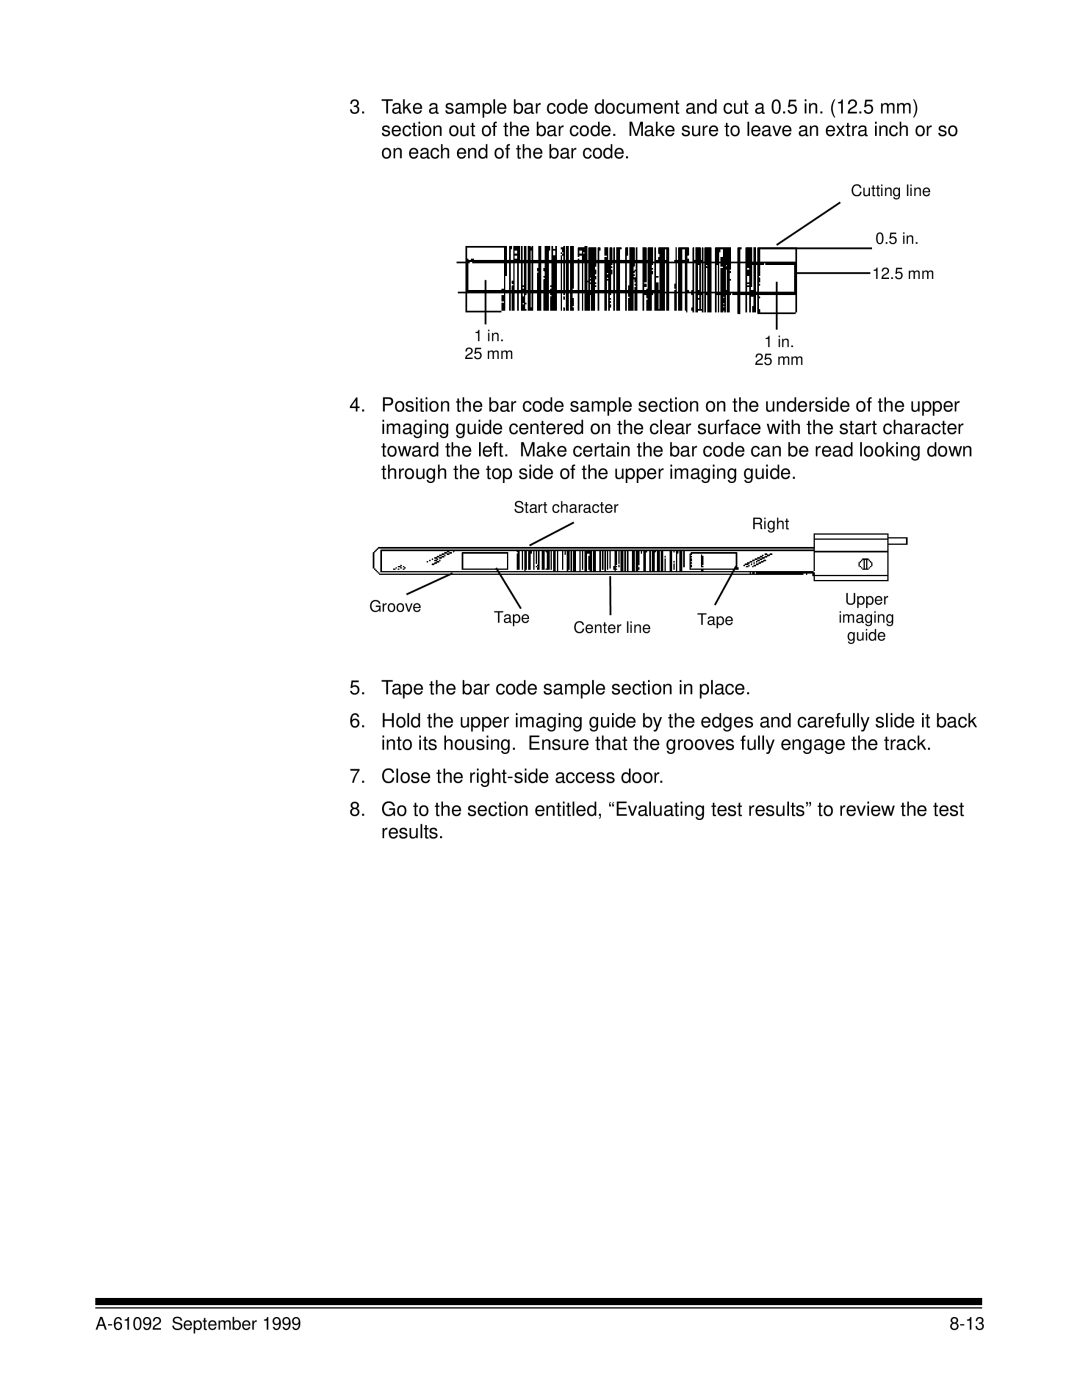
3.Take a sample bar code document and cut a 0.5 in. (12.5 mm) section out of the bar code. Make sure to leave an extra inch or so on each end of the bar code.
Cutting line
0.5 in.
12.5 mm
|
|
|
|
|
1 in. |
| 1 in. | ||
25 mm |
| |||
| 25 mm | |||
|
|
| ||
|
|
|
|
|
|
|
|
|
|
4.Position the bar code sample section on the underside of the upper imaging guide centered on the clear surface with the start character toward the left. Make certain the bar code can be read looking down through the top side of the upper imaging guide.
Start character
|
|
|
|
|
|
|
| Right |
|
|
|
|
|
|
|
|
|
|
|
|
|
|
|
|
|
|
|
|
|
|
|
|
|
|
|
|
|
|
|
|
|
| Upper |
Groove |
|
|
|
|
|
|
|
|
| |
| Tape |
|
|
|
|
|
|
| imaging | |
|
|
| Tape |
|
| |||||
|
|
| Center line |
|
|
| ||||
|
|
|
|
|
|
|
|
| guide | |
|
|
|
|
|
|
|
|
|
| |
|
|
|
|
|
|
|
| |||
|
|
|
|
|
|
|
|
|
|
|
5.Tape the bar code sample section in place.
6.Hold the upper imaging guide by the edges and carefully slide it back into its housing. Ensure that the grooves fully engage the track.
7.Close the
8.Go to the section entitled, “Evaluating test results” to review the test results.
|
