Configuring Netboot Services with Site Manager
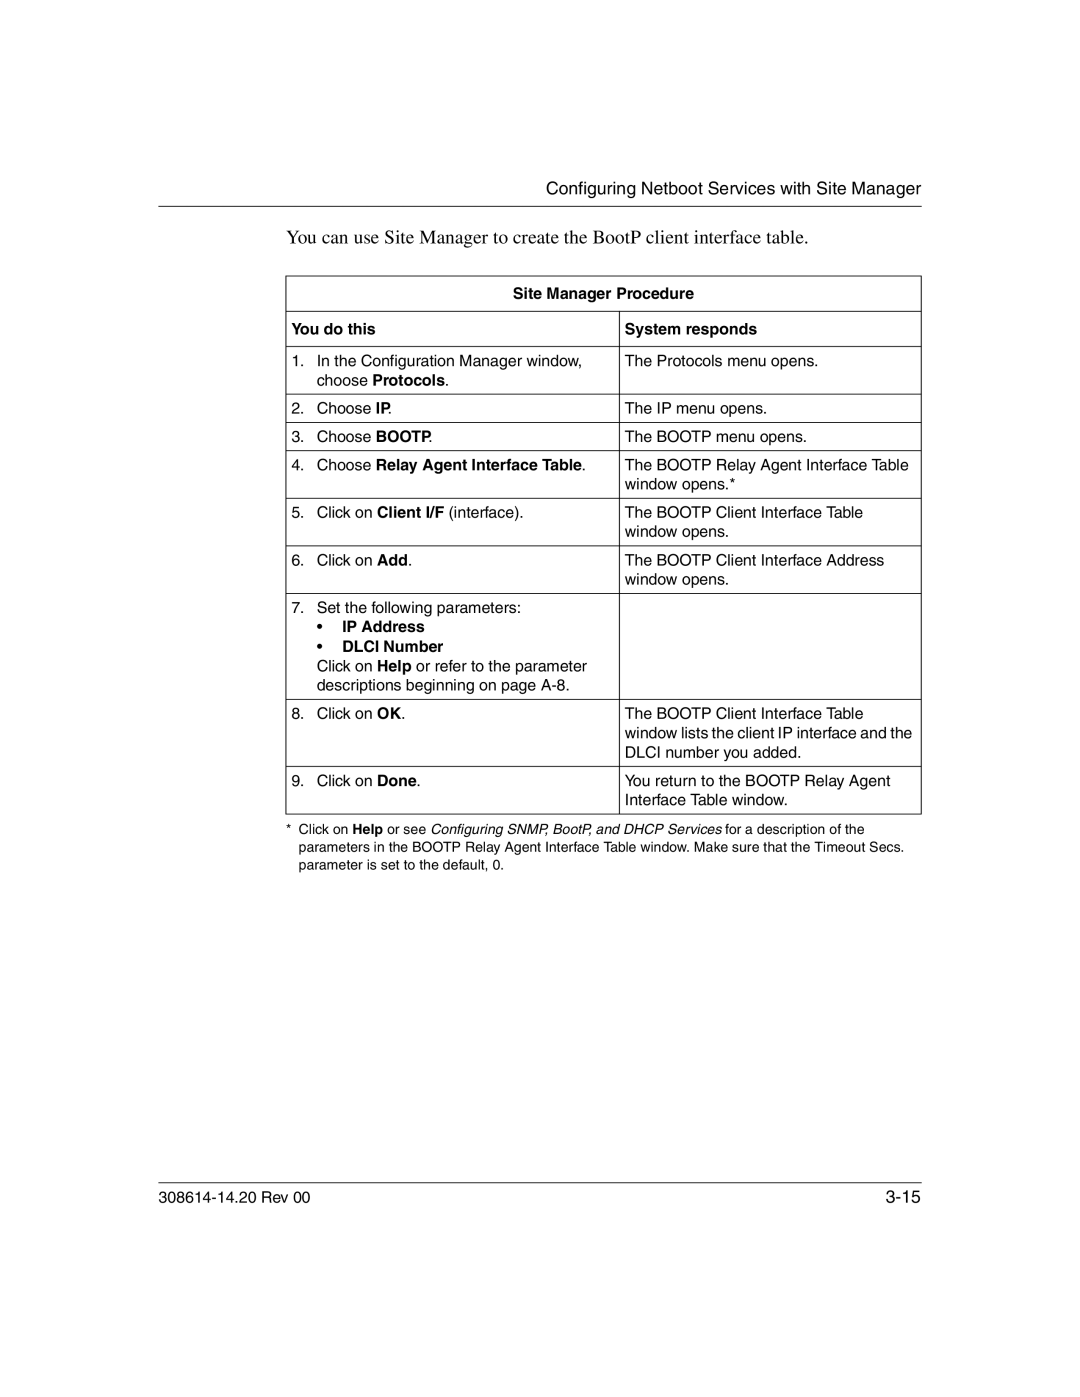
You can use Site Manager to create the BootP client interface table.
Site Manager Procedure
You do this | System responds | ||
|
|
| |
1. | In the Configuration Manager window, | The Protocols menu opens. | |
| choose Protocols. |
| |
|
|
| |
2. | Choose IP. | The IP menu opens. | |
|
|
| |
3. | Choose BOOTP. | The BOOTP menu opens. | |
|
|
| |
4. | Choose Relay Agent Interface Table. | The BOOTP Relay Agent Interface Table | |
|
|
| window opens.* |
|
|
| |
5. | Click on Client I/F (interface). | The BOOTP Client Interface Table | |
|
|
| window opens. |
|
|
| |
6. | Click on Add. | The BOOTP Client Interface Address | |
|
|
| window opens. |
|
|
| |
7. | Set the following parameters: |
| |
| • | IP Address |
|
| • | DLCI Number |
|
| Click on Help or refer to the parameter |
| |
| descriptions beginning on page |
| |
|
|
| |
8. | Click on OK. | The BOOTP Client Interface Table | |
|
|
| window lists the client IP interface and the |
|
|
| DLCI number you added. |
|
|
| |
9. | Click on Done. | You return to the BOOTP Relay Agent | |
|
|
| Interface Table window. |
|
|
|
|
*Click on Help or see Configuring SNMP, BootP, and DHCP Services for a description of the parameters in the BOOTP Relay Agent Interface Table window. Make sure that the Timeout Secs. parameter is set to the default, 0.