4.10 CPU fan assembly | 4 Replacement Procedures |
4.10 CPU fan assembly
Removing the CPU fan assembly
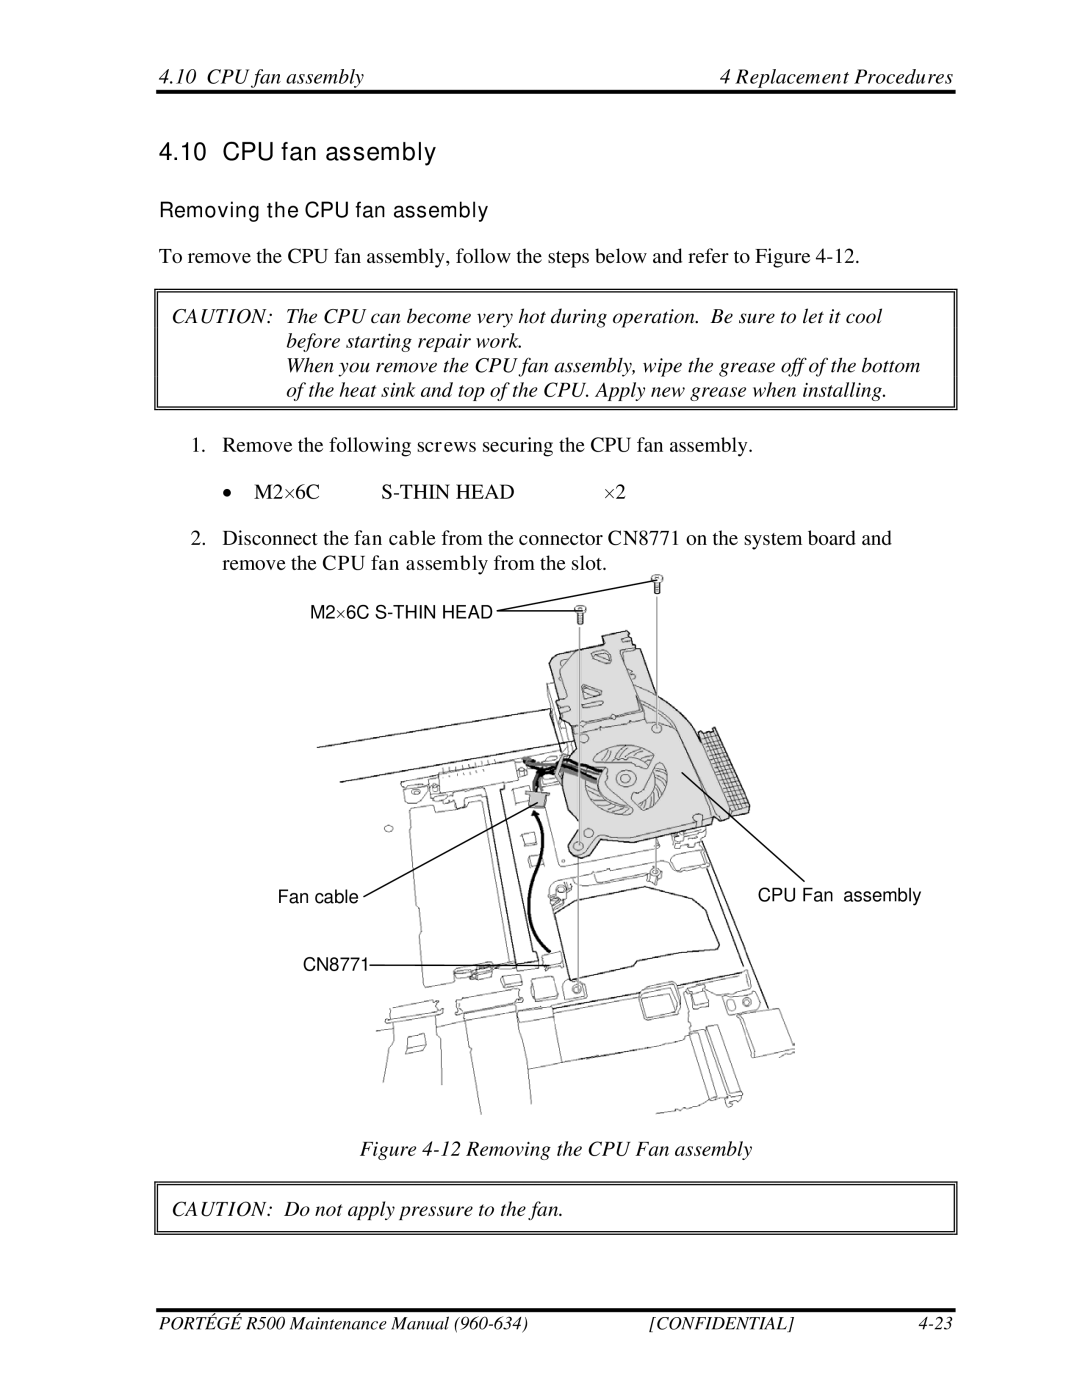
To remove the CPU fan assembly, follow the steps below and refer to Figure
CAUTION: The CPU can become very hot during operation. Be sure to let it cool before starting repair work.
When you remove the CPU fan assembly, wipe the grease off of the bottom of the heat sink and top of the CPU. Apply new grease when installing.
1. Remove the following screws securing the CPU fan assembly.
• M2×6C |
| ×2 |
2.Disconnect the fan cable from the connector CN8771 on the system board and remove the CPU fan assembly from the slot.
M2×6C
Fan cable |
| CPU Fan assembly |
|
|
|
|
|
|
CN8771
Figure 4-12 Removing the CPU Fan assembly
CAUTION: Do not apply pressure to the fan.
PORTÉGÉ R500 Maintenance Manual | [CONFIDENTIAL] |
