P r i n t Q u a l i t y P r o b l e m s
Table 6.2 | Print quality problems (continued) |
| |||
|
|
|
|
|
|
Problem |
|
| Possible Cause(s) | Corrective Action(s) | |
|
|
|
|
| |
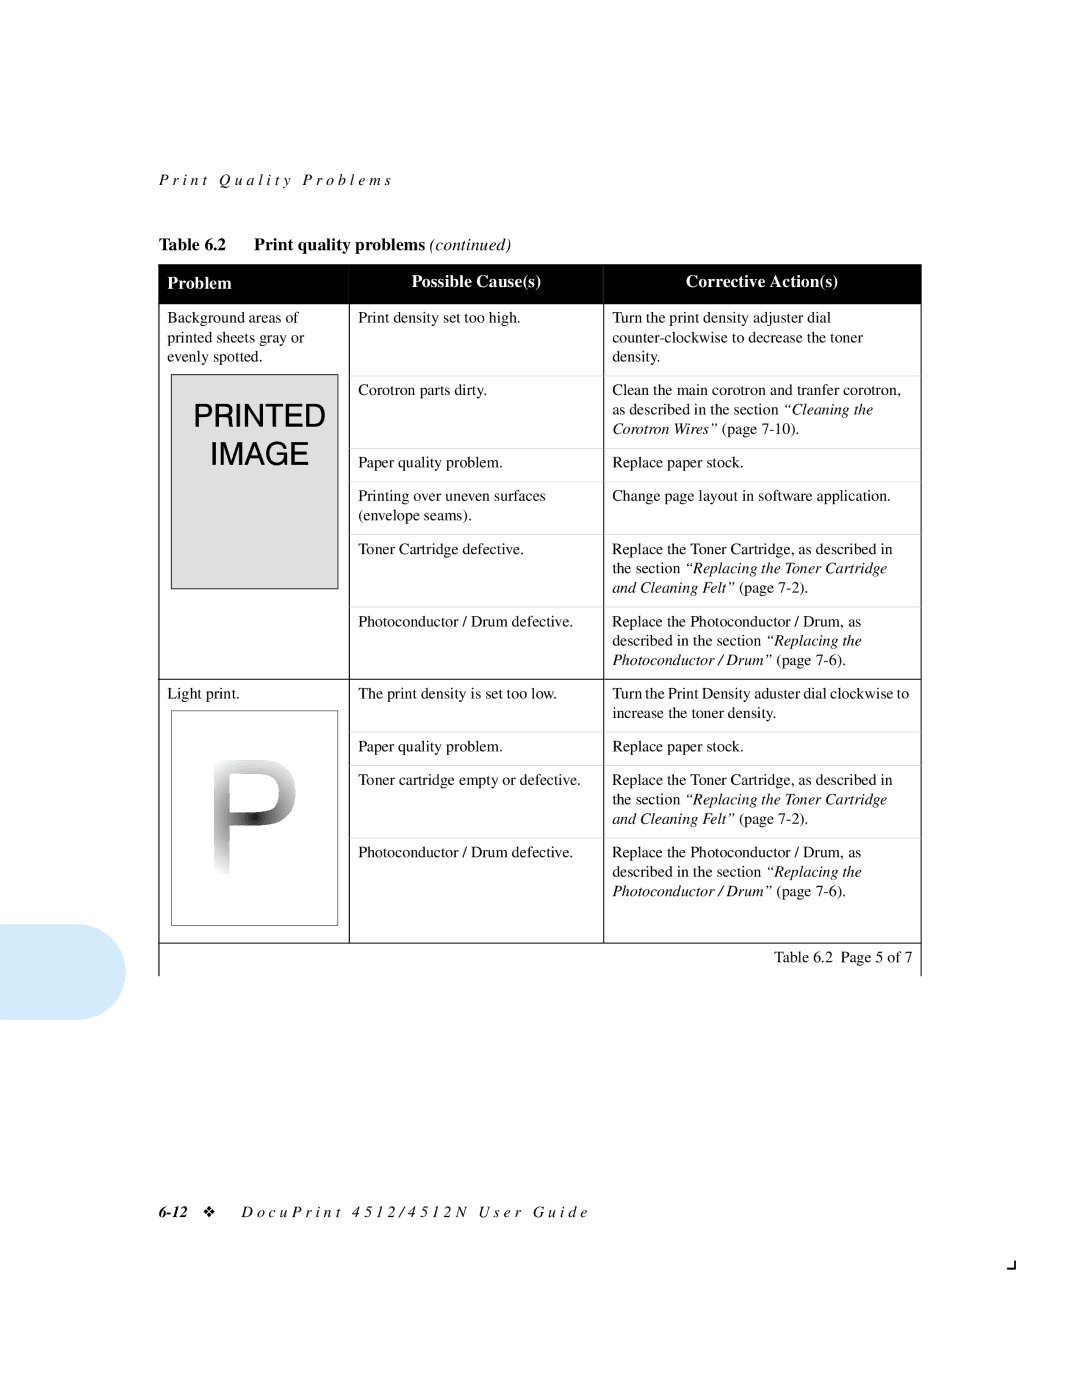
Background areas of | Print density set too high. | Turn the print density adjuster dial | |||
printed sheets gray or |
| ||||
evenly spotted. |
| density. | |||
|
|
|
|
|
|
|
|
|
| Corotron parts dirty. | Clean the main corotron and tranfer corotron, |
|
|
|
|
| as described in the section “Cleaning the |
|
|
|
|
| Corotron Wires” (page |
|
|
|
|
|
|
|
|
|
| Paper quality problem. | Replace paper stock. |
|
|
|
|
|
|
|
|
|
| Printing over uneven surfaces | Change page layout in software application. |
|
|
|
| (envelope seams). |
|
|
|
|
|
|
|
|
|
|
| Toner Cartridge defective. | Replace the Toner Cartridge, as described in |
|
|
|
|
| the section “Replacing the Toner Cartridge |
|
|
|
|
| and Cleaning Felt” (page |
|
|
|
|
| |
|
|
|
|
|
|
|
|
|
| Photoconductor / Drum defective. | Replace the Photoconductor / Drum, as |
|
|
|
|
| described in the section “Replacing the |
|
|
|
|
| Photoconductor / Drum” (page |
|
|
|
|
|
|
Light print. |
|
| The print density is set too low. | Turn the Print Density aduster dial clockwise to | |
|
|
|
|
| increase the toner density. |
|
|
|
|
| |
|
|
|
|
|
|
|
|
|
| Paper quality problem. | Replace paper stock. |
|
|
|
|
|
|
|
|
|
| Toner cartridge empty or defective. | Replace the Toner Cartridge, as described in |
|
|
|
|
| the section “Replacing the Toner Cartridge |
|
|
|
|
| and Cleaning Felt” (page |
|
|
|
|
|
|
|
|
|
| Photoconductor / Drum defective. | Replace the Photoconductor / Drum, as |
|
|
|
|
| described in the section “Replacing the |
|
|
|
|
| Photoconductor / Drum” (page |
|
|
|
|
|
|
|
|
|
|
|
|
|
|
|
|
| Table 6.2 Page 5 of 7 |
|
|
|
|
|
|