C l e a n i n g t h e P r i n t e r
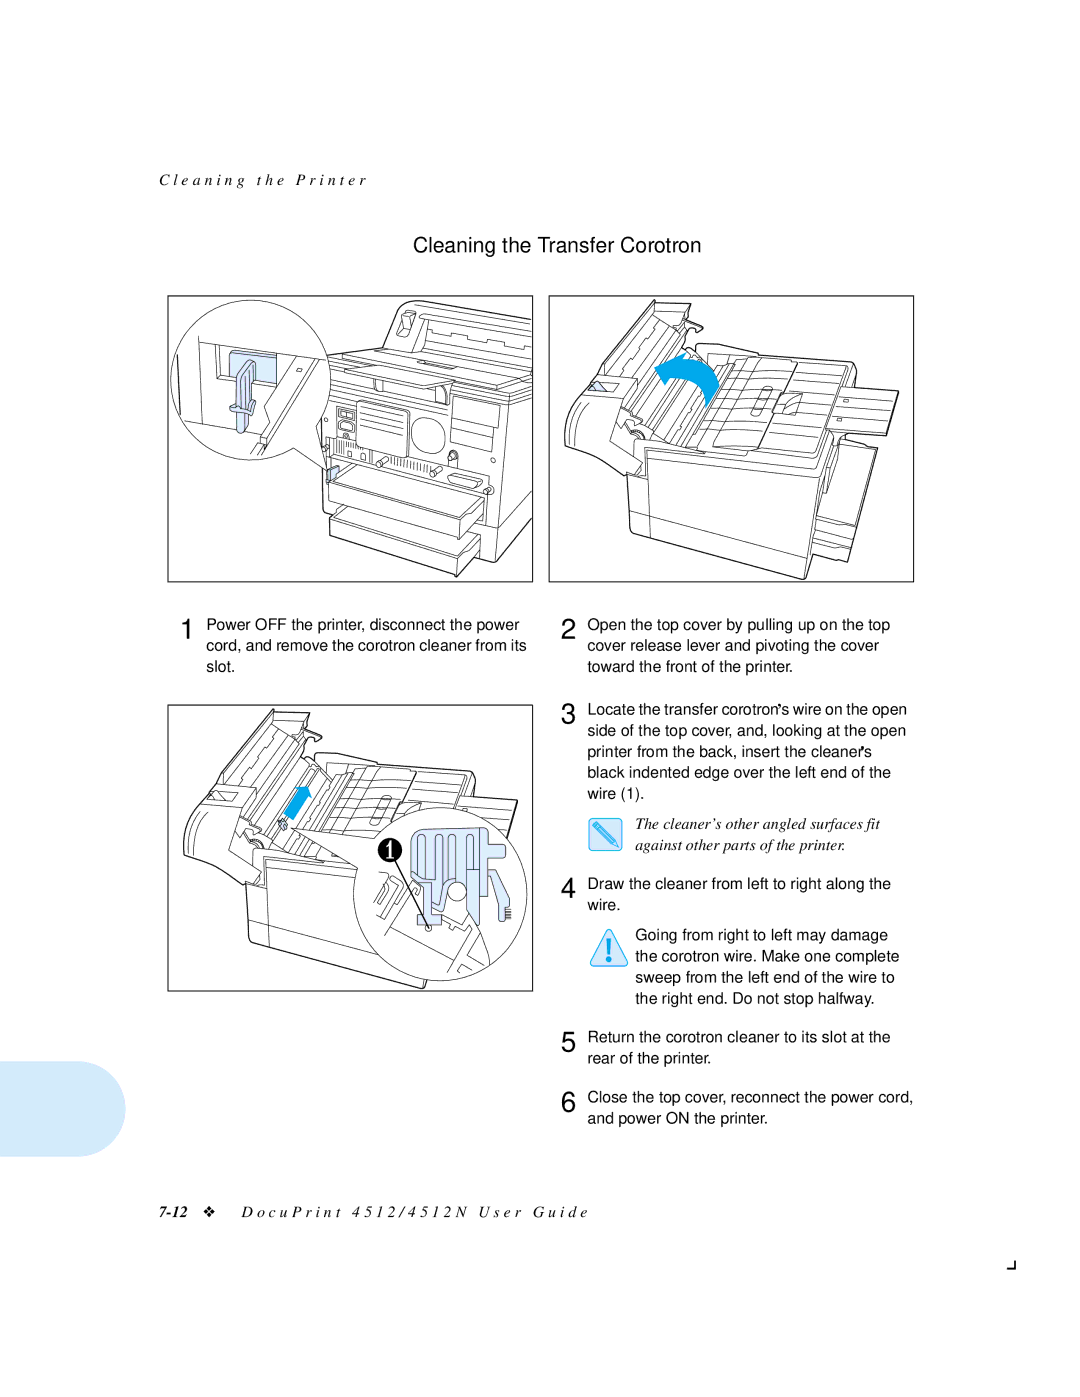
Cleaning the Transfer Corotron
1 Power OFF the printer, disconnect the power cord, and remove the corotron cleaner from its
slot. |
2 | Open the top cover by pulling up on the top |
| cover release lever and pivoting the cover |
| toward the front of the printer. |
3 | Locate the transfer corotron’s wire on the open |
| side of the top cover, and, looking at the open |
| printer from the back, insert the cleaner’s |
| black indented edge over the left end of the |
| wire (1). |
| The cleaner’s other angled surfaces fit |
| against other parts of the printer. |
4 | Draw the cleaner from left to right along the |
| wire. |
Going from right to left may damage the corotron wire. Make one complete sweep from the left end of the wire to the right end. Do not stop halfway.
5 | Return the corotron cleaner to its slot at the |
| rear of the printer. |
6 | Close the top cover, reconnect the power cord, |
| and power ON the printer. |