S e t t i n g U p t h e D o c u P r i n t 4 5 1 2 / 4 5 1 2 N
Assembling the | Assembling the printer is easily accomplished in just a few steps: | |||||
|
| |||||
Printer | • Install the Toner Cartridge. | |||||
• Install the Photoconductor / Drum. | ||||||
|
| |||||
|
| • Install the Cleaning Felt. | ||||
|
| • Load the paper tray(s) with paper. | ||||
|
| • Attach the Manual Feed Guide and the Tray Extension. | ||||
|
| • Connect the power cord. | ||||
|
| Follow the instructions below to assemble the printer. | ||||
|
|
|
|
|
| |
|
| Do not expose the Photoconductor / Drum to direct sunlight or | ||||
|
| artificial light for more than 15 minutes. Overexposure will | ||||
|
| permanently damage the photosensitive imaging drum. | ||||
| Caution Complete the Toner Cartridge and Photoconductor / Drum | |||||
|
| installation within 15 minutes of removing them from their | ||||
|
| packaging. | ||||
|
|
|
|
|
| |
|
|
|
|
|
| |
|
|
|
|
|
| |
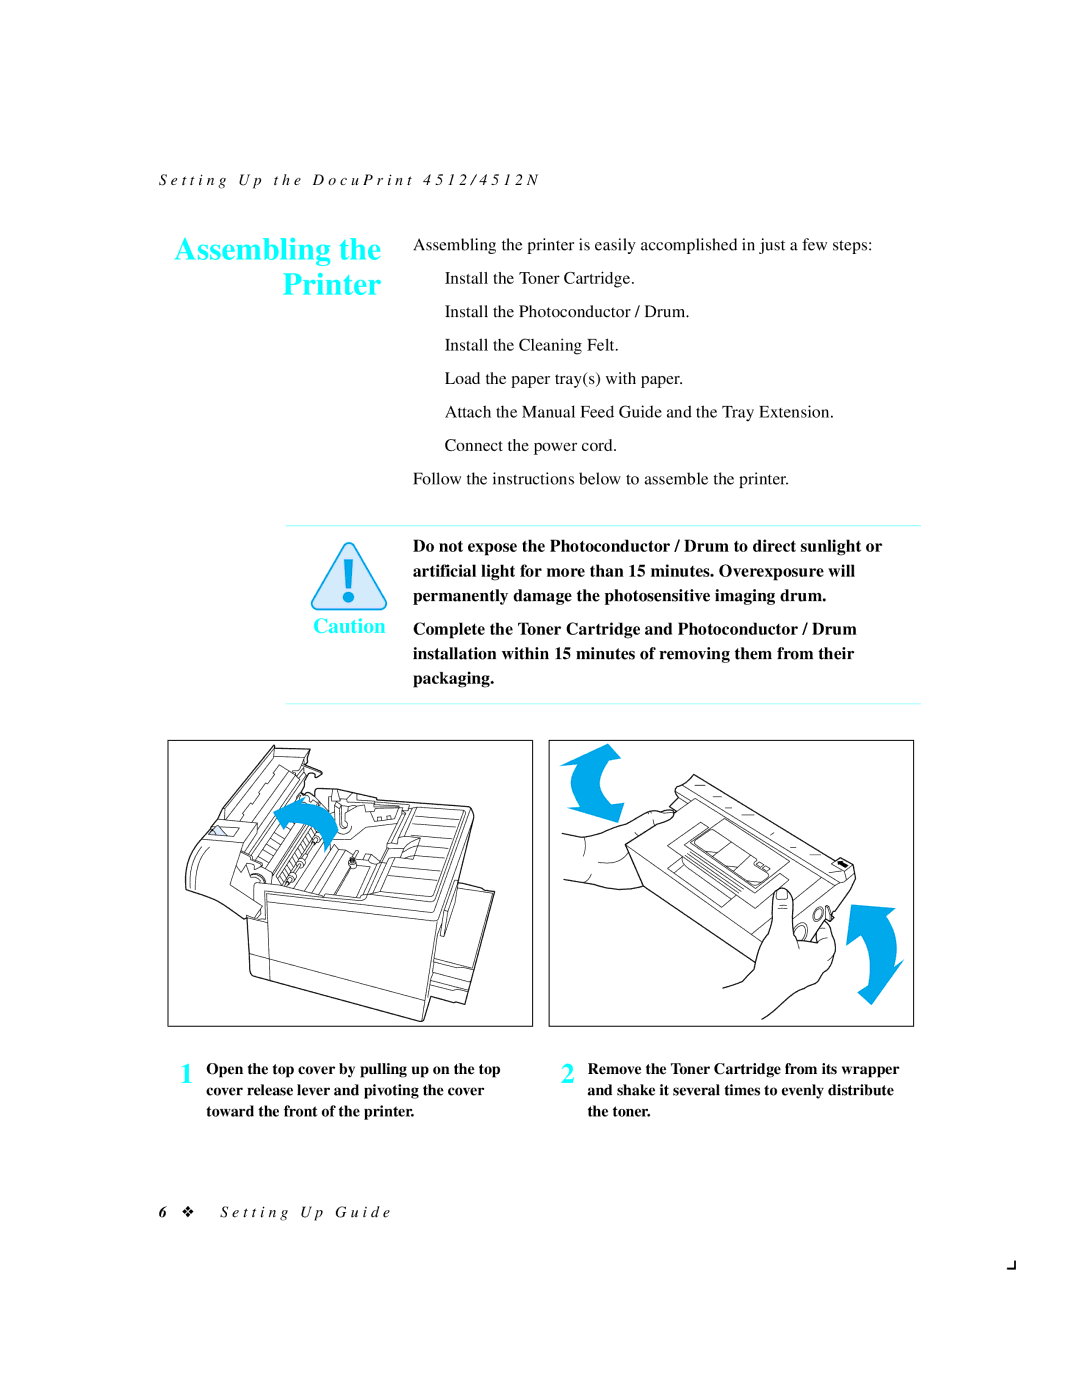
1 Open the top cover by pulling up on the top cover release lever and pivoting the cover toward the front of the printer.
2 Remove the Toner Cartridge from its wrapper and shake it several times to evenly distribute the toner.
6 ❖ S e t t i n g U p G u i d e