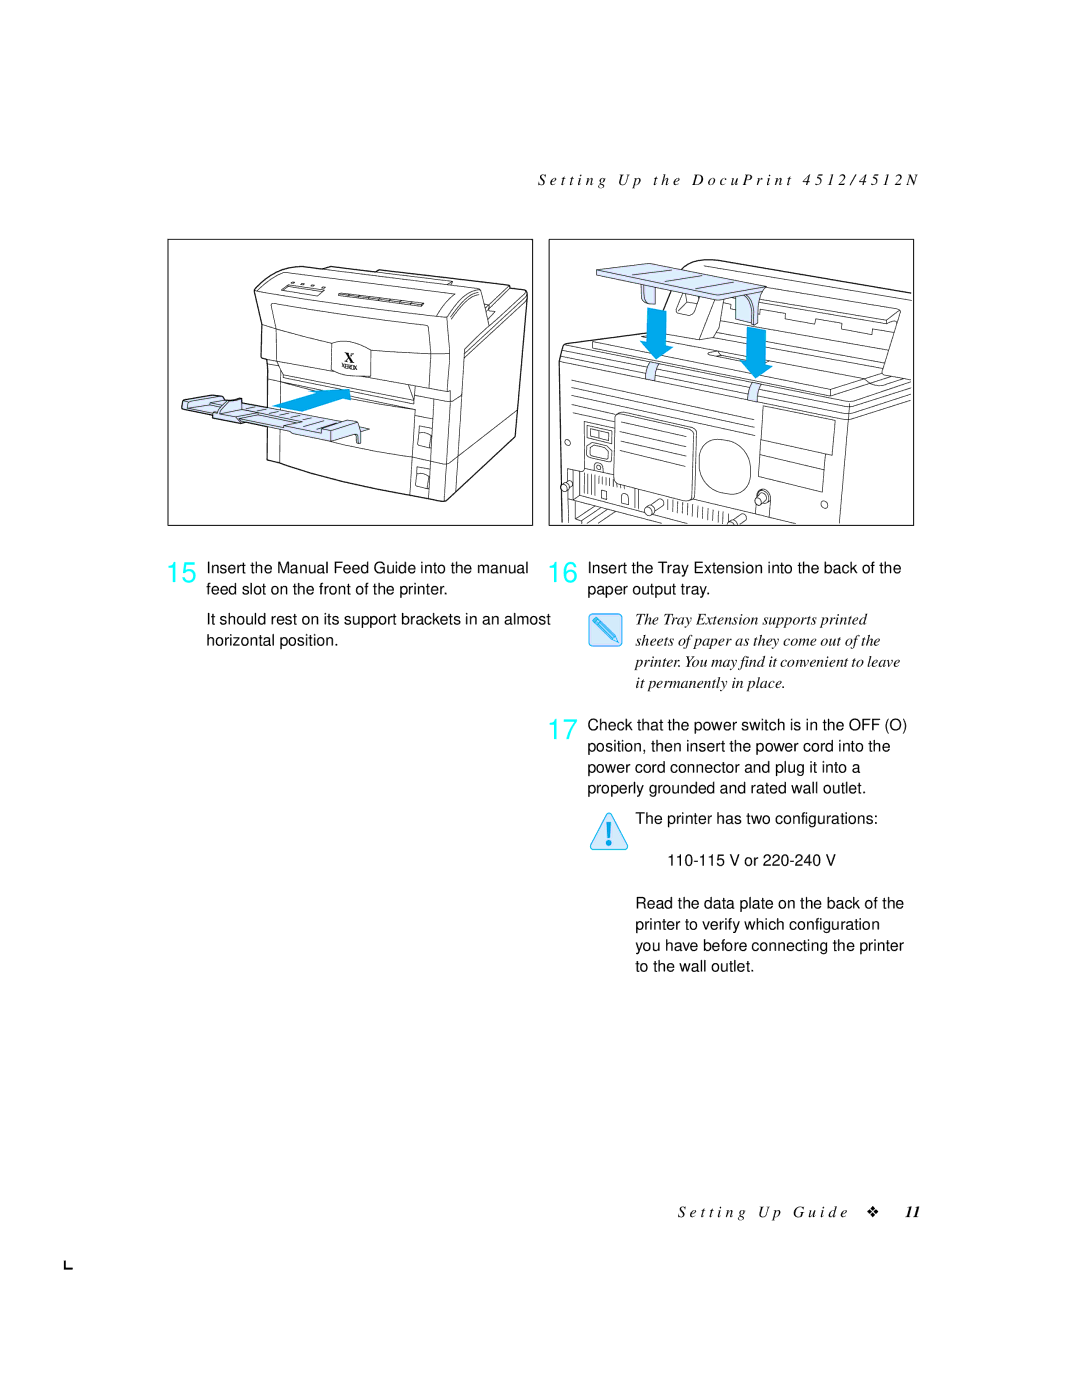
15 Insert the Manual Feed Guide into the manual feed slot on the front of the printer.
It should rest on its support brackets in an almost horizontal position.
S e t t i n g U p t h e D o c u P r i n t 4 5 1 2 / 4 5 1 2 N |
16 Insert the Tray Extension into the back of the paper output tray.
The Tray Extension supports printed sheets of paper as they come out of the printer. You may find it convenient to leave it permanently in place.
17 Check that the power switch is in the OFF (O) position, then insert the power cord into the power cord connector and plug it into a properly grounded and rated wall outlet.
The printer has two configurations:
Read the data plate on the back of the printer to verify which configuration you have before connecting the printer to the wall outlet.