C l e a n i n g t h e P r i n t e r
Cleaning the
Corotron Wires
Cleaning the Autofeed Pickup Area
1 | Power OFF the printer, disconnect the power cord, and remove the |
| Photoconductor / Drum and Toner Cartridge, following Steps 1 |
| through 3 on page |
2 | Wipe the interior surfaces of the printer. |
| The gears inside the printer are coated with grease and will |
| soil hands and cleaning cloths. Try to avoid touching these |
| gears. |
3 | Reassemble the printer and power it ON. |
If the corotron wires become dirty, printouts may show streaks and blotches. There are wires in the main corotron, located under the Photoconductor / Drum, and in the transfer corotron, located inside the top cover.
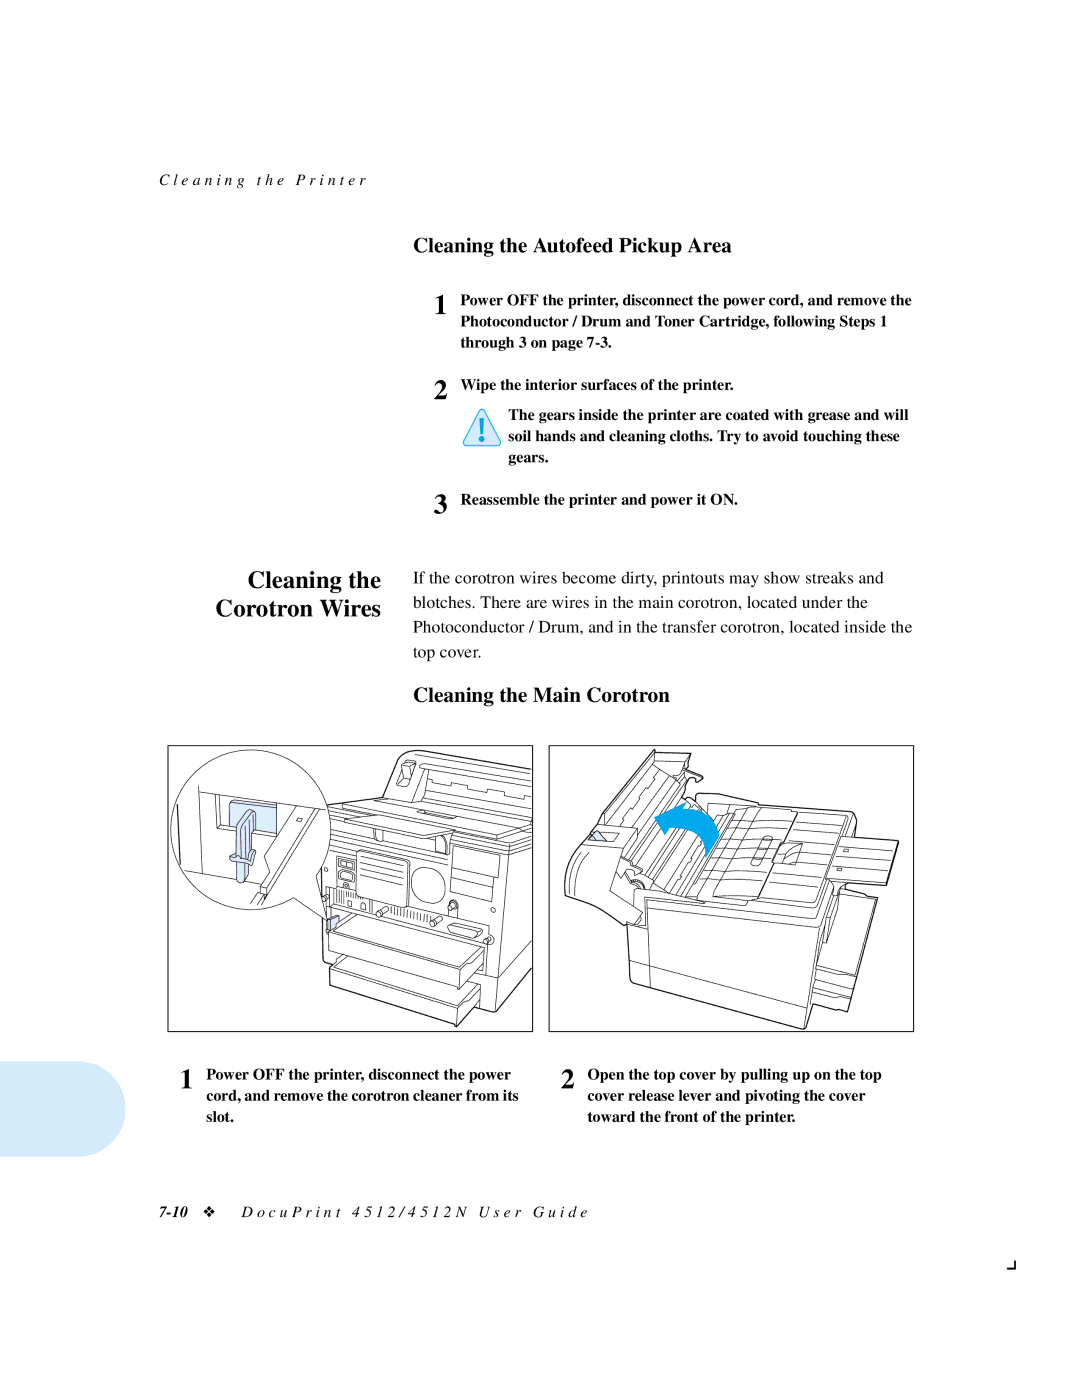
Cleaning the Main Corotron
1 Power OFF the printer, disconnect the power cord, and remove the corotron cleaner from its slot.
2 Open the top cover by pulling up on the top cover release lever and pivoting the cover toward the front of the printer.