Frame Rail Installation
Pre-Installing Frame Rails: (continued)
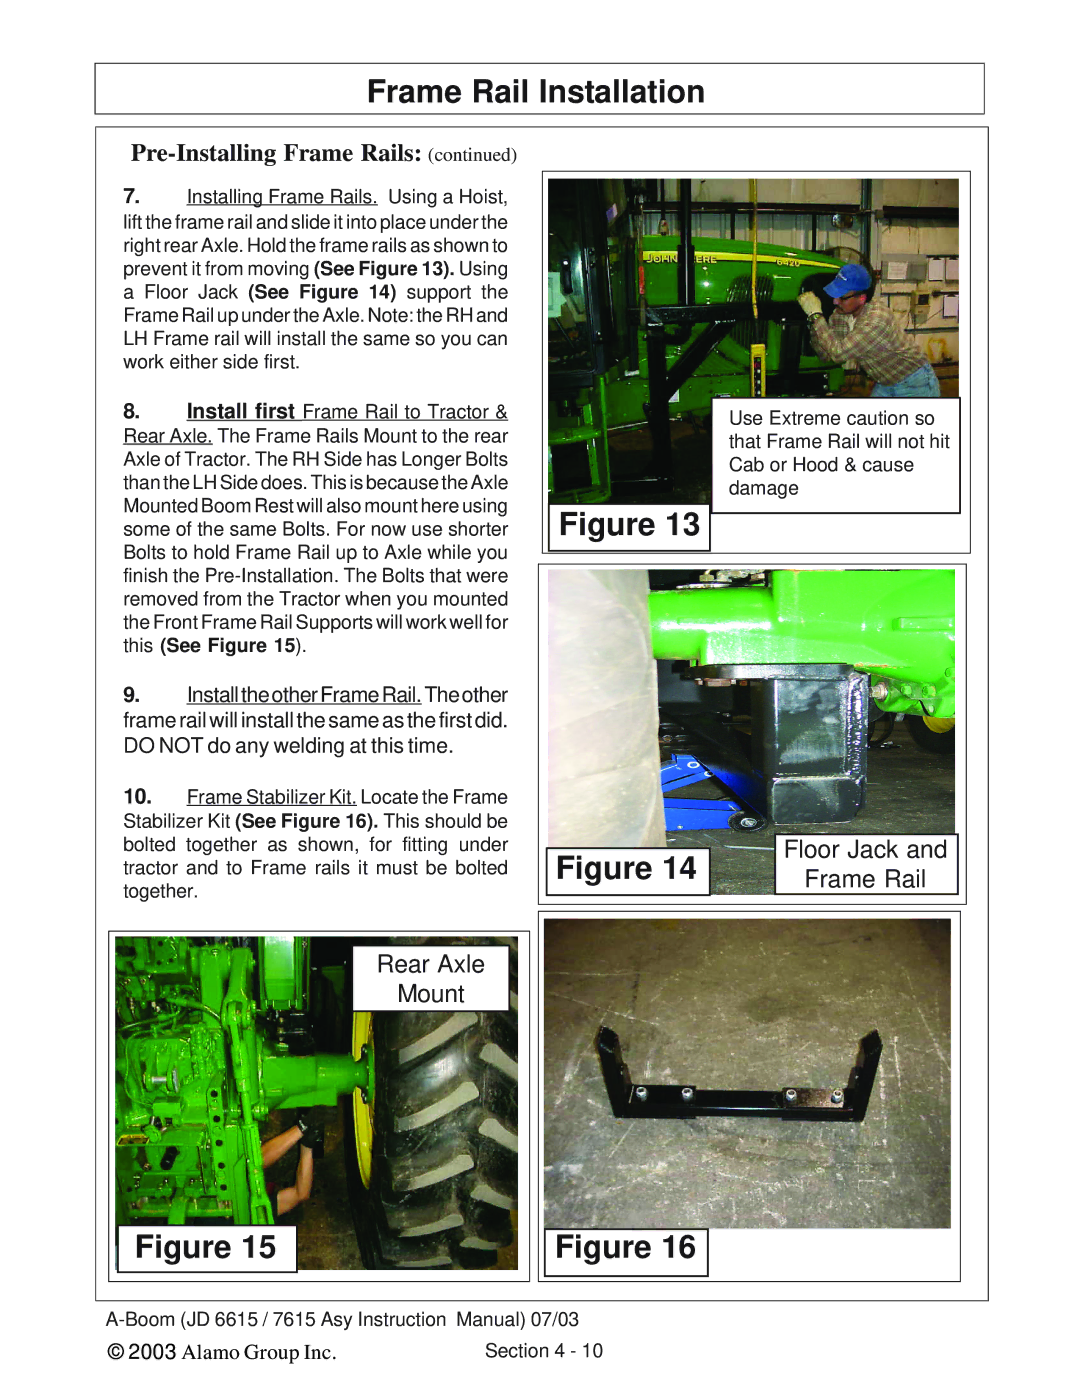
7.Installing Frame Rails. Using a Hoist, lift the frame rail and slide it into place under the right rear Axle. Hold the frame rails as shown to prevent it from moving (See Figure 13). Using a Floor Jack (See Figure 14) support the Frame Rail up under the Axle. Note: the RH and LH Frame rail will install the same so you can work either side first.
8.Install first Frame Rail to Tractor & Rear Axle. The Frame Rails Mount to the rear Axle of Tractor. The RH Side has Longer Bolts than the LH Side does. This is because the Axle Mounted Boom Rest will also mount here using some of the same Bolts. For now use shorter Bolts to hold Frame Rail up to Axle while you finish the
9.InstalltheotherFrameRail. Theother frame rail will install the same as the first did. DO NOT do any welding at this time.
10.Frame Stabilizer Kit. Locate the Frame Stabilizer Kit (See Figure 16). This should be bolted together as shown, for fitting under tractor and to Frame rails it must be bolted together.
Use Extreme caution so that Frame Rail will not hit Cab or Hood & cause damage
Figure 13
Figure 14 | Floor Jack and |
Frame Rail |
| Rear Axle |
| Mount |
Figure 15 | Figure 16 |
© 2003 Alamo Group Inc. | Section 4 - 10 |