Frame Rail Installation 4 WD
Re-Install High Frame to Tractor:
1.High Frame Paint.
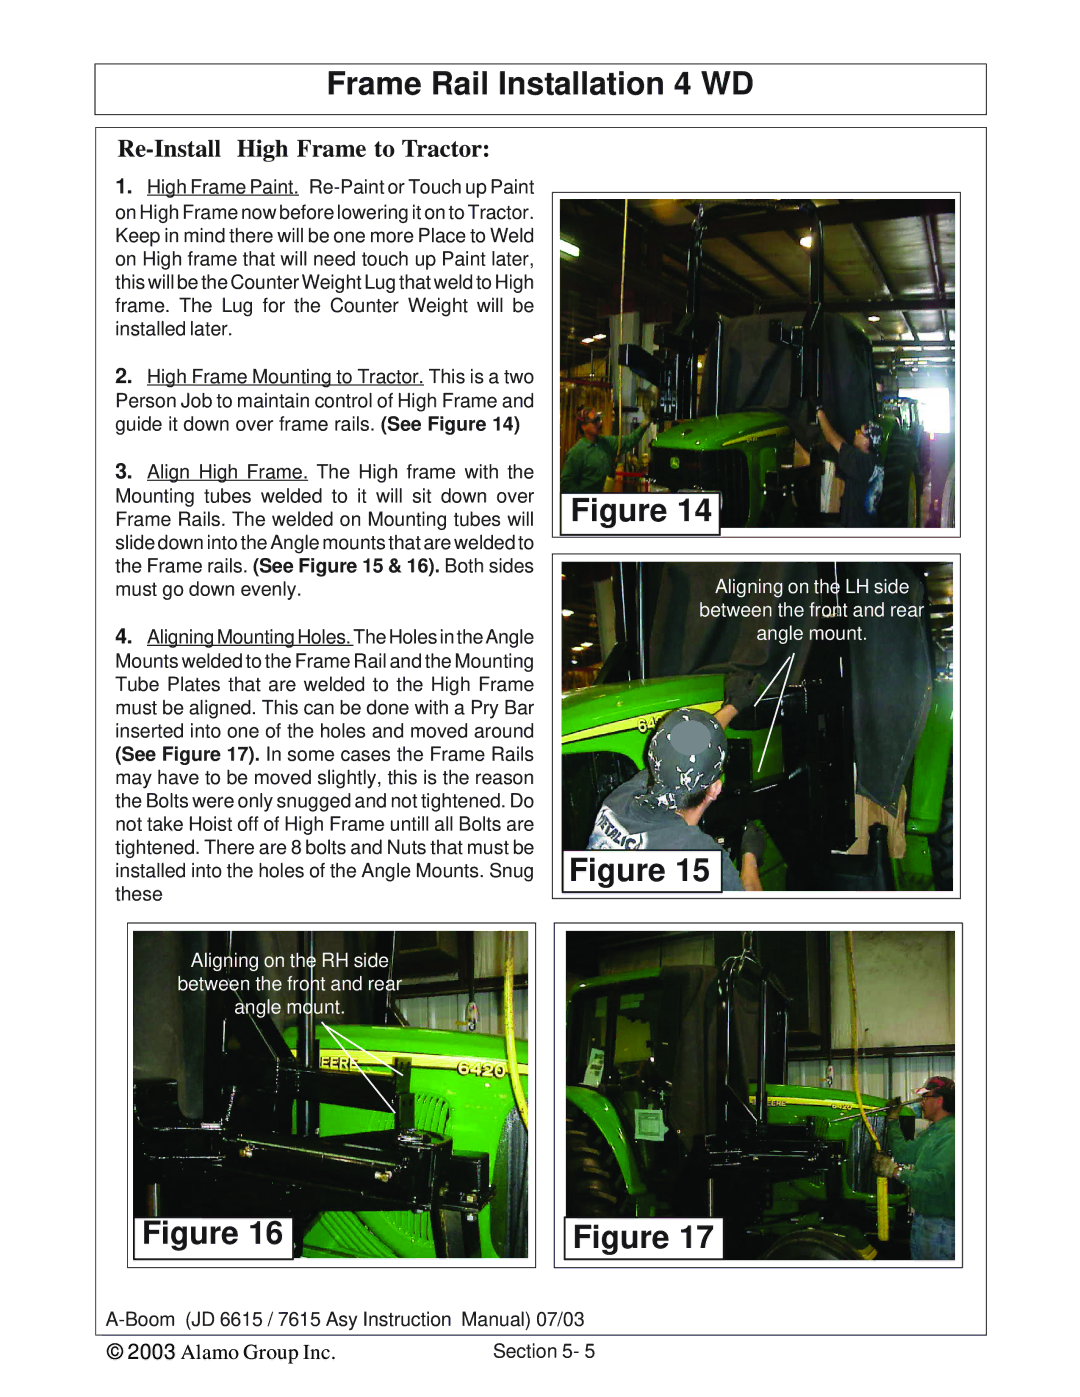
2.High Frame Mounting to Tractor. This is a two Person Job to maintain control of High Frame and guide it down over frame rails. (See Figure 14)
3.Align High Frame. The High frame with the Mounting tubes welded to it will sit down over Frame Rails. The welded on Mounting tubes will slide down into the Angle mounts that are welded to the Frame rails. (See Figure 15 & 16). Both sides must go down evenly.
4.Aligning Mounting Holes. The Holes in the Angle Mounts welded to the Frame Rail and the Mounting Tube Plates that are welded to the High Frame must be aligned. This can be done with a Pry Bar inserted into one of the holes and moved around (See Figure 17). In some cases the Frame Rails may have to be moved slightly, this is the reason the Bolts were only snugged and not tightened. Do not take Hoist off of High Frame untill all Bolts are tightened. There are 8 bolts and Nuts that must be installed into the holes of the Angle Mounts. Snug these
Aligning on the RH side
between the front and rear
angle mount.
Figure 16
Figure 14
Aligning on the LH side
between the front and rear
angle mount.
Figure 15
Figure 17
© 2003 Alamo Group Inc. | Section 5- 5 |