Frame Rail Installation
Tack Welding Frame Rails:
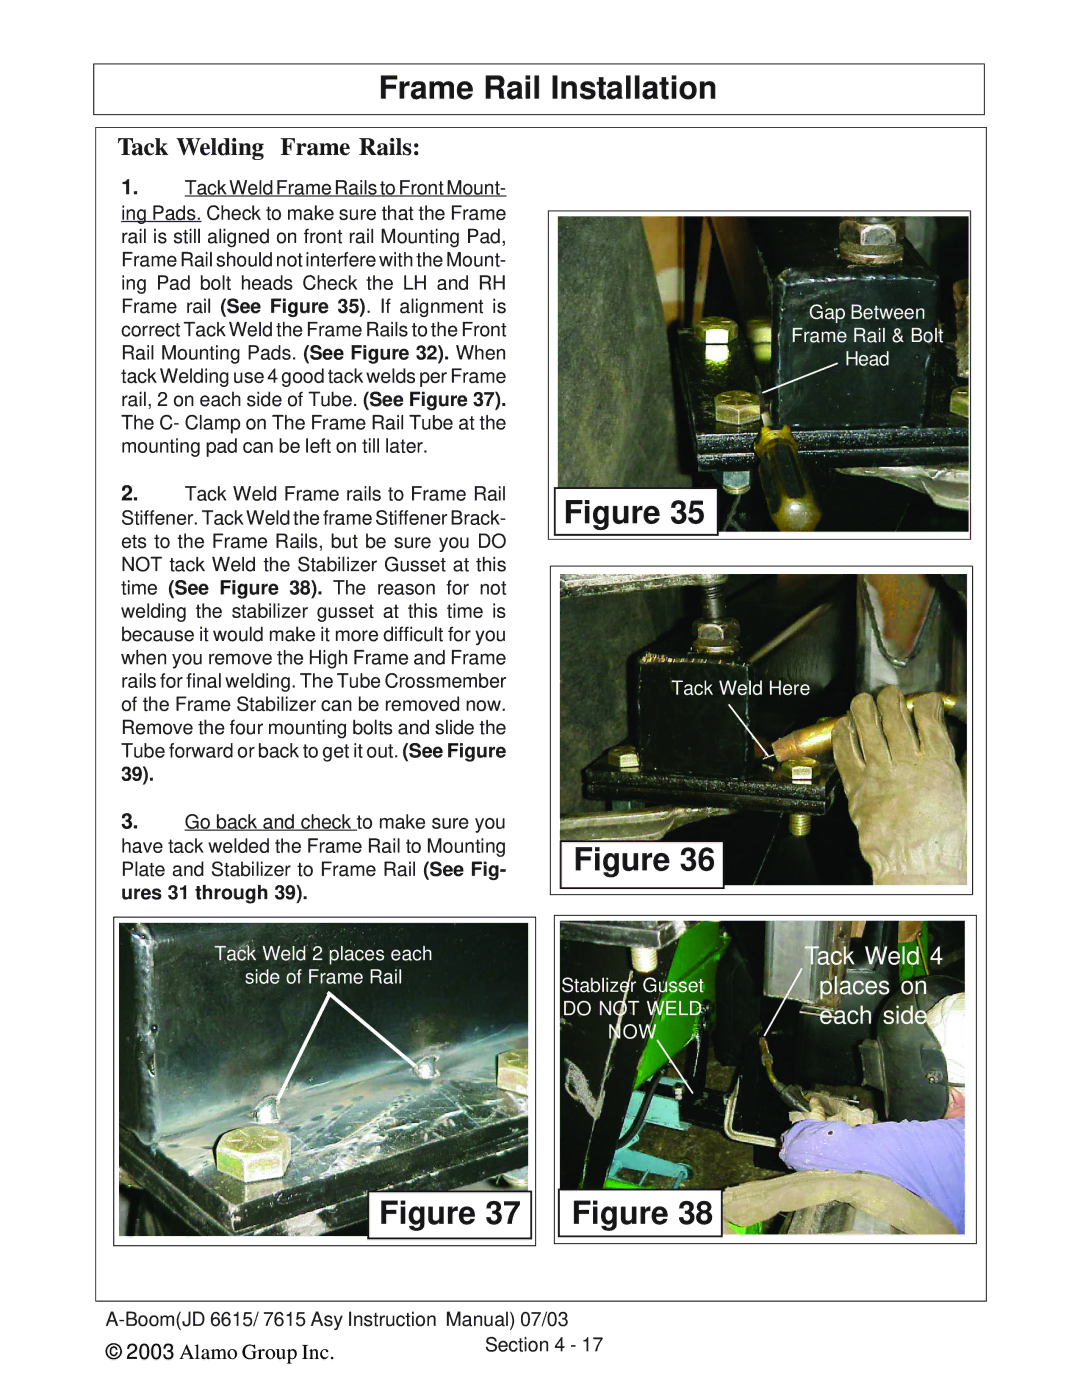
1.Tack Weld Frame Rails to Front Mount- ing Pads. Check to make sure that the Frame rail is still aligned on front rail Mounting Pad, Frame Rail should not interfere with the Mount- ing Pad bolt heads Check the LH and RH Frame rail (See Figure 35). If alignment is correct Tack Weld the Frame Rails to the Front Rail Mounting Pads. (See Figure 32). When tack Welding use 4 good tack welds per Frame rail, 2 on each side of Tube. (See Figure 37). The C- Clamp on The Frame Rail Tube at the mounting pad can be left on till later.
2.Tack Weld Frame rails to Frame Rail Stiffener. Tack Weld the frame Stiffener Brack- ets to the Frame Rails, but be sure you DO NOT tack Weld the Stabilizer Gusset at this time (See Figure 38). The reason for not welding the stabilizer gusset at this time is because it would make it more difficult for you when you remove the High Frame and Frame rails for final welding. The Tube Crossmember of the Frame Stabilizer can be removed now. Remove the four mounting bolts and slide the Tube forward or back to get it out. (See Figure 39).
3.Go back and check to make sure you have tack welded the Frame Rail to Mounting Plate and Stabilizer to Frame Rail (See Fig- ures 31 through 39).
Tack Weld 2 places each
side of Frame Rail
Figure 37
Gap Between
Frame Rail & Bolt
Head
Figure 35
Tack Weld Here
Figure 36
| Tack Weld 4 |
Stablizer Gusset | places on |
DO NOT WELD | each side |
NOW |
|
Figure 38
© 2003 | Alamo Group Inc. | Section 4 - 17 |
|