Frame Rail Installation
Pre-Installing High Frame: (continued)
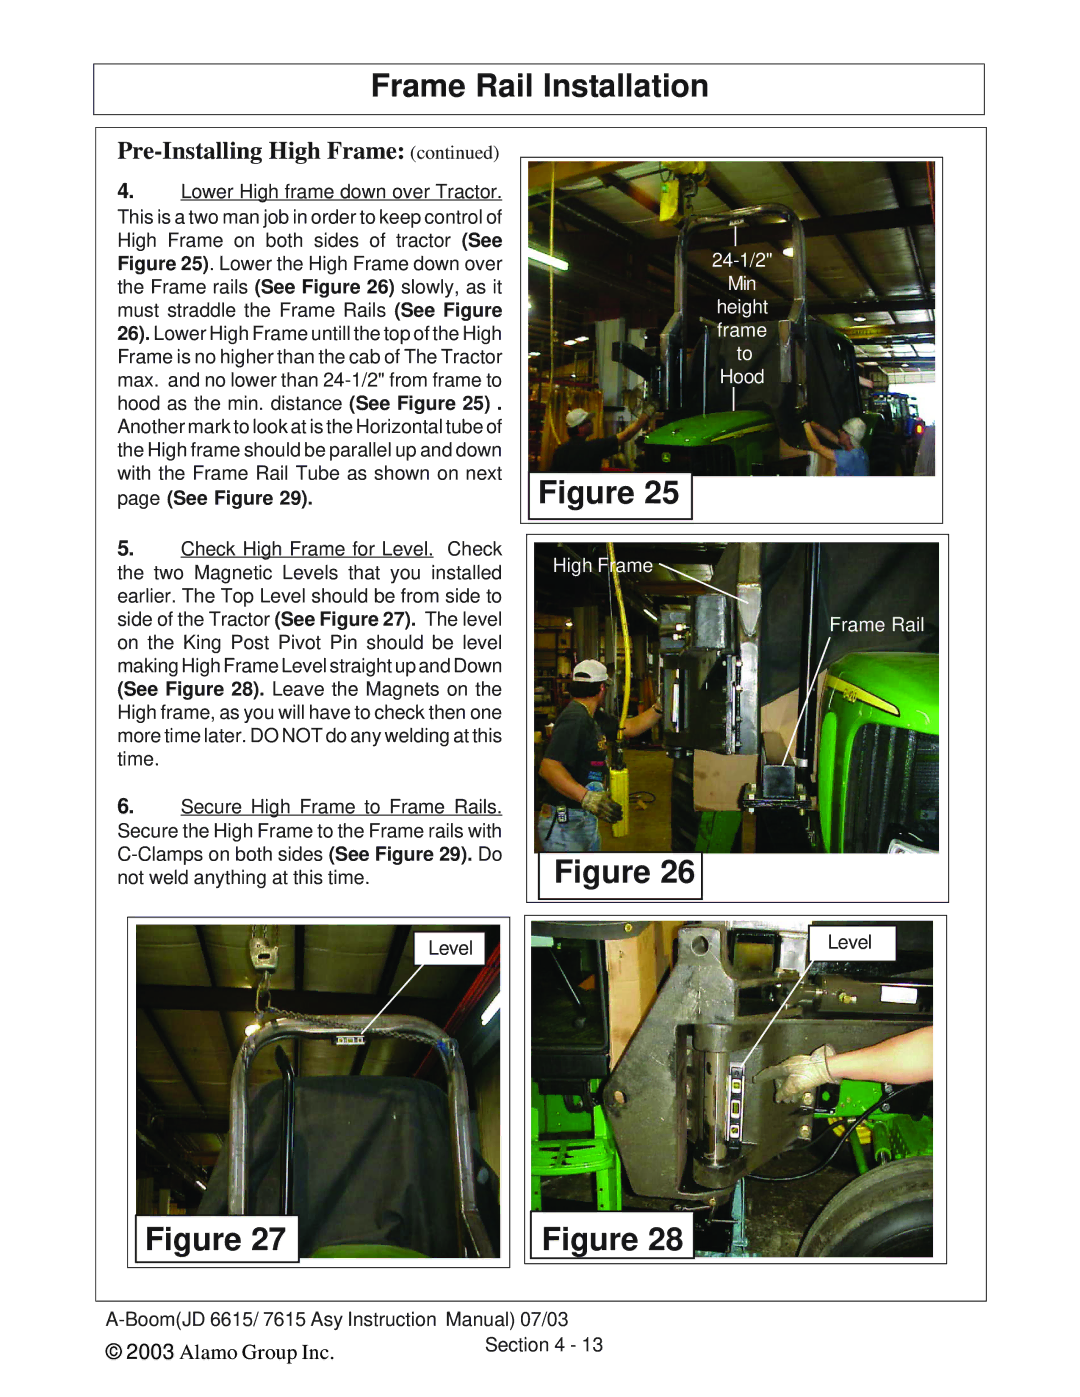
4.Lower High frame down over Tractor. This is a two man job in order to keep control of High Frame on both sides of tractor (See Figure 25). Lower the High Frame down over the Frame rails (See Figure 26) slowly, as it must straddle the Frame Rails (See Figure 26). Lower High Frame untill the top of the High Frame is no higher than the cab of The Tractor max. and no lower than
5.Check High Frame for Level. Check the two Magnetic Levels that you installed earlier. The Top Level should be from side to side of the Tractor (See Figure 27). The level on the King Post Pivot Pin should be level making High Frame Level straight up and Down (See Figure 28). Leave the Magnets on the High frame, as you will have to check then one more time later. DO NOT do any welding at this time.
6.Secure High Frame to Frame Rails. Secure the High Frame to the Frame rails with
24-1/2"
Min
height frame to Hood
Figure 25
High Frame 
Frame Rail
Figure 26
| Level | Level |
|
| |
Figure 27 | Figure 28 |
|
| ||
© 2003 Alamo Group Inc. | Section 4 - 13 |
|
|
| |