Frame Rail Installation
Pre-Installing Frame Rails: (continued)
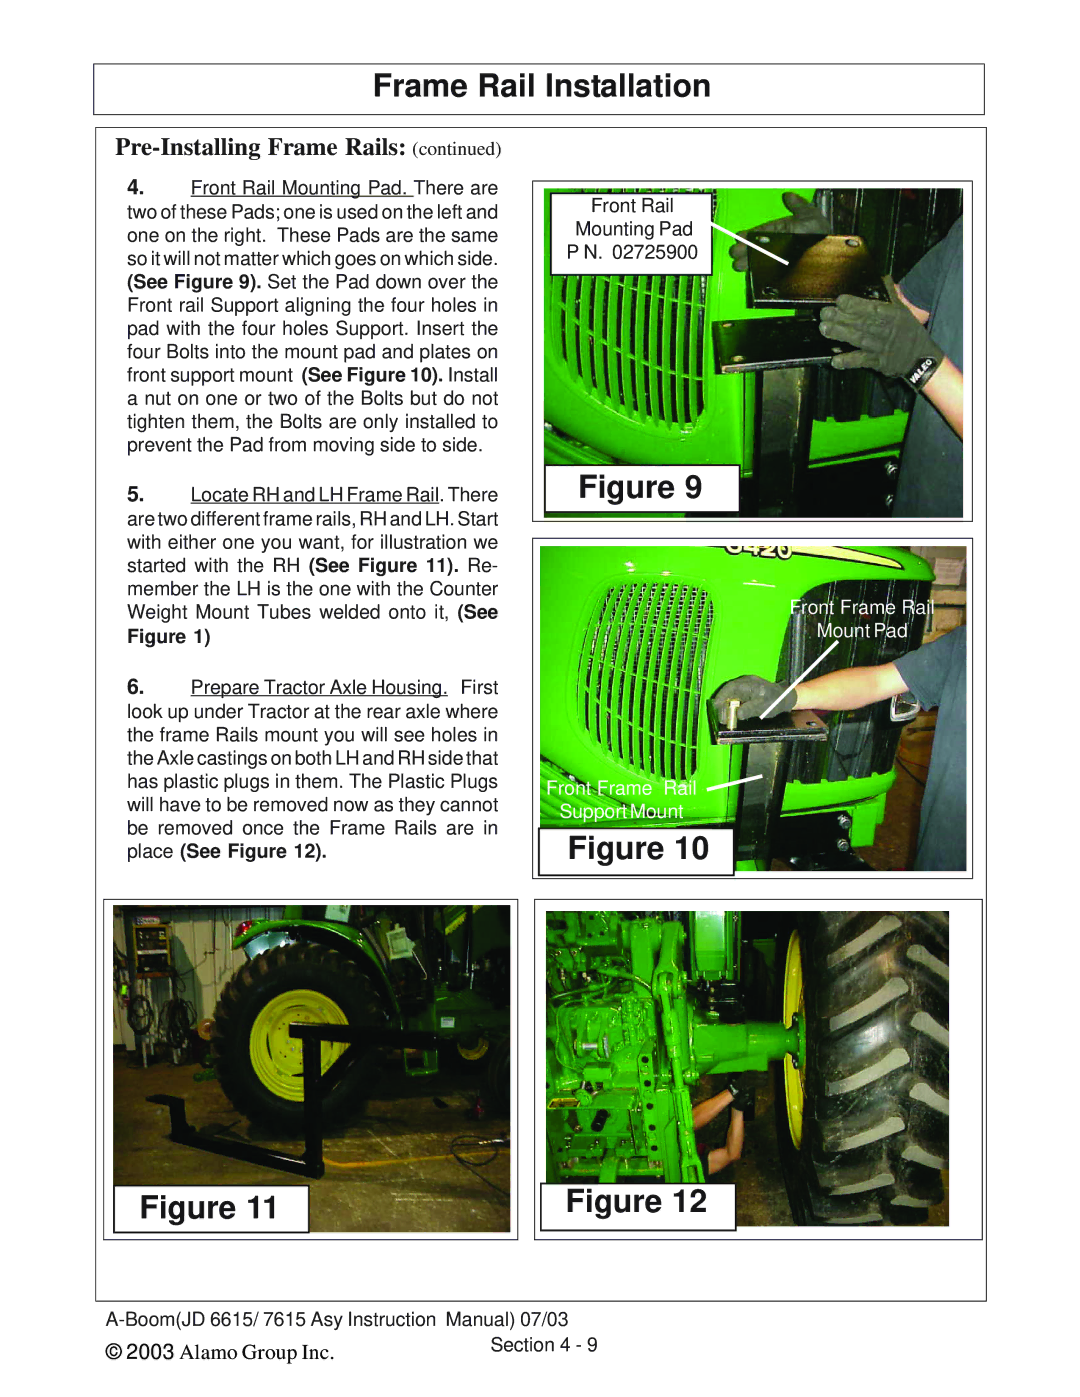
4.Front Rail Mounting Pad. There are two of these Pads; one is used on the left and one on the right. These Pads are the same so it will not matter which goes on which side. (See Figure 9). Set the Pad down over the Front rail Support aligning the four holes in pad with the four holes Support. Insert the four Bolts into the mount pad and plates on front support mount (See Figure 10). Install a nut on one or two of the Bolts but do not tighten them, the Bolts are only installed to prevent the Pad from moving side to side.
5.Locate RH and LH Frame Rail. There are two different frame rails, RH and LH. Start with either one you want, for illustration we started with the RH (See Figure 11). Re- member the LH is the one with the Counter Weight Mount Tubes welded onto it, (See
Figure 1)
6.Prepare Tractor Axle Housing. First look up under Tractor at the rear axle where the frame Rails mount you will see holes in the Axle castings on both LH and RH side that has plastic plugs in them. The Plastic Plugs will have to be removed now as they cannot be removed once the Frame Rails are in place (See Figure 12).
Front Rail
Mounting Pad
P N. 02725900
Figure 9
Front Frame Rail
Mount Pad
Front Frame Rail
Support Mount
Figure 10
Figure 11
Figure 12
© 2003 | Alamo Group Inc. | Section 4 - 9 |
|