Chapter 3: Installation

Attaching the Strain-Relief Bracket

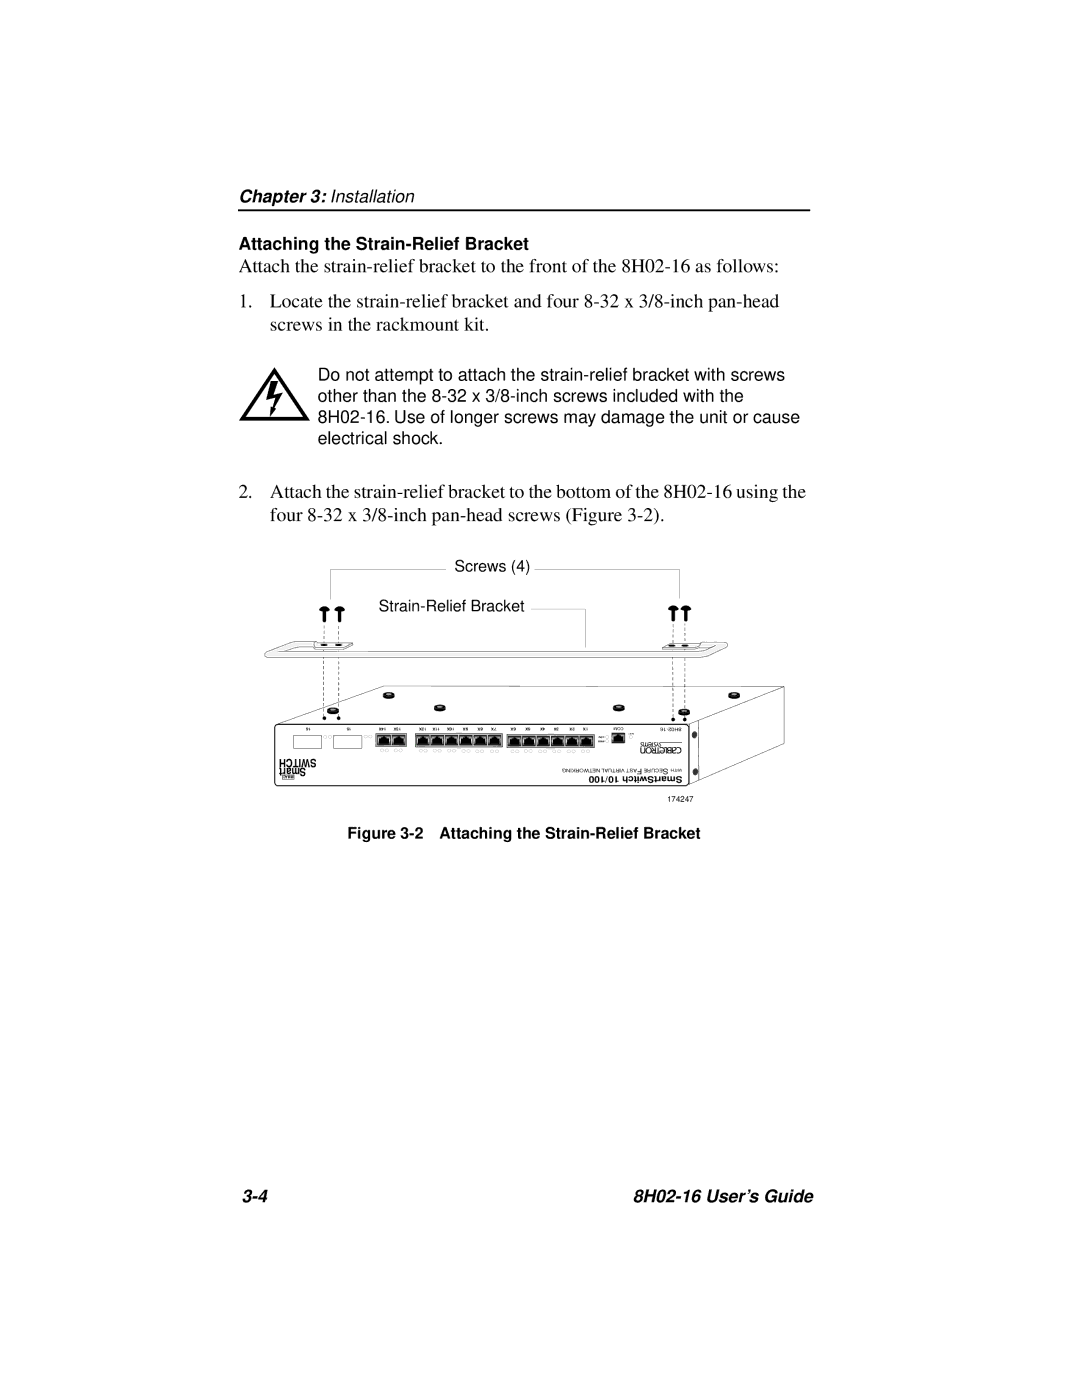
Attach the strain-relief bracket to the front of the 8H02-16 as follows:

1.Locate the strain-relief bracket and four 8-32 x 3/8-inch pan-head screws in the rackmount kit.

Do not attempt to attach the strain-relief bracket with screws other than the 8-32 x 3/8-inch screws included with the

8H02-16. Use of longer screws may damage the unit or cause electrical shock.

2.Attach the strain-relief bracket to the bottom of the 8H02-16 using the four 8-32 x 3/8-inch pan-head screws (Figure 3-2).

Screws (4)

Strain-Relief Bracket

16

15

14X

13X

12X

11X

10X

9X

8X

7X

6X

5X

4X

3X

2X

1X

COM

16-8H02


CPU


PWR


SWITCH


F


S


Smart

NETWORKING VIRTUAL AST

ECURE

WITH

MMAC

10/100 SmartSwitch


174247

Figure 3-2 Attaching the Strain-Relief Bracket

3-4

8H02-16 User’s Guide

Page 28
Image 28
Cabletron Systems 8H02-16 manual Attaching the Strain-Relief Bracket