Chapter 2 Switch Installation
Connecting to Power
To attach source DC to the PoE DC-input connector, follow these steps:
Step 1 Verify that power is off to the DC circuit that you are going to attach to the switch PoE DC-input connector. This can be either of the two power supplies (AC-input or DC-input) or site source DC. As an added precaution, place the appropriate safety flag and lockout devices at the source power circuit breaker, or place a piece of adhesive tape over the circuit breaker handle to prevent accidental power restoration while you are working on the circuit.
Step 2 Locate the PoE DC-input power connector, which is labeled PoE, on the switch front panel.
Step 3 Loosen the power connector’s two screws and remove the plug portion of the connector from the switch.
Step 4 Measure two strands of twisted-pair copper wire (18 AWG twisted-pair copper wire, such as Belden part number 9344 or the appropriate type, wire size, and color-code for your country) long enough to connect the switch to the DC power source.
Step 5 Using a wire-stripping tool, strip each of the two twisted pair wires coming from each DC-input power source to
0.25inch (6.3 mm) ± 0.02 inch (0.5 mm). Do not strip more than 0.27 inch (6.8 mm) of insulation from the wire. Stripping more than the recommended amount of wire can leave exposed wire from the power connector after installation.
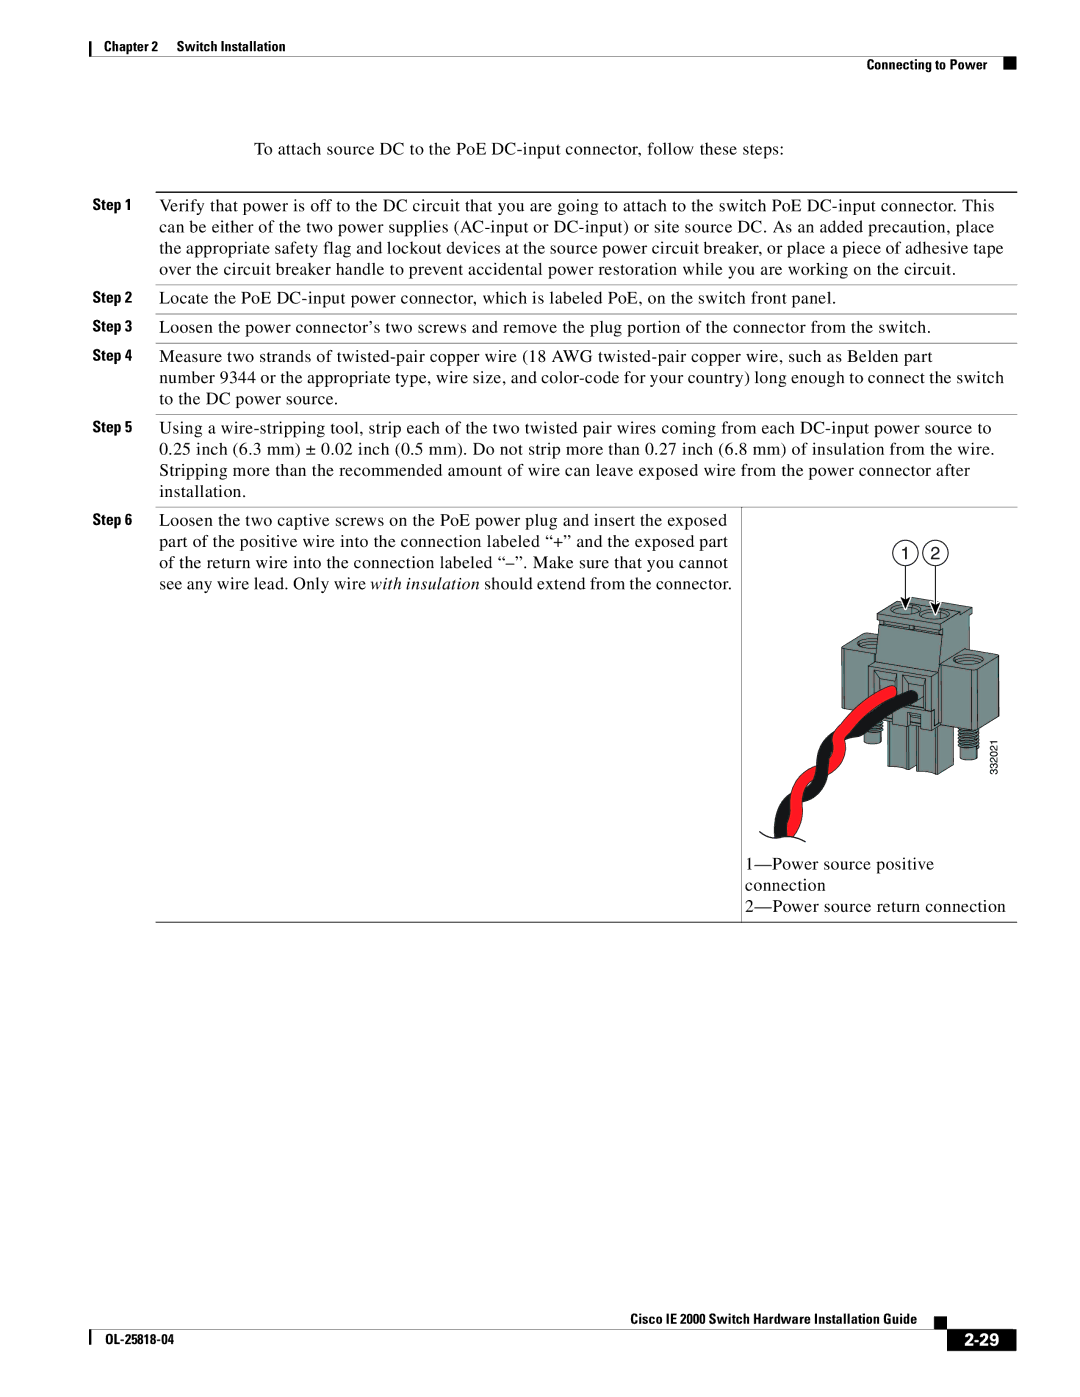
Step 6 Loosen the two captive screws on the PoE power plug and insert the exposed part of the positive wire into the connection labeled “+” and the exposed part of the return wire into the connection labeled “–”. Make sure that you cannot see any wire lead. Only wire with insulation should extend from the connector.
1 2
332021
1—Power source positive connection
2—Power source return connection
| | Cisco IE 2000 Switch Hardware Installation Guide | | |
| | |
| OL-25818-04 | | | 2-29 | |
| | | |