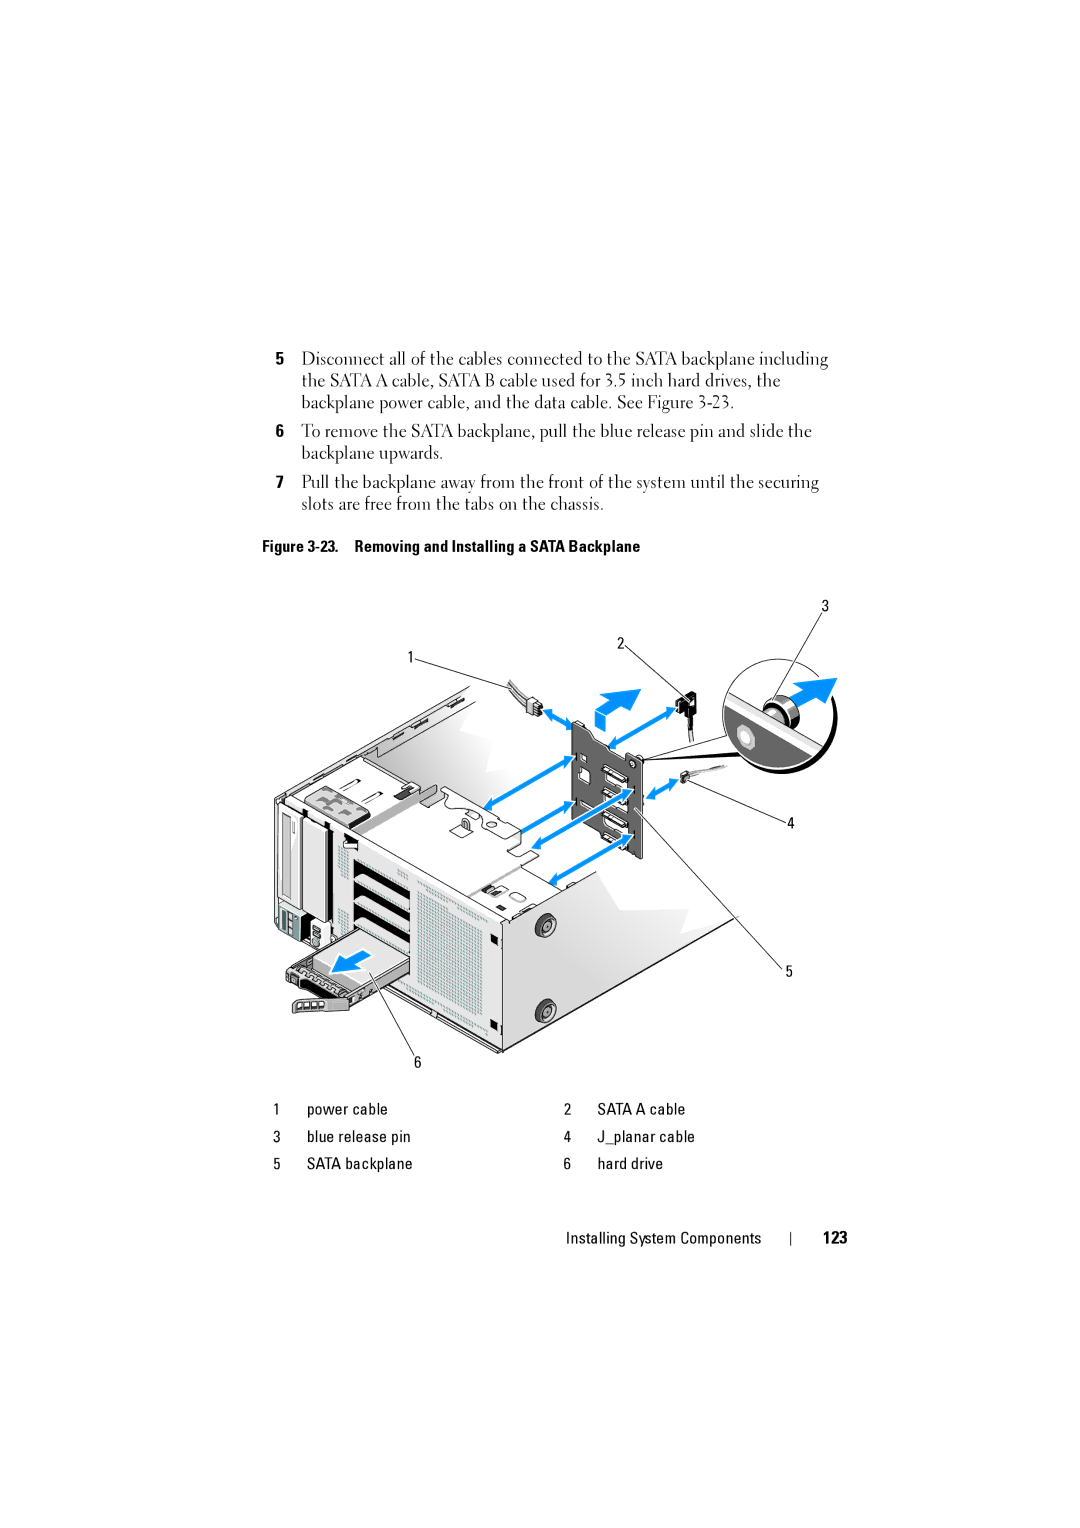
5Disconnect all of the cables connected to the SATA backplane including the SATA A cable, SATA B cable used for 3.5 inch hard drives, the backplane power cable, and the data cable. See Figure
6To remove the SATA backplane, pull the blue release pin and slide the backplane upwards.
7Pull the backplane away from the front of the system until the securing slots are free from the tabs on the chassis.
Figure 3-23. Removing and Installing a SATA Backplane
1
3
2
![]() 4
4
5
|
| 6 |
|
1 | power cable | 2 | SATA A cable |
3 | blue release pin | 4 | J_planar cable |
5 | SATA backplane | 6 | hard drive |
